


4
5.
Refasten the HBA’s retaining bracket using the existing screw or lever.
6.
Close the computer cover.
7.
Plug the FC cable into the HBA.
8.
Plug in the power cable and turn on the computer.
Sample Motherboard and Slots
Step 3. Install the HBA Driver
After you have completed the hardware installation and turned on the computer, insert the SANsurfer CD into your
CD-ROM drive and follow the instructions below.
NOTE:
If the auto-run screen does not appear, double-click the
start_here
html file on the CD.
To install the HBA driver from the SANsurfer CD:
1.
Click
Windows, Linux, Solaris
,
Netware
or
Mac OS
, as applicable.
2.
Click
I Accept
on the License Agreement.
3.
Select your specific operating system.
4.
Install the driver:
❑
For
Windows
, click the
SANsurfer Install Wizard for Windows
link and follow the
on-screen directions.
❑
For
Linux
, click the
SANsurfer Linux Driver Installer
link and follow the on-screen
directions.
❑
For
Solaris
/
Netware
/
Mac OS
, select the driver and complete the installation as described
in the readme file.
NOTE:
For detailed driver installation options, please refer to the specific driver readme file located on the CD or on
the QLogic website
http://support.qlogic.com/support/drivers_software.aspx
.
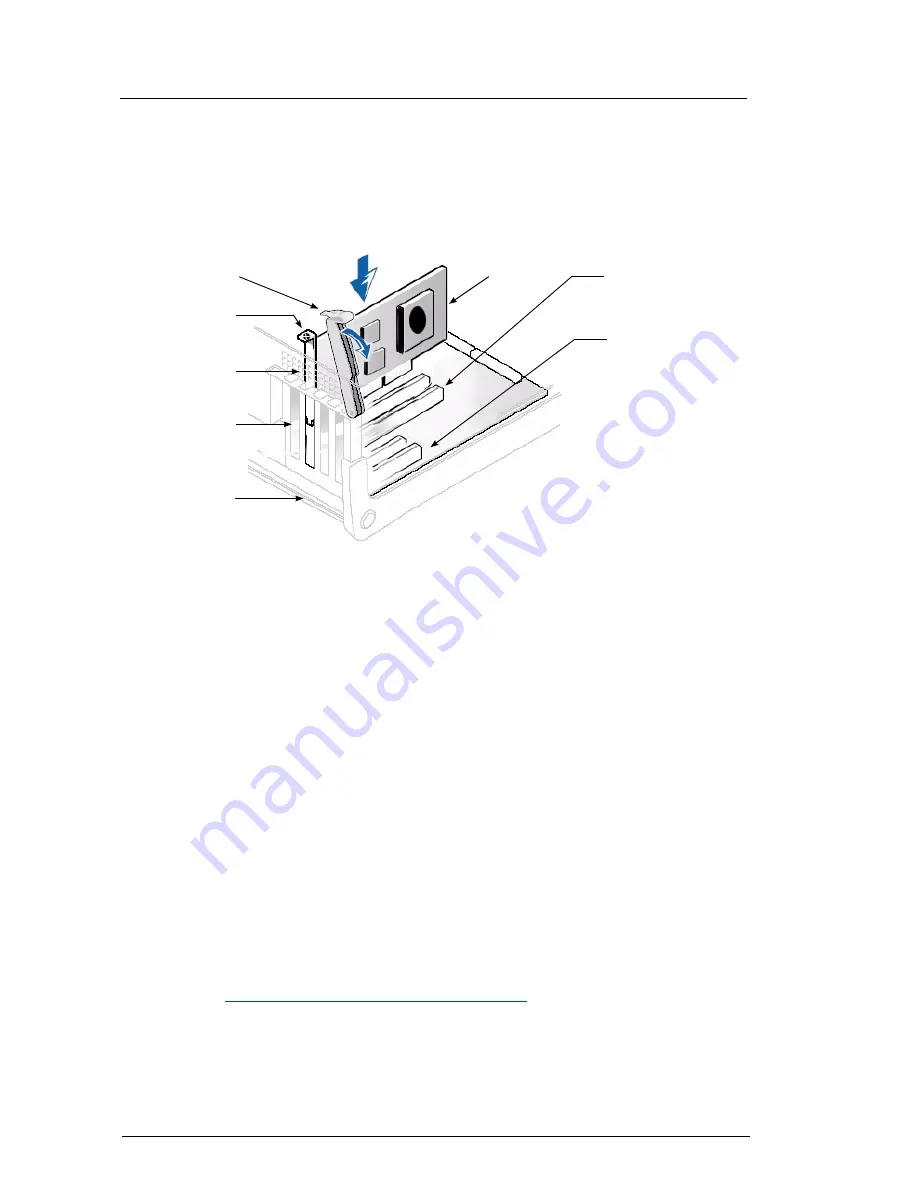
HBA RETAINING
BRACKET
LEVER
SLOT COVERS
SYSTEM
CHASSIS
64-BIT PCI-X SLOT
x4 PCI EXPRESS SLOT
(x8 PHYSICAL SLOT OR
ABOVE REQUIRED FOR
QLE25
xx
HBAs)
SCREW
HBA
OR
Summary of Contents for QLA200
Page 10: ...10 ...


