


4
5
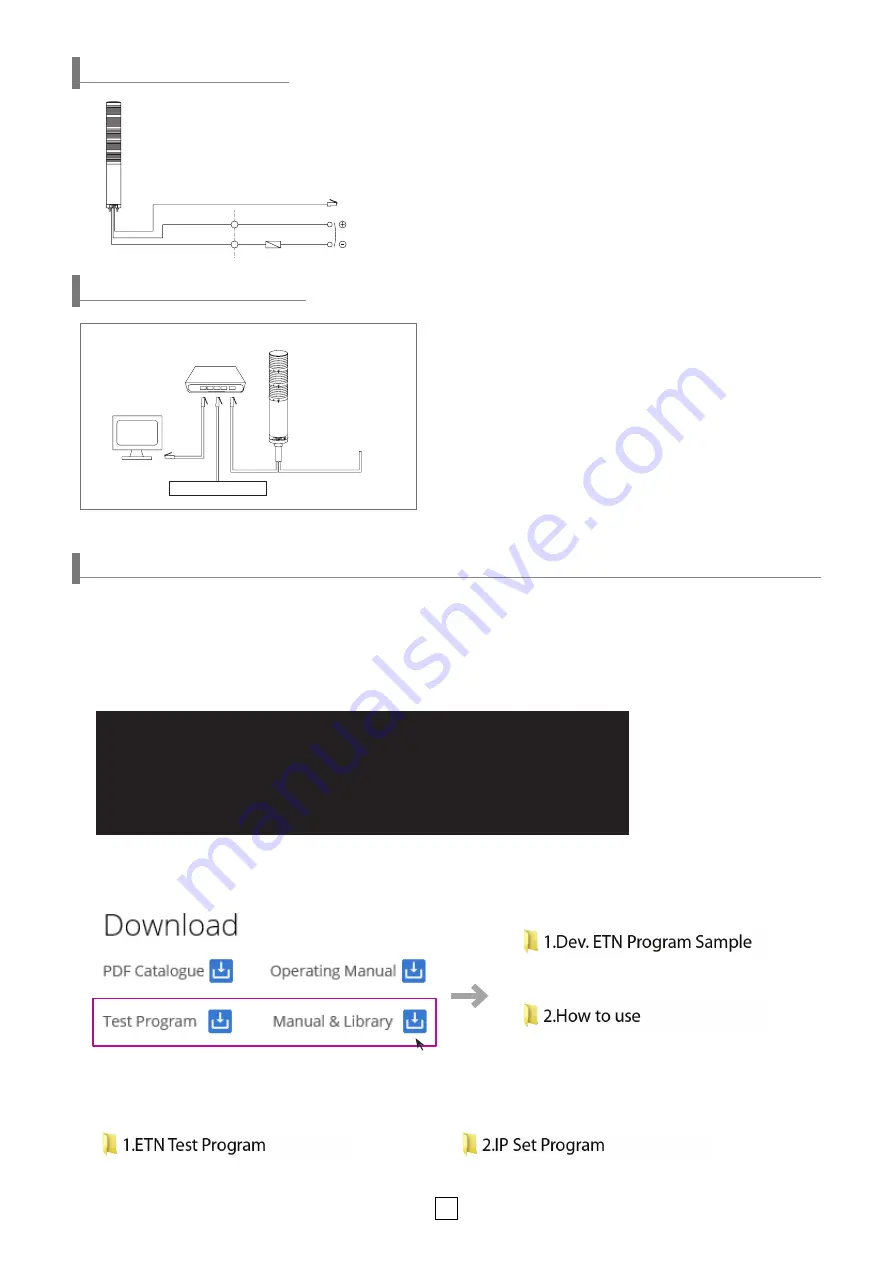
PC
RJ45
HUB
EtherNet Tower
VDC 12/24
EtherNet Network
DC
Power
Fuse
White
Black
LAN CABLE
• Connect RJ45 connector that is connected to UTP cable to
Ethernet port of a PC or a router.
• External power line - UL1015 AWG18(0.75sq) x 2C 400mm
• For AC type, power cable is equipped with the product.
• UTP Cable: Category 5 cable
Wiring Instructions
5. When you unzip “ETN TEST PROGRAM.zip” file, following folders are created.
4. When you unzip the file, there will be a file with the same name below. The instructions are listed inside the file.
Program Sample needed when developing
(x32bit/x64bit compatibility)
Instructions of how to use the product and library file
A program for setting IP before testing the ETN device
A program for setting testing the ETN device
■ Test Ethernet LED Tower Light
1. Please connect LAN cable of the tower light to the router so that
the tower light can access Ethernet network by referring left
diagram.
2. Please be sure that the power supply shall meet the product
specification accordingly.
Product Installation
2. Because the ETN tower light is connected to a hub with the PC that is same as the picture on the front page, ETN tower
light and the PC are now connected with the same network.
3. Please download the product manual, library file and test program from Qlight website(www.qlight.com) or blog.qlight.com
1. Please activate default PC network only. Please run Windows CMD(Command line) of PC over the same network in order to confirm
network information where the Ethernet product will be connected.
Example) Windows 7 : Start(Run)->CMD->ipconfig /all
Windows 10 : Start menu-> Click right mouse button->CMD->ipconfig /all
- Please refer to below network information when the Ethernet product’s network environment is configured.
Applying the Ethernet Device
Ethernet adapter
Local Area Connection
:
Connection-specific DNS Suffix . :
IP Address. . . . . . . . . . . . : 192.168.10.101
Subnet Mask . . . . . . . . . . . : 255.255.255.0
Default Gateway . . . . . . . . . : 192.168.10.1
VAC 110V~220V
Installation wiring instructions
Summary of Contents for QTG50(M)L
Page 11: ...MEMO...


