QIDI I-mate, Manual
The QIDI I-mate manual is essential for understanding how to operate this cutting-edge 3D printer. Easily download the free manual from our website for step-by-step instructions on setup, troubleshooting, and maintenance. Maximize the potential of your QIDI I-mate by accessing the manual at manualshive.com.
Share
Download


Reviews:
No comments
Related manuals for I-mate

QL800
Brand: QuickLabel Systems Pages: 122

34A0252
Brand: Lexmark Pages: 9

OKIPAGE 8p Plus
Brand: Oki Pages: 18

PRO511DW
Brand: Oki Pages: 2

iGen3
Brand: Xerox Pages: 8

1600 LED
Brand: SIGN RACER Pages: 73

PIXMA G7010
Brand: Canon Pages: 22

Pixma iP1600 Pixma iP1200
Brand: Canon Pages: 24

PIXMA G4610 Series
Brand: Canon Pages: 20

PIXMA G4411
Brand: Canon Pages: 60

PIXMA GM4010
Brand: Canon Pages: 22

PIXMA GM4040
Brand: Canon Pages: 447

PIXMA G6070
Brand: Canon Pages: 391

PIXMA G5040
Brand: Canon Pages: 422

PIXMA G3660
Brand: Canon Pages: 336

PIXMA G5000 Series
Brand: Canon Pages: 20
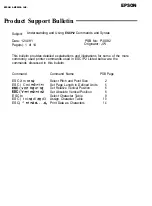
LQ-1170
Brand: Epson Pages: 20

LQ 870 - B/W Dot-matrix Printer
Brand: Epson Pages: 5


