background image

L–000867(A) 

A–1

A – Limited Warranty

This warranty gives you specifi c legal rights. Additionally, you may have other rights that vary 
from region to region.

The QBC STAR Centrifugal Hematology System is warranted to the original purchaser to be free 
from defects in materials and workmanship for a period of twelve months following installation. 
QBC Diagnostics Inc., sole responsibility under this warranty shall be to repair or replace any in-
strument or its components (except for expendable supplies such as printer paper) which under 
normal operating conditions, prove to be defective within twelve months of delivery. 

QBC Diagnostics Inc., will furnish new or remanufactured components upon its option. All replace-
ments shall meet new part specifi cations and shall be warranted as above for the remainder of the 
twelve month period. Replaced components become the property of QBC Diagnostics Inc.

It is understood that the equipment covered by this Agreement has been installed in accordance 
with the recommendations and instructions in the QBC STAR System User’s Manual. 

Any damage to a QBC STAR system resulting from the insertion or removal of cables that connect 
this instrument to systems other than those approved or supplied by QBC Diagnostics Inc., or the 
failure of the owner to maintain reasonable care and precautions in the operation and mainte-
nance of the system will void this warranty and terminate the obligations of the manufacturer as 
stated herein. 

The warranty stated herein shall extend to the original consumer only and not to any subsequent 
consumer of the instrument.

This warranty is in lieu of all other warranties, whether express or implied, including but not limited 
to, warranties of merchantability, or fi tness for a particular use. In no event will QBC Diagnostics 
Inc., be liable for indirect, incidental, special or consequential damages regardless of whether QBC 
Diagnostics Inc., has been advised of such

.

Summary of Contents for Star

Page 1: ...QBC STAR System Operator s Service Manual 2006 02 QBC Diagnostics Inc Document Number L 000867 200 Innovation Blvd Suite 212 Revision A State College PA 16803 USA 877 231 3115...

Page 2: ...iner are registered trademarks of QBC Diagnostics Inc Copyright QBC Diagnostics Inc 2006 All rights reserved No part of this publication may be repro duced transmitted transcribed stored in retrieval...

Page 3: ...1 5 Use of this Manual 1 5 Conventions 1 6 Symbols Used on the Equipment 1 6 Notes Cautions and Warnings 1 6 Summary of Warnings and Cautions 1 7 2 Installation and Setup 2 1 Unpacking and Setup 2 1...

Page 4: ...rument Power on 4 2 Prepare the QBC STAR tube 4 2 Mix the tube 4 4 Tilt the tube 4 5 Cap the tube 4 5 Insert the tube into the instrument 4 6 Close the instrument door 4 6 Start the test 4 6 Printing...

Page 5: ...ccessories B 1 C Software Update Log C 1 D Contacts D 1 E Blood Collection and Handling E 1 General Comments E 1 Universal Precautions for Specimen Handling E 1 Venous Blood Collection Venipuncture E...

Page 6: ...loppy Disk Drive Controls and Indicators 3 4 9 Setup Keypad 3 5 10 Sample Vial 4 3 11 Inverting the Sample Vial 4 3 12 Filling a Tube from Venous Blood 4 3 13 Filling a Tube from Capillary Blood 4 4 1...

Page 7: ...QBC STAR System User s Manual QBC Diagnostics Inc...

Page 8: ...e when it is centrifuged A special coating in the QBC STAR tube stains the two white blood cell populations granulocytes appear orange yellow and lymphocytes monocytes appear green and the platelet la...

Page 9: ...nt It consists of a precision glass QBC tube and the plastic sleeve that serves as a carrier for the tube A cap and oat assembly comprise the second component The oat expands the buffy coat region by...

Page 10: ...rating the blood into the various cell populations Analysis of the sample occurs in the centrifuge rotor while the centrifuge is running See Figure 2 A single lled QBC STAR tube is placed into the rot...

Page 11: ...nal Quality Control Printout occurs automatically The instrument runs a built in calibration check every time a sample is processed Sample integrity checks include statistical matching of bandlengths...

Page 12: ...nson international contacts specimen collection and bibliography Getting Started The QBC STAR system has been designed and tested for ease of use However before you begin to use the instrument you wil...

Page 13: ...ck of the QBC STAR instrumet Figure 3 Symbols Used on the QBC STAR Instrument rear Top gure Left Symbol for electrical hazard Right Symbol for refer to accompanying documenta tion speci cally the user...

Page 14: ...rotective glasses or goggles is recommended when working around the INSTRUMENT ACRIDINE ORANGE REAGENT MAY BE TOXIC DO NOT INGEST AVOID CONTACT WITH SKIN EYES AND CLOTHING If a tube breaks in the unit...

Page 15: ...ctrical connection described below Electrical Connection Connect the female end of the power cord to the QBC STAR instrument see Figure 4 Connect the male end of the power cord to the main AC power so...

Page 16: ...ns Height loading door open 16 3 in 41 4 cm Width 16 in 40 6 cm Depth 16 3 in 41 4cm Weight 30 lb 13 6 kg Clearance 11 8 in 30 cm Electrical Speci cations Voltage 100 240 VAC 10 Frequency 47 63 Hz Cur...

Page 17: ...y instrument temperature shutdown or some results may be suppressed Humidity 10 95 non condensing Ambient Light 15 150 ft candles Noise 70 db 3 ft Altitude Up to 2 000 m Surface Inclination 2 any dire...

Page 18: ...n System LIS or PC Barcode Scanner Port for connecting a barcode scanner Parallel Port for connecting a full size printer Keyboard Port for connecting a full size keyboard Connecting an External Print...

Page 19: ...pack and set up the printer according to the manufacturer s operating instructions 2 Connect the printer to the QBC STAR instrument s printer parallel port see Figure 4 using the cable speci ed above...

Page 20: ...software ever has to be installed again System Setup and Utilities Before using the QBC STAR instrument for sample testing you should review system setup parameters to see if they are suitable for yo...

Page 21: ...t When you reach the desired contrast press Date and Time The Date and time option lets you adjust the date and time that is printed on results reports When you select the option a sub menu shown belo...

Page 22: ...Print Data This option is typically used to help QBC Diagnostics Inc personnel to troubleshoot possible problems When selected Print Data sends raw scan data from tube readings and diagnostic paramete...

Page 23: ...rmat i e 00 00 to 23 59 If you want to change the time format use the or key to move the arrow cursor to the other format Press on the keypad to save that format Internal Printer Internal Printer lets...

Page 24: ...nu lets you disable it by selecting option 2 Color print ing is enabled by default When color printing is enabled option 2 reads Disable Color You can disable color printing by con rming that the arro...

Page 25: ...s etc and indicators readouts lights etc are described below The following items are discussed Power Switch Star Button Door Release Latch Liquid Crystal Display Printer Floppy Disk Drive Setup Keypad...

Page 26: ...p open the door on the top of the instrument The door can only be opened when the system determines that it is safe to do so The door is locked electromechanically when it is unsafe to open the door s...

Page 27: ...ve it from the unit Paper Release Lever The paper release lever is located on the right side of the printer Pull the lever forward to enable load ing paper When the lever is forward the manual advance...

Page 28: ...e left side of the drive below the insertion slot When off it indicates that no activity is occurring in the drive When on or ashing it indicates that the disk drive is accessing a oppy disk Do not at...

Page 29: ...ate and time LCD contrast etc The setup keypad keys are described below Setup functions are described in Section 2 Installation and Setup ESC Key Press this key to cancel an action or to return to a p...

Page 30: ...ACRIDINE ORANGE REAGENT MAY BE TOXIC DO NOT INGEST AVOID CON TACT WITH SKIN EYES AND CLOTHING IF A TUBE BREAKS IN THE UNIT CAREFULLY REMOVE THE TUBE WITH A HE MOSTAT OR OTHER DEVICE USING PUNCTURE RE...

Page 31: ...fer to the package insert in the tube carton The blood source can be either a capillary ngerstick drop of blood or a source of anticoagulated ve nous blood such as a Vacutainer tube lavender top only...

Page 32: ...and the molded plastic packaging and lifting and peeling the foil layer away After mixing tilt the sample vial to bring the blood up to the open end Place the collection tip of the QBC STAR tube in c...

Page 33: ...65 and 75 microliters The instrument automatically identi es the tube type and detects if the ll volume is correct Mix the tube Rock the QBC STAR tube back and forth at least four times to mix the bl...

Page 34: ...e tube See Figure 15 Figure 15 Tilting the Tube Cap the tube Remove the cap from the tube by pulling it straight off Place the cap over the collection end of the tube by guiding the glass end of the t...

Page 35: ...ake sure the cap is seated fully and place the tube back into the instrument as described above Close the instrument door Make sure the door clicks into place Figure 18 Inserting the Tube into the Ins...

Page 36: ...to separate and pack the cell populations into distinct cell bands A countdown displays the time remaining in the cycle Finally a series of readings is taken The messages Reading Cycle In Progress Sc...

Page 37: ...lts printout Refer to Section 6 Troubleshooting for causes of errors and corrective actions Test results are printed when the electronic QC checks have been successful This is indicated on the results...

Page 38: ...pm Software Version 12 20 38 1 00XX Instrument S N XXXXXXX Hematocrit 45 5 Hemoglobin 13 3 g dL MCHC 29 2 g dL Total WBC 7 8 x10⁹ L Granulocytes 4 8 x10⁹ L Granulocytes 62 Lymph Monos 3 0 x109 L Lymph...

Page 39: ...utomatically stops testing if a power failure or system error occurs or the unit breaks down If this occurs a message appears on the LCD display Emergency Door Unlock In the event of a power failure o...

Page 40: ...L 000867 A 4 11 4 Operation Door Unlatch Access Hole Bottom of instrument Front of instrument Figure 21 Door Unlatch Access Hole...

Page 41: ...99 9 x 10⁹ L Results that fall outside these ranges may be con rmed by alternate methods Precision Data on typical within run precision tests on QBC STAR tubes tested in the QBC STAR system are shown...

Page 42: ...s are presented below Control Level 1 Control Level 2 Intra Day Intra Run Intra Day Intra Run Parameter Site Mean Value CV df CV df Mean Value CV df CV df HCT BD POL 1 POL 2 30 46 30 93 30 71 0 28 1 3...

Page 43: ...ined by comparing the QBC STAR results against the microhematocrit reference method 12 Interfering Substances Hemolysis Do not perform tests on visibly hemolyzed blood specimens Bilirubin No effects o...

Page 44: ...d abnormal cell types in disease states characterized by the presence of abnormal white cell types or nucleated red blood cells If abnormal cell populations are suspected veri cation of QBC test resul...

Page 45: ...nstrument until the problem is corrected and a valid self test is performed Additional built in checks include tests for proper centrifuge speed optical focus and internal temperature When these quali...

Page 46: ...n to results obtained by other laboratories using the QBC STAR System A partial list of organizations that may offer pro ciency testing for the QBC STAR System is shown below American Pro ciency Insti...

Page 47: ...blood and aerosols If blood or glass should escape the plastic protective tube clean and disinfect the QBC STAR instrument as follows 1 Put on puncture resistant gloves Use a hemostat or other device...

Page 48: ...and remove the old roll of paper 2 Peel off the beginning of the new roll of paper 3 Place the paper in the instrument with the paper feeding up from the bottom 4 Insert the paper between the two blac...

Page 49: ...eplace the fuses 1 Lift the small tab at the bottom of the fuse holder with a thumbnail or small screwdriver 2 Slide the fuse holder out of the instrument 3 Remove the fuses and examine the fuse eleme...

Page 50: ...s that DO cause error codes If any of these error messages appear use the chart to nd the possible causes and corrective actions General Problems Consult the table below for general problems not repor...

Page 51: ...nstrument Place correct tube in instrument and press Star key to begin testing If problem recurs rerun test with new tube If tube was not previously tested and was prepared in a prompt time frame ensu...

Page 52: ...lem could be paper supply is exhausted paper jam exists cable has become disconnected power is not turned on or other problem CORRECTIVE ACTIONS Check paper supply to the printer paper jam condition c...

Page 53: ...s the Enter Key left bent arrow located on the far right of the keypad The printer will be activated and it will print 3 boxes with some graphical information followed by a block of numbers Press the...

Page 54: ...o detector g s Unit of acceleration 1g acceleration of gravity Gran Granulocytes Hgb Hemoglobin Hct Hematocrit L M Lymphocytes and Monocytes Lymph Monos Lymphocytes and Monocytes MCHC Mean Corpuscular...

Page 55: ...perty of QBC Diagnostics Inc It is understood that the equipment covered by this Agreement has been installed in accordance with the recommendations and instructions in the QBC STAR System User s Manu...

Page 56: ...1 B Parts and Accessories Item Catalog Number Paper Printer 3 pk 429580 Fuses 250V 3 15A 5x20 mm 5 pk 429581 QBC STAR Tubes box 100 429625 Power Cord U K 421554 Power Cord Europe 421551 Power Cord US...

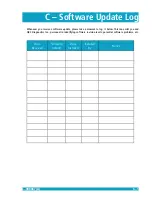
Page 57: ...ceive a software update please take a moment to log it below This can assist you and QBC Diagnostics Inc personnel in identifying software revision levels potential software problems etc Date Received...

Page 58: ...ceive a software update please take a moment to log it below This can assist you and QBC Diagnostics Inc personnel in identifying software revision levels potential software problems etc Date Received...

Page 59: ...ontact QBC Diagnostics Inc 200 Innovation Blvd Suite 212 State College PA 16803 USA Voice 814 231 7660 Fax 814 231 3118 Toll Free Technical Services 1 866 265 1486 Customer Service 1 877 231 3115 www...

Page 60: ...Document POL1 and POL2 For more information contact NCCLS at 771 East Lancaster Avenue Villanova PA 19085 215 525 2435 Universal Precautions for Specimen Handling WARNINGS BLOOD AND BODY FLUIDS MAY CO...

Page 61: ...e tourniquet about 3 4 inches above the venipuncture site Do not stop the blood ow for more than one minute before the blood is drawn If necessary release and reapply the tourni quet 6 Select the veni...

Page 62: ...as stopped and apply a bandage over the site Instruct the patient to wear the bandage for at least 15 minutes i Gently invert any tube s containing anticoagulant or clot activators as in SST Brand tub...

Page 63: ...nger of the non dominant hand Choose a puncture site halfway between the center of the nger pad and the outer edge of the nger For infants punctures may be performed on the outer or inner portion of t...

Page 64: ...ng with alcohol Do not squeeze the puncture site excessively Do not press or scrape the collection device on the skin To avoid clotting in capillary blood collection Keep the puncture site clean by wi...

Page 65: ...at Analysis JAMA 5 617 620 1983 8 Data on le at Becton Dickinson Biosciences Division Sparks MD 21152 9 Young D S Pestaner L C and Gibberman V 1975 Effects of Drugs on Clinical Laboratory Tests Clinic...

Reviews: