background image


Table of Contents 

4.4


Cables .............................................................................................. 48


5.


Technical data ............................................................ 51


5.1


General Specifications ....................................................................... 52


5.2


Environmental Specifications .............................................................. 54


5.3


Dimensions ...................................................................................... 55


5.3.1


Front Views........................................................................................ 55


5.3.2


Rear and Right Side Views .................................................................. 57


Index ............................................................................... 61


Record of Changes 

Summary of Contents for Imagechecker Q.400PD

Page 1: ...Imagechecker Q 400PD Hardware Manual www qvitec de Erkennen was möglich ist ...

Page 2: ...mage resulting from any defect in the product or its documentation even if advised of the possibility of such damages Please direct support matters and technical questions to Q VITEC LIMITED WARRANTY If physical defects caused by distribution are found Q VITEC will replace repair the product free of charge Exceptions include When physical defects are due to different usage treatment of the product...

Page 3: ...could be fatal or critical injury Indicates that you should proceed with caution Failure to do so may result in injury or significant damage to instruments or their contents e g data Contains important additional information Contains an illustrative example of the previous text section Indicates that a step by step procedure follows Indicates where you can find additional information on the subjec...

Page 4: ...standards 14 2 Scope of delivery 15 2 1 Product parts 16 2 2 Type label and product identification 16 3 Product description 17 3 1 All views 18 3 2 Front view 20 3 2 1 USB interface on the front 20 3 2 2 Front plates 21 3 2 3 Display with touch screen 21 3 2 4 Touch screen care and cleaning 21 3 3 Bottom view 22 3 3 1 Optional interfaces 22 3 3 1 1 RS422 RS485 serial interface 23 3 3 1 2 PROFIBUS ...

Page 5: ...the RS422 RS485 port 31 3 8 2 Configuration of the PROFIBUS DP slave interface 33 3 8 3 Replacing the lithium battery 33 4 Wiring and installation 35 4 1 Connecting the system to the power supply 36 4 1 1 DC Power Plug 36 4 1 2 Connecting to the DC Power Supply 37 4 2 Mounting the system to a subframe or panel 39 4 3 Pin assignments 43 4 3 1 Ethernet interfaces LAN0 and LAN1 43 4 3 2 USB interface...

Page 6: ...Contents 5 4 4 Cables 48 5 Technical data 51 5 1 General Specifications 52 5 2 Environmental Specifications 54 5 3 Dimensions 55 5 3 1 Front Views 55 5 3 2 Rear and Right Side Views 57 Index 61 Record of Changes ...

Page 7: ......

Page 8: ...Chapter 1 Introduction ...

Page 9: ...should be used Do not use an extension cable to connect the product To guarantee that sufficient air circulation is available to cool the product please ensure that the ventilation openings are not covered or blocked If a filter mat is provided this should be cleaned regularly Do not place the system in direct sunlight close to heat sources or damp places Only devices or parts which fulfill the re...

Page 10: ...22 RS485 interfaces These procedures have to be carried out by qualified personnel only Additional safety instructions for DC power supply circuits To guarantee safe operation of devices with DC power supply voltages greater than 60V DC or a power consumption larger than 240VA please observe that the device is set up installed and operated in a room or enclosure marked with RESTRICTED ACCESS if th...

Page 11: ...ed either from the power source or the unit Therefore the DC power cord and its connectors must always remain easily accessible All plugs on the connection cables must be screwed or locked on the housing The chassis of the GN series device must be grounded by establishing a large area contact between the earth screw at the rear bottom side and an appropriate grounding connection point ...

Page 12: ...dustrial fieldbus interface and one additional serial COM2 RS232 or RS485 422 The GN07 can be expanded with one additional interface This can be either an indus trial fieldbus interface or an additional serial COM2 RS232 or RS485 422 The GN is designed to be connected to a 24V DC power supply using the DC power plug included The GN series touch panels are designed to fulfill the IP65 degree of pro...

Page 13: ...n ductive foam 1 3 1 Grounding methods Guard against electrostatic damage of the device by taking the following preventative steps Cover workstations with approved anti static material Provide a wrist strap connected to a work surface and properly grounded tools and equipment Use anti static mats heel straps or air ionizers for added protection Handle electrostatic sensitive components PCBs and as...

Page 14: ...ual may cause harmful interference to radio communications Operation of this equipment in residential area is likely to cause harmful interference in which case the user will be required to correct the interference at his own expense This Class A digital apparatus complies with the Canadian ICES 003 1 5 Electromagnetic compatibility This product has been designed for industrial use The most recent...

Page 15: ...ublic low voltage supply systems for equipment with rated current 16 A per phase and not subjected to condi tional connection EUROPE EN 61000 6 3 2007 Electromagnetic compatibility EMC Part 6 3 Generic standards Emission standard for residential commercial and light industrial environments EM 55022 B 2006 A1 2007 Information technology equipment Radio disturbance characteristics Limits and methods...

Page 16: ...Chapter 2 Scope of delivery ...

Page 17: ...lamp with Allen screws for the GN12 8 x mounting clamp with Allen screws for the GN15 2 2 Type label and product identification Product name Product identification QPC PD10 H04V06 G PB GN10 system with a 10 4 display and PROFIBUS QPC PD10 H04V06 G RS GN10 system with a 10 4 display QPC PD15 H04V06 G PB GN15 system with a 15 display and PROFIBUS QPC PD15 H04V06 G RS GN15 system with a 15 display Th...

Page 18: ...Chapter 3 Product description ...

Page 19: ...Product description 18 3 1 All views The pictures show a GN10 Bottom view Right view Front view Left view Top view ...

Page 20: ...3 1 All views 19 Rear view ...

Page 21: ...re designed to fulfill the IP65 degree of protection for the front side However the USB connector on the front if present must be covered by the elastic captive rubber coat The GN07 is not equipped with a USB interface on the front This USB 2 0 interface allows you to connect different USB compatible devices to the GN series The USB connector is covered by an elastic captive rubber coat The rubber...

Page 22: ...en and allows you to move the mouse pointer This works only if the necessary software is installed You receive the touch screen driver for your operating system installed on your system Do not use a hard or a pointed object like screw drivers to operate the touch screen because this can damage the touch screen surface The front panel GN10 GN12 GN15 and the touch screen are covered by a plastic ove...

Page 23: ...85 isolated 1 5kV COM2 see p 23 RS232 COM2 Industrial fieldbus Industrial Ethernet not GN07 GN10 GN12 GN15 supports up to two optional interfaces 1 serial interface COM2 1 cifX interface fieldbus Ethernet GN07 supports one optional interface 1 serial interface COM2 or 1 cifX interface fieldbus only For possible combinations of optional interfaces please contact us ...

Page 24: ... RTS signal has to be disabled again after data transmis sion has been terminated TxD the receiver device has to wait a certain time timeout before starting to send any data Default DIP switch settings DIP switch SW1 settings Factory settings are marked in gray Serial communication type Switch from transmitting to receiving mode SW1 settings DIP1 DIP2 DIP3 RS422 4 channel mode OFF OFF OFF RS485 4 ...

Page 25: ... slave interface The optional PROFIBUS DP slave interface is available as a Sub D 9 pin connector female and is mounted at optional interface 1 The interface can be configured using the software tool Sycon NET from the company Hilscher mbH http www hilscher com For further information on this interface please refer to the corresponding information on Hilscher cifX 90E fieldbus card and Sycon NET s...

Page 26: ... 10 Base T Green 100 Base T Yellow 1000 Base T 3 3 4 VGA interface connector An external analog monitor can be plugged into this Sub D 15 pin socket 3 3 5 Reset button To restart the GN unit e g after a system hang up press the reset button with a pen for example The system restarts automatically you do not have to switch the computer off and on During a reset all data in the main memory is erased...

Page 27: ...power supply on and off The GN unit is only completely disconnected from the DC main power supply when the DC power cord is disconnected either from the power supply or the unit Therefore the DC power cord and its connectors must always remain easily accessible 3 3 7 Grounding screw M4 with lock washers The housing of the GN unit must be grounded by establishing a large area contact between the gr...

Page 28: ...ystem is equipped with a CompactFlash CF card slot and only accepts CF cards type I Before installing or removing the CF card the GN unit must be powered down and disconnected from the power supply The GN10 GN12 GN15 is equipped with an angled metal cover in order to cover the card slot if no CF card is inserted If a CF card is inserted the cover can be mounted in the safe keeping location The GN0...

Page 29: ...Product description 28 3 5 Left and right side view Right side of a GN10 Left side of a GN10 3 5 4 5 1 2 5 3 5 4 5 1 2 5 6 ...

Page 30: ... the rear 2 Enclosure of the display 3 System cover 4 Screws that secure the cover on the left and right side 5 Mounting slots with installed mounting clamp and Allen screw 6 Safe keeping location for the angled metal cover of the CF slot if a CF card is inserted the cover is not used for the GN07 3 5 1 5 3 5 1 5 ...

Page 31: ...Product description 30 3 6 Rear view Rear of the GN10 Rear of the GN07 3 5 1 2 2 4 2 2 2 2 2 2 3 1 2 2 2 2 ...

Page 32: ...may be the result The system may only be opened in accordance with the description in this hardware manual for Replacing the lithium battery Configuring the RS422 RS485 interface GN10 GN12 GN15 These procedures may be carried out by qualified specialized personnel only Do not operate the system without the cover Please observe the safety instructions for handling assemblies with static sensitive d...

Page 33: ...and damage 4 GN07 Unscrew the screws that secure the cover GN10 12 15 Unscrew the screws that secure the metal cover on the optional in terface area 5 Remove the cover and put it aside For GN07 proceed to step 6 For GN10 12 15 Pull the mechanical adapter with the RS422 RS485 from the case 6 Locate the DIP switches in the unit 7 By use of an insulated thin tool e g screwdriver or a stylus set the D...

Page 34: ...s equipped with a lithium battery Location of the lithium battery 1 Lithium battery 2 Motherboard WARNING There is a risk of explosion if the battery is replaced by an in correct type The lithium battery must be replaced with an identical battery or of the same battery type lithium battery 3 0V for a real time clock type CR2032 The lithium battery type must be UL listed To replace this battery ple...

Page 35: ... the cover and put it aside 15 Pull the battery outwards Check which side of the battery should be facing up or 16 Position the new lithium battery in the battery holder 17 Gently push the battery as far as it goes into the holder Make sure that you insert the battery correctly 18 Put the cover back on 19 When the cover is firmly in place fasten the screws Do not dispose of lithium batteries in do...

Page 36: ...Chapter 4 Wiring and installation ...

Page 37: ...connected properly 4 1 1 DC Power Plug The GN panels are delivered with a DC power plug 3 pin Phoenix connector which you need to prepare The length of the wires connected to the DC power connector may not ex ceed 10m DC power plug 1 Cover for terminal screws 2 wire terminal 3 wire terminal 1 Cut the two isolated wires AWG18 Ø up to 1mm2 to the required length 2 Strip each end 5 7mm 3 Apply wire e...

Page 38: ...connection to the DC power supply 4 1 2 Connecting to the DC Power Supply Connect the GN panel to a DC power supply using the DC power plug and a corresponding cable see p 37 The DC power supply must be able to output 50W to cope with the inrush current The DC power supply should be able to be switched off and on via an isolating switch The unit is only completely disconnected from the DC main pow...

Page 39: ...DC power cable to the appropriate DC power connector of the GN panel The DC power connector of the system is located on the rear bottom side and is labeled 24V DC see p 24 Make sure the connector is securely locked in place 2 Connect the other end of the DC power cable to the terminals of the 24V DC power supply Ensure that the power connections maintain the proper polarity 3 Switch on the isolati...

Page 40: ... delivered with the product The GN panel may not tilt more than 10 in the application The system is delivered with mounting clamps and Allen screws in order to mount the system to a subframe or panel Mounting a GN10 1 Example of subframe for system installation 2 Enclosure of the 10 4 display 3 Mounting clamp with screw 4 Compact flash card slot 1 2 3 4 3 3 3 ...

Page 41: ...Wiring and installation 40 Mounting a GN15 1 Example of subframe for system installation 2 Enclosure of the 15 display 3 Mounting clamp with screw 4 Compact flash card slot 1 2 3 4 3 3 ...

Page 42: ... a switching cabinet verify that the seal on the rear of the front plate is in perfect condition The seal has to be in place without defects and dirt When you install the GN07 on a panel or a subframe for a switching cabinet leave enough free space at the rear top side to insert or remove the CF card The material on the bottom surface of the enclosure interior where the GN HMI is to be mounted mus...

Page 43: ...ce with the seal must be clean and flush 4 Ensure the vertical and horizontal alignment of the system 5 Fasten the system from the rear using the mounting clamps 6 Hook the mounting clamps with screws from the rear side of the panel into the corresponding pairs of slots of the enclosure The system must be attached firmly with the screws Tighten the screws with a torque of 0 5 Nm ...

Page 44: ...MDI3 8 MDI3 LED green LINK ACTIVE LED off green yellow 10 100 1000 Base T 4 3 2 USB interfaces Pin No Signal name 4 pin USB socket type A version 2 0 1 1 1 VCC 2 Data 3 Data 4 Ground 4 3 3 RS232 COM1 Pin Signal short name Long name 9 pin Sub D plug male 1 DCD Data carrier detect 2 RxD Receive data 3 TxD Transmit data 4 DTR Data terminal ready 5 GND Signal ground 6 DSR Data set ready 7 RTS Request ...

Page 45: ... Analog green output 3 Analog blue output 4 Not connected 5 GND 6 GND 7 GND 8 GND 9 5V DDC 10 GND 11 Not connected 12 SDA DDC 13 TTL Hsync 14 TTL Vsync 15 SCL DDC 4 3 5 DC Power Connector Pin Signal name 3 pin POWER SUBCON male 1 0V input 24V DC polarity on the unit panel 2 24V DC input NC 3 Functional earth ...

Page 46: ...al name 9 pin Sub D plug female 1 Data 2 NC 3 Data 4 NC 5 GND 6 NC 7 NC 8 NC 9 NC RS422 RS485 configured as RS422 4 channel mode Use the DIP switches to configure the interfaces see p 23 Pin Signal short name Long name 9 pin Sub D plug female 1 TxD Transmit data 2 RxD Receive data 3 TxD Transmit data 4 RxD Receive data 5 GND Signal ground 6 RTS Request to send 7 RTS Request to send 8 CTS Clear to ...

Page 47: ...connected 4 3 6 2 RS232 COM2 Pin Signal short name Long name 9 pin Sub D plug male 1 DCD Data carrier detect 2 RxD Receive data 3 TxD Transmit data 4 DTR Data terminal ready 5 GND Signal ground 6 DSR Data set ready 7 RTS Request to send 8 CTS Clear to send 9 RI Ring indicator 4 3 6 3 PROFIBUS DP slave Isolated RS485 interface Pin Signal short name Description 9 pin Sub D plug female 1 2 3 RxD TxD ...

Page 48: ...round at every device and make sure that there is no potential difference between the grounds at the devices reference User Manual cifX Cards Fieldbus Hilscher User Manual cifX Cards Fieldbus cifX 90E device description Hilscher mbH http www hilscher com PROFIBUS DP standard ...

Page 49: ...ini DIN Cable length 3m AFC8513D RS232C GN COM1 to FP2 COM MCU RS232 Cable length 2m AIP81862E1D RS232C GN COM1 9 pin Sub D loose wire Cable length 3m AIGNCAB232D Ethernet You may use a commercially available Ethernet LAN cable to program the GN panel for example RS232 connection cable wiring RS485 connection cable wiring ...

Page 50: ...male PROFIBUS connectors We recommend using a straight 0 bus interface connector e g PR 103 658 When a hor izontal 90 bus interface connector is used ensure that the orientation is correct For further wiring information please refer to the corresponding device description of Hilscher and to the PROFIBUS standard ...

Page 51: ......

Page 52: ...Chapter 5 Technical data ...

Page 53: ...00 1 700 1 Touch screen 4 wire resistive analog Single board computer with Intel Atom processor N270 1 6 GHz Yes RAM Standard 512 GB Windows CE Lithium battery 3 0 V for real time clock Type CR2032 UL listed Yes Reset button RESET Yes Power button PWR Yes Power supply input see note 12V DC 2 8A max to 24V DC 1 8A max 10 Status LEDs system and storage medium Yes USB 2 0 interface 2 x 3 x Ethernet i...

Page 54: ...her operating systems available upon request DC power connector 3 pin 1 x DC power plug 3 pin 1 x Mounting clamps 4 x 1 screw 8 x 1 screw 6 x 2 screws 8 x 2 screws The DC power supply must be able to output 50W to cope with the inrush current The GN panel may not tilt more than 10 in the application ...

Page 55: ...torage transit temperature relative hu midity 20 70 C 10 90 non condensing Operating altitude 300m to 3 000m Storage transit altitude 300m to 4 500m Operating shock 15G 11ms duration half sinus Storage transit vibration 50G 11ms duration half sinus Operating vibration 10 58Hz 0 1 mm 58 500Hz 1G Storage transit vibration 10 58Hz 0 15 mm 58 500Hz 2 0G Degree of protection IP65 front panel side ...

Page 56: ...ension GN07 GN10 GN12 GN15 Height 168mm 277mm 312mm 354mm Width 235mm 348mm 380mm 449 4mm Depth total 50 3mm 49 6mm 57 1mm 55 6mm Depth without front plate 47 3mm 45 6mm 51 1mm 51 6mm Weight 2 6kg 3 6kg 4 9kg 6 5kg 5 3 1 Front Views GN07 ...

Page 57: ...Technical data 56 GN10 GN12 ...

Page 58: ...5 3 Dimensions 57 GN15 5 3 2 Rear and Right Side Views GN07 ...

Page 59: ...Technical data 58 GN10 GN12 ...

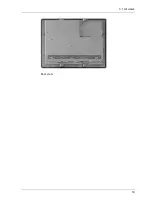
Page 60: ...5 3 Dimensions 59 GN15 ...

Page 61: ......

Page 62: ... Display 21 52 Display with touch screen 21 E Electromagnetic compatibility 13 Electrostatic discharge 12 Electrostatic discharge ESD 12 Environmental Specifications 54 Ethernet 24 43 Ethernet interfaces LAN0 and LAN1 43 F FCC statement 13 Front plates 21 Front view 20 Front Views 55 G General Specifications 52 Grounding 12 26 Grounding methods 12 Grounding screw M4 with lock washers 26 I Importan...

Page 63: ...22 RS485 configured as RS485 2 wire mode half duplex 45 RS422 RS485 configured as RS485 4 wire mode full duplex bus master 46 RS422 RS485 serial interface 23 Rubber coat 20 S Safety instructions 8 Scope of delivery 15 Serial interface 22 23 43 45 46 Single board computer 31 Specifications 52 54 Status LEDs 26 Stylus 16 21 T Technical data 51 Timeout 23 Top view 27 Touch screen care and cleaning 21...

Page 64: ...63 Record of changes Manual No Date Description of Changes MANHWQPCPD13AE June 2013 First edition ...

Page 65: ...Q VITEC GmbH Im Stadtfelde 22 31515 Wunstorf Germany Phone 49 0 5031 939 86 17 Fax 49 0 5031 697 297 6 E Mail info qvitec de www qvitec de ...

Reviews: