QSDR74RTB User Manual
21
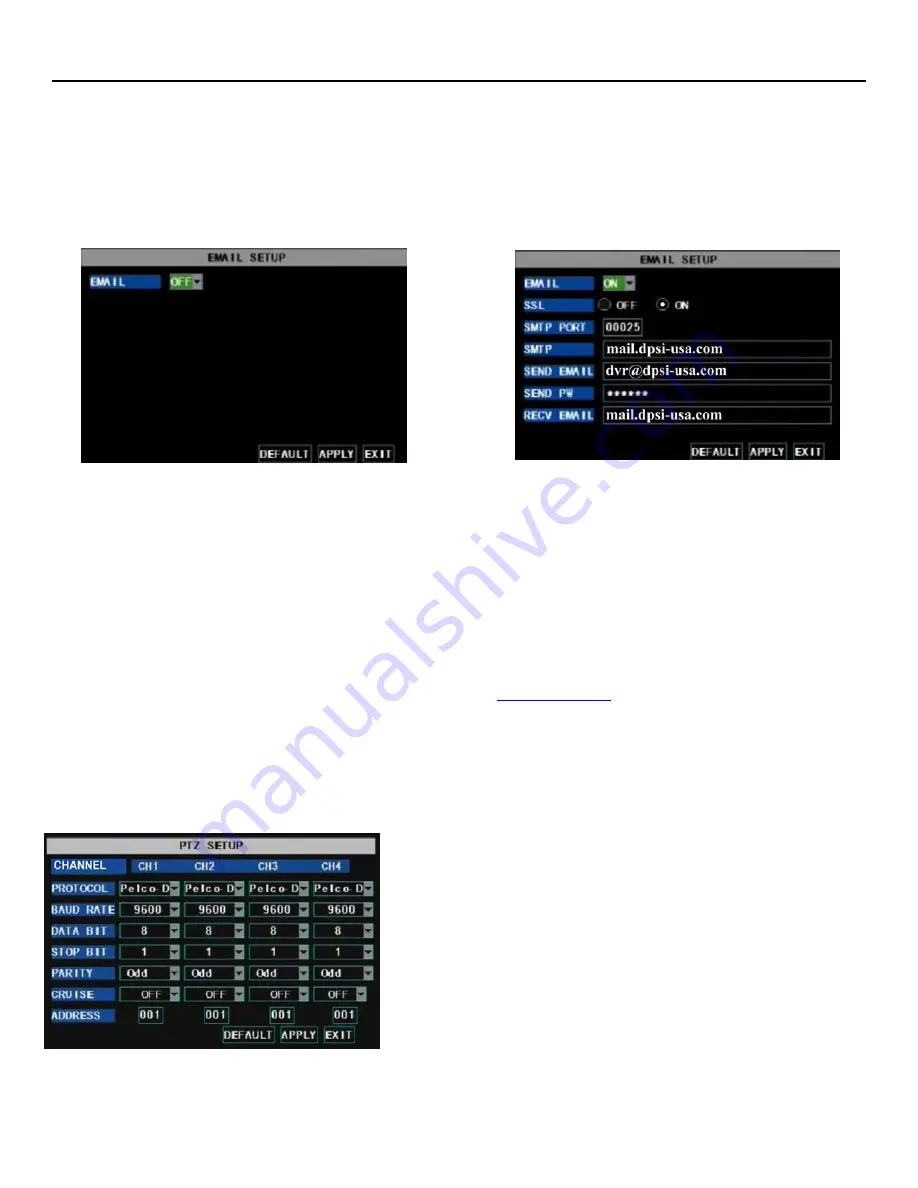
(Picture 35)
•
The
EMAIL SETUP
button allows you to configure your system to send you an email when motion has been
detected by your system. To configure your email notification settings, click on the EMAIL SETUP button
and you will generate an EMAIL SETUP interface as illustrated in Picture 35. In the EMAIL SETUP interface,
choose the ON option in the pull down menu. Choosing the “On” option will generate list of options to
choose from to customize your SSL, SMTP PORT, SMTP server, Send and Deliver Servers and your email
account password. (Picture 36). Your SSL button turned to “On:” will allow an extra layer of protection to
keep your email account and password from being hacked.
You can obtain the correct settings for your SMTP server and the SSL configuration of your mailbox at your mail
server’s website (such as G-Mail, Yahoo, or others). Brief explanations of the information you need to obtain
from your Email server are as follows:
SMTP Port:
indicates sender port of SMTP server. Generally the SMTP port value is 25. There are exceptions
however and you should check with your Email server’s website.
SMTP Server
: indicates server address you use.
Sender Email:
indicates sender’s email address. The email address should be consistent with the server you
use. That is to say, when you use email address –
, the according server should be
smtp.gmail.com.
Receiver Address:
indicates receiver’s email address. The email address is used to receive image transmitted
from motion detection alarm of DVR. Please clear the images you have received as soon as possible to avoid
overloading your email account.
5.2.7.3: PTZ Setup
Clicking on the PTZ Setup icon in the Device Management interface
(Picture 32) will allow you to configure your PTZ settings. Once
you click on the icon a pop up PTZ Setup interface as illustrated in
Picture 37 will appear. Select the channel you want to control in
the top row of the PTZ interface screen and set the PTZ protocol
from the protocol drop-down menu (Pelco-D or Pelco-P); the Baud
Rate from the baud rate drop down menu (1200, 2400, 4800 or
9600); the Stop Bit rate from the stop bit drop down menu (1 or 2);
the Parity Check from the parity drop down menu (None, Odd or
Even Mark Space); and the Address Code and Cruise status
accordingly. Please note the above mentioned channel settings
must match the settings of the PTZ camera.
(Picture 36)
(Picture 37)


