Q-See QSD004 User Manual Download Page 9


- 6 - 

QSD004 User’s Manual 
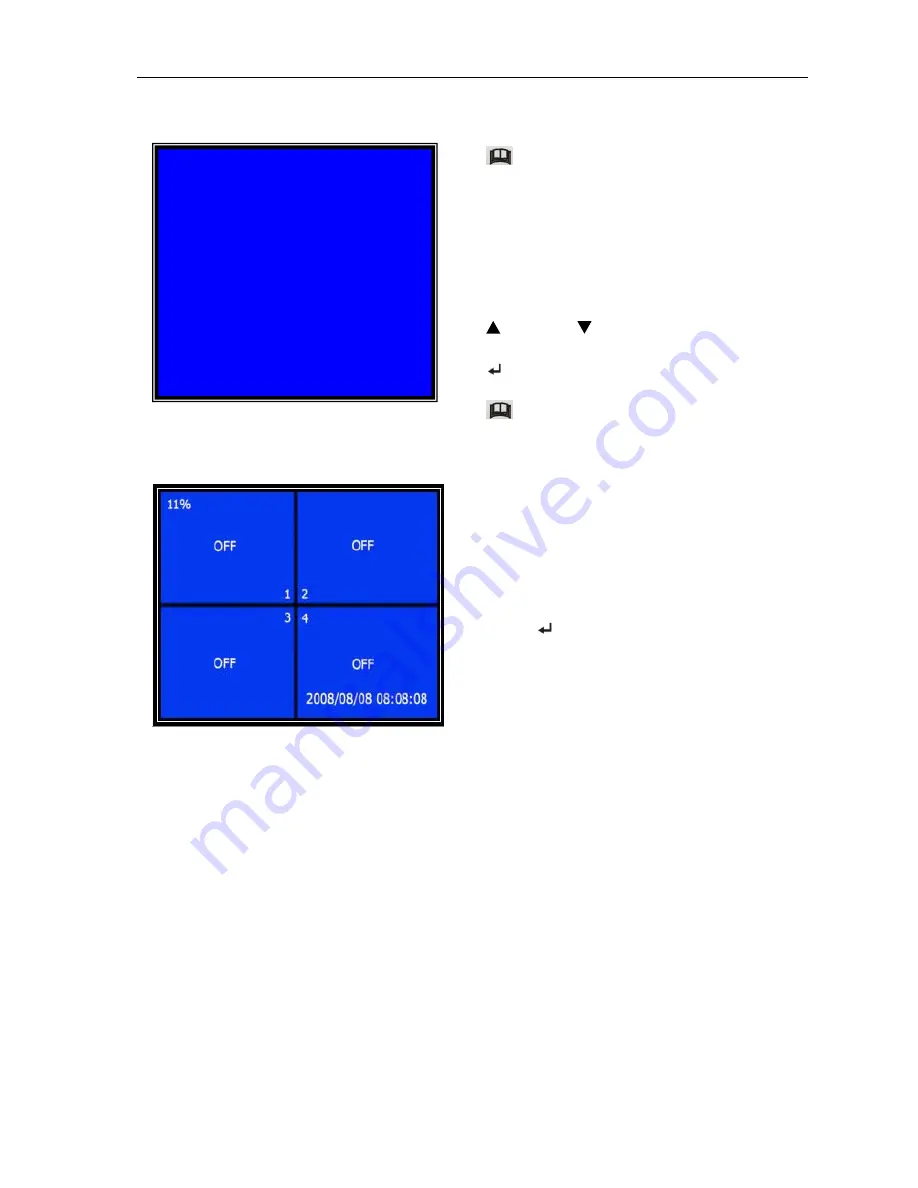


5.2 Camera Select


If a channel is disabled, the system will display “

OFF

” on the monitor, and this 

channel will not be selected to record. (

Refer to 5.3 Record Select

)


5.3 Record Select


Configure which channels you want to record. 

Note: If no channels are selected, an error message will appear briefly on 

the screen when record is selected.


The DVR system can display 4 

camera feeds in one picture (Quad Mode).   

You can configure which cameras are 

displayed.   

Press [

SEL

] to modify setting, or 

press [

CH1

], [

CH2

], [

CH3

] and [

CH4

] to 

select each channel separately. 

[

Menu

]: enter system menu 

Note: If you are recording to enter 

Menu you need to push stop button to 

stop recording first. 

[


Up

] and [


Down

]: move the cursor 

[

SEL

]: select/modify settings 

[

Menu

]: press again to exit 


MAIN MENU 


CAMERA SELECT                      1 2 3 4 

        RECORD SELECT                      1 2 3 4 
        RESOLUTION                              EACH 
        RECORD FRAME                              25           
        RECORD QUALITY                      HIGH 
        SCHEDULE SET 

MISCELLANEOUS MENU 
HARD DISK SET 
MOTION SET 
VIDEO MODE                                  PAL 
FACTORY RESET 


PRESS (UP

DOWN), ENTER (SELECT)   

PRESS (MENU) TO EXIT


Summary of Contents for QSD004

Page 1: ......

Page 2: ...onnecting Power Supply 3 4 System Boot 4 1 Detecting Installed Hard Drive 4 4 2 Recovering Lost Data 4 4 3 Restore Recording Feature 4 4 4 Main Screen 5 5 DVR Setup 5 1 Setup Menu 5 5 2 Camera Select...

Page 3: ...5 15 Video Mode 12 5 16 Factory Reset 12 6 Recording 6 1 Start Recording 12 6 2 Stop Recording 13 6 3 Recording Time on Hard Drive 13 7 Playback 14 8 USB Programming 15 8 1 PC Viewer Program 15 8 2 Pr...

Page 4: ...ter Remote Control 2 1 Front Panel CH1 1 Channel 1 Stop 10 Stop recording playing back CH2 2 Channel 2 REC 11 Record CH3 3 Channel 3 Menu Esc 12 Enter exit setup menu CH4 4 Channel 4 SEL Edit 13 Selec...

Page 5: ...or enlarge Channel 2 CH3 Select or enlarge Channel 3 CH4 Select or enlarge Channel 4 Quad Quad View Rewind Play recording list Forward Record Pause Stop recording playing back Menu Enter or exit setup...

Page 6: ...hard drive manual 4 Carefully replace the case cover 3 2 Connecting Camera and Monitor There are 4 camera inputs and 1 video output with BNC connectors Refer to 2 2 Rear Panel Attach the cable from e...

Page 7: ...he hard drive information A power error can cause data to be lost and the DVR system can automatically recover lost data after power is reconnected If a power error occurs during the recording process...

Page 8: ...N SET VIDEO MODE FACTORY RESET Chapter 5 DVR Setup MAIN MENU AUTO RECORD PASSWORD ENABLE PASSWORD CHANGE COLOR SET TIME SET While the DVR is running the monitor will display the information from the c...

Page 9: ...in one picture Quad Mode You can configure which cameras are displayed Press SEL to modify setting or press CH1 CH2 CH3 and CH4 to select each channel separately Menu enter system menu Note If you ar...

Page 10: ...n in sequence The full screen view of each channel will be displayed for three 3 seconds including Quad view The switch will last until any button is pushed For example Stop will stop the switch and m...

Page 11: ...to be T Both of the two recording methods need to be triggered by pressing REC button After pressing REC button if the schedule is set to be T at that time DVR will start to record immediately if the...

Page 12: ...l be required to enter the password if you want to stop recording or enter menu System default password Press CH1 button six 6 times 5 10 Miscellaneous Menu Password Change 5 11 Miscellaneous Menu Col...

Page 13: ...Note When you install a new hard drive in the DVR you use this function to format the hard drive Configure system date and time Up and Down move the cursor SEL modify the value Menu exit and save OVER...

Page 14: ...e channel you want to modify press SEL to adjust sensitivity of motion detection on each channel High 1 9 OFF Low When it s OFF the channel cannot be triggered by motion MOTION RECORD TIME This number...

Page 15: ...u forget your password please keep the system on main screen and then press Pause button ten 10 times the DVR will reset the system Then the default password will be CH1 button six 6 times If the DVR...

Page 16: ...tivated the password protection you need to input the password 6 3 Recording Time on Hard Drive Estimated record time based on a 120GB Hard Drive Quad Mode in hours You can estimate recording hours by...

Page 17: ...an also play recorded video by searching exact date and time using the following steps 1 Press FWD button to change the select mode 2 Press Up and Down button to select date starting time or ending ti...

Page 18: ...Driver Program CD into your CD ROM Drive 2 Open CD directory 3 Double click on the PCViewerInstall exe file to install the PC Viewer software 4 Run the installed PC Viewer program PC Viewer will dete...

Page 19: ...hange location of capture directory On PC 4 Time Search Search for time file on DVR hard disk 5 DVR event list Open event list recorded in DVR 6 DVR Mode 7 PC Mode To switch working mode between PC vi...

Page 20: ...Each Channel 25 fps Number of Cameras Max 25 frames s Total Record Mode Continuous Time Schedule Motion Triggered Display NTSC 720 480 PAL 720 576 Resolution Record NTSC 320 112 640 224 PAL 320 136 6...

Page 21: ...Note refer to 2 2 Rear Panel on page 2 for connections 10 2 DVR Accessories included Chapter 10 Appendix Power Cord The shape of the plug might be different for different countries or regions Power A...

Page 22: ...ditions in on which the equipment operates e g improper power environment temperature humidity and lightening strike etc that cause equipment damage 3 Damage caused by acts of nature earthquake and fi...

Reviews: