MOUSE WHEEL
Page up or page down
Switch items in check box
Increase or decrease numerical value in numerical input box
CLICK-AND-DRAG
Select motion detection zone
Select privacy mask zone
MOUSE CONTROL
The mouse operates in a manner similar to how it is used on a conventional computer; point-and-
click, right-click, double click and so on. How these functions are used is based on the context of
where they are used. Some examples are:
LEFT CLICK:
Selecting an item
Opening a menu
Checking a box or motion detection status
Selecting letters, numbers or symbols on the virtual keyboard.
DOUBLE CLICK:
Selecting an event for playback
Selecting a screen to zoom into from multi-screen mode
VIRTUAL KEYBOARD
The virtual keyboard is contextual. For example, it will only show digits when the field is for numeral
entries. In fields where letters and symbols can be entered, users can switch between various
formats – numbers, upper case, lower case and symbols – by selecting the white keyboard symbol
that will appear to the right of a field where text can be entered. The symbol itself will change to
show which keyboard format is available next.
Available keyboards include:
RIGHT CLICK
Exits any window. Exits
any menu or reopens
previous menu.
Opens
Pop-Up
Shortcut
Menu
View 1
View 4
View 9
View 16
Pan/Tilt/Zoom
Color Setting
Search
Record
Alarm Output
Alarm Input
Main Menu
The keyboards are used by clicking on the
desired character. Spaces are entered using
the
symbol and characters are deleted
with the
key. Clicking outside of the
keyboard will close it.
1
2 3
5
4
6
8
7
9
0
1 /
4 ?
7 @
0 &
2 :
5 -
8 #
3 .
6 _
9%
a
h
o
u
b
i
p
v
c
j
q
w
d
k
r
x
e
l
s
y
f
m
t
z
g
n
A
H
O
U
B
I
P
V
C
J
Q
W
D
K
R
X
E
L
S
Y
F
M
T
Z
G
N
NUMBERS
SYMBOLS
UPPER CASE
LETTERS
LOWER CASE
LETTERS
PART 5 - ACCESSING THE DVR’S MENUS
When the system boots up, it will be in multi-screen mode. Press
Enter
on the front panel, the
Enter/Menu
button on the remote control to bring up the
System Login
window. You can also
right-click the mouse to bring up the
Pop-Up Shortcut
menu where you select
Main Menu
.
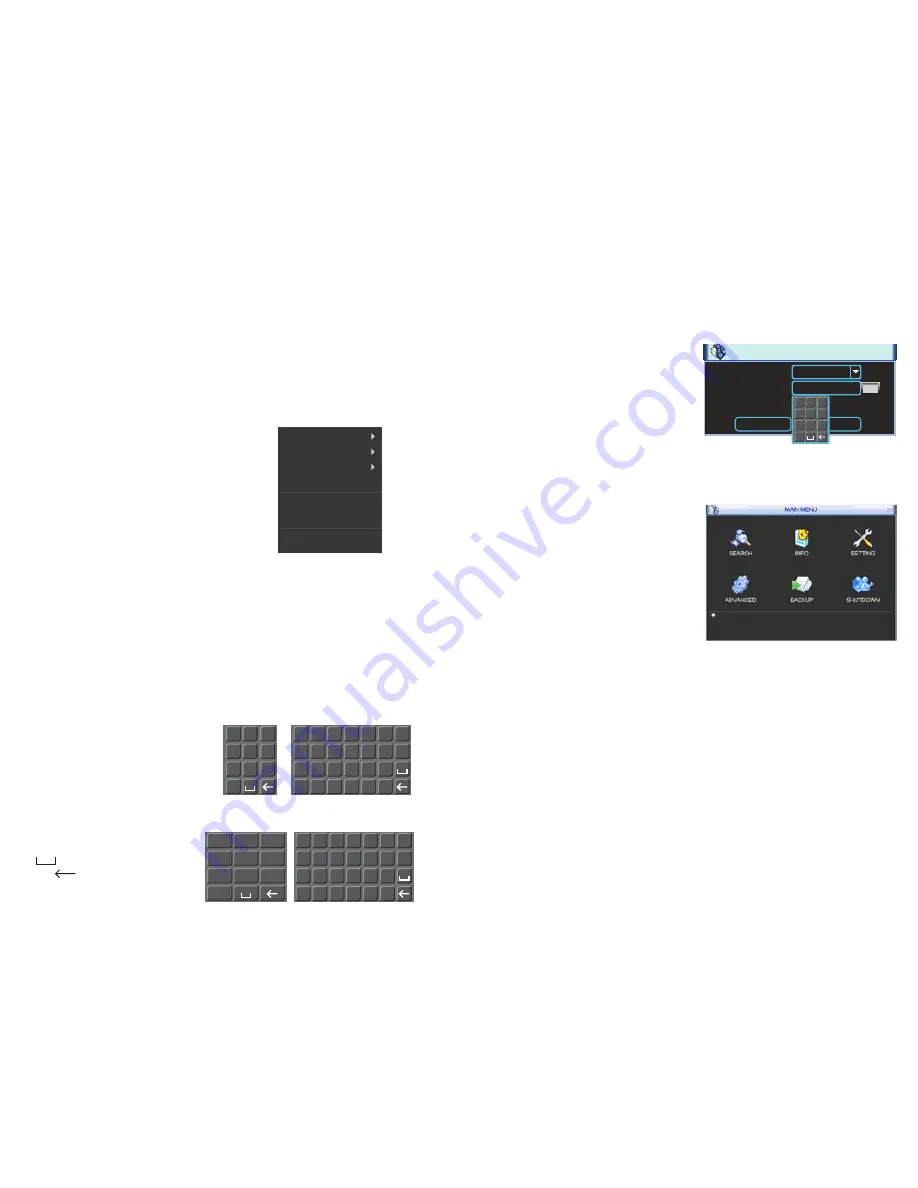
Once you have logged in, you will be presented with the
Main Menu
. There are 6 icons;
Search
,
Info
,
Setting
,
Advanced
,
Backup
and
Shutdown
.
SYSTEM LOGIN
User Name
Password
admin
OK
Cancel
1
2 3
5
4
6
8
7
9
0
1
2
3
Log in using the Admin account using the virtual
keyboard.
Username:
admin
Password:
admin
SEARCH
: Find and playback files from the hard drive.
INFO
: Contains hard drive info, system log, version information, and online users.
SETTING
: Most system configuration takes place in this window and its submenus. Access General
settings to set system time, language, hard drive overwrite, file size, and video display format. The
Encode submenu is where you set compression, frame rate, bit rate, audio, and sub stream. You will
also find schedule setup, network setup, motion detection setup, display setup, and default settings
here.
ADVANCED
: Used for hard drive management, manual recording, account setup, auto mainte-
nance, and monitor output adjustment.
BACKUP
: Backup files from the hard drive.
SHUTDOWN
: Use this icon to safely shut down the system.
PICTURE 5-1
PICTURE 5-2


