background image


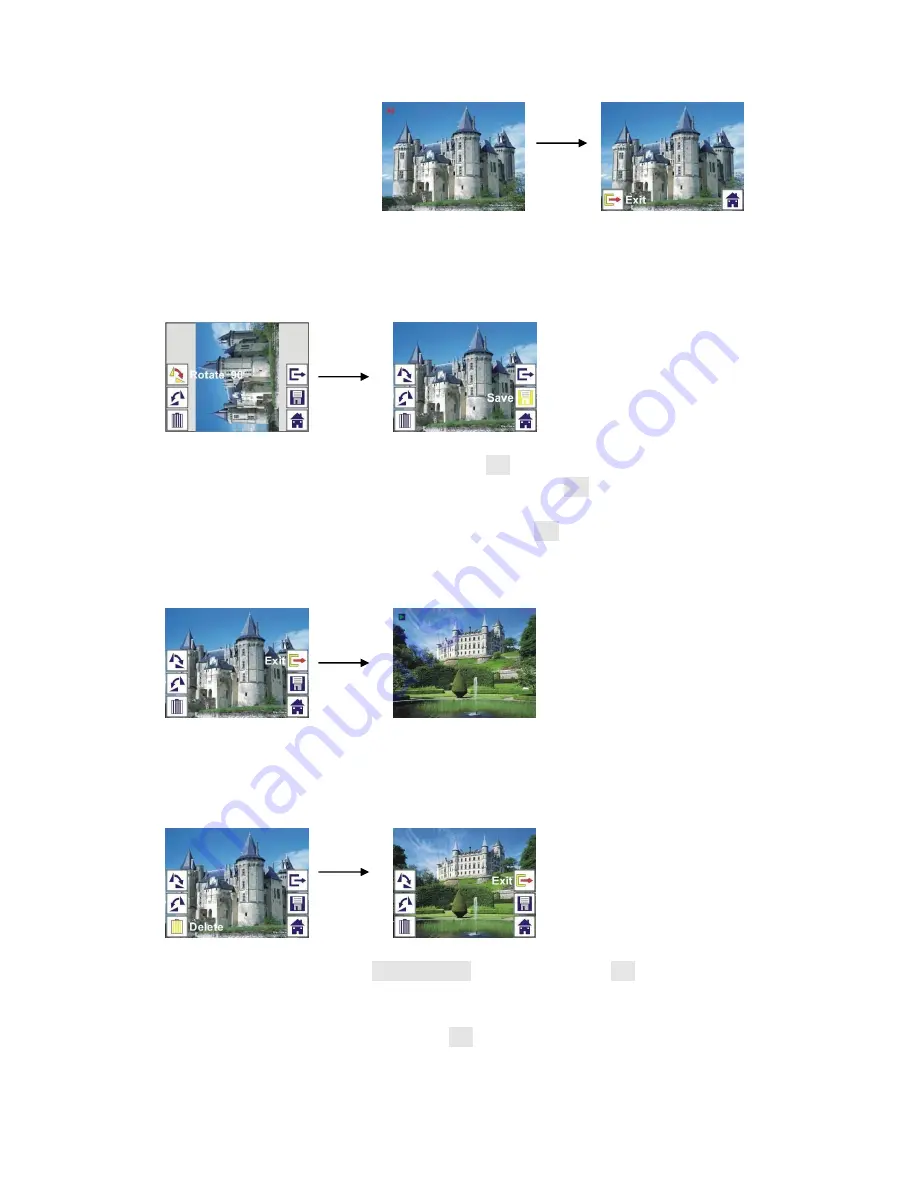
2.4 Playback: Rotate/Save 


If user wants to 90 degrees by OK button, the image will be rotated 

+90 degrees and cursor will  remain  at  Save.  Press  OK button again to save 
modified  result  and  next  picture  will  be  shown.  For  continuously  rotate  +90 
degrees, move cursor to rotate again and press OK button. (Same for Rotate 
–90 function) 


2.5 Playback: Exit 


Once  user  select  Exit  function  in  edit  menu,  the  display  will  go  back  to 

slide show starting with the current picture without any change 


2.6 Playback: Delete 


Select delete icon with LEFT/RIGHT button then press OK button, that will 

delete the present selected picture and next picture will be shown. Cursor will 
remain  at  Exit  icon.  If  user  intend  to  process  continuously  delete,  just  move 
cursor to delete icon again and press OK button to confirm. 


    OK 

    OK 

OK 

    OK 

Summary of Contents for PSCNPHO32

Page 1: ...N MANUAL Model PSCNPHO32 For correct usage please read these instructions carefully and keeps in a safe place for future reference Illustrations are for instructional purposes only and may be different from the actual product ...

Page 2: ...me USB overloading Do not overload the USB connections on your computer If you have too many devices connected to your computer such as a wireless mouse media player mobile phone or other USB powered devices There may not be enough power for the film photo scanner to operate properly Servicing The user should not attempt to service the device beyond those means described in the operating instructi...

Page 3: ...e Adapter 110 lnsert Super8 lnsert Video cable USB cable AC DC adapter Brush User s Manual Please remove the adaptor from the mains when not in use Operation Guide Home MODE Main menu Language mode USB mode Capture mode Playback mode Film Type Resolution ...

Page 4: ... the selection 1 1 Adjust brightness and color of image You can adjust brightness and color of image in capture mode When enter into capture mode press OK button following picture will show on EV means brightness R means red G means green B means blue Press OK button to switch press LEFT RIGHT button to adjust data Press SCAN button back to image preview mode 1 2 Capture Mirror Flip Hard Key If an...

Page 5: ...ght Press RIGHT button to upside down image 1 3 Capture mode Once entered capture mode there will be an indicator on the left top corner to indicate it is in live view mode User can also press OK button then press LEFT RIGHT button to adjust EV value press SCAN button again to confirm and back to live view mode 1 4 Capture Edit Menu Save save captured image Cancel cancel any editing with this imag...

Page 6: ...live view image will be selected and shown on the TFT which will take between 1 2 second with 2 icons shown on the left side of the screen Save icon will be highlighted for user to confirm by OK button after the above step the display will go back to live view mode preview 1 7 Capture Cancel Select Cancel icon with LEFT RIGHT button and press OK button to cancel any editing step with present selec...

Page 7: ... Once the images in internal memory or memory card is full a memory full icon will be shown on screen when press SCAN button User has to download the images to PC or replace another memory card for continue capture 2 Playback or Press LEFT RIGHT button to playback mode when power on the device or access the main menu by Home icon MENU button anytime Press OK button to confirm the selection 2 1 Pla...

Page 8: ...yback Slide show Single picture Edit mode User can interrupt stop slide show mode to stand alone playback mode single picture playback by press OK button Pause slide show Then user is able to scroll each picture by LEFT RIGHT button Once user select the picture stored in internal memory or memory card which intended to be modified press OK button again to bring out the edit mode for modification I...

Page 9: ...n Same for Rotate 90 function 2 5 Playback Exit Once user select Exit function in edit menu the display will go back to slide show starting with the current picture without any change 2 6 Playback Delete Select delete icon with LEFT RIGHT button then press OK button that will delete the present selected picture and next picture will be shown Cursor will remain at Exit icon If user intend to proces...

Page 10: ...is no picture when enter playback mode a No picture symbol will show on screen Using the Adapter Plates Once you ve set your scanner to the correct film type be sure to choose and use the proper adapter for the job lncluded are 2 adapter plates and 2 adapter inserts each precisely cut to accommodate a particular type of film 1 Slide Adapter 2 Negative Adapter 3 Super8 lnsert 4 110 lnsert ...

Page 11: ...se Negative Adapter and press until it clicks 12 From right side of scanner unit slide Adapter inward until it clicks Note Our 126KPK Super8 Slide Negative Scanner is a premium model Unlik cheaper models that require the user to fit each strip of film into an Adapter or lnsert before inserting into unit this scanner allows you to easily capture and convert one film after the other Simply click the...

Page 12: ...time Press LEFT RIGHT button for Film Type and press OK button to confirm Negatives Film select Negatives film when load color negative film in holder Slides select Slides when load slide in holder B W select B W when load B W negative film in holder User can press LEFT RIGHT button to select film type then press OK button to confirm Resolution Change resolution by enter Resolution menu when power...

Page 13: ...the film photo scanner to download the stored images from the memory card When the device is connected with USB cable to PC User can also press MENU button to main menu then press LEFT RIGHT button to select USB mode then press OK button to confirm the film photo scanner will become a mass storage device and user can review or edit images on PC User can also press MENU button to back to main menu ...

Page 14: ... 2 4 inch LCD Display External memory SD MMC Exposure Auto Color balance Auto Resolution 14 Megapixels 22 Megapixels interpolation Supported Film Types 135 Film 36x24mm 126KPK Film 27x27mm 110 Film 17x13mm Super8 Film 4 01x5 79mm Monochrome Slide Picture Effects B W Slides Negatives File Format Picture JPEG TV Out Type NTSC PAL Power Powered from USB 5V adapter Internal Memory 128MB Dimension 3 42...

Reviews: