


14
Pause (still picture)
Pressing
during playback will stop
play temporary. Return to normal
playback, press
once again.
Repeat
Press the REPEAT button to select
repeat mode as follow:
DVD:
Press the REPEAT button to select
repeat mode as follow.
VCD/CD
Press the REPEAT button to select repeat
mode as follow:
1. Continuously repeat at the current
chapter/track, when selected REP-
ONE mode.
2. Select REP-ALL mode to continuously
repeat all chapter/track on the current
disc.
3. When the player finish playback the
current disc last chapter/track, it will
stop display the elapsed time. When
selected REPEAT OFF mode, REP-
ONE & REP-ALL disappear at the
screen display.
4. REPEAT feature does not support
VCD2.0 (with PBC ON).
Remote Sensor (IR)
Point the remote handset to the
remote sensor. Receive the signal
from remote handset.
CHAPTER REPEAT ON
TITLE REPEAT ON
REPEAT OFF
REP-ONE
REP-ALL
REPEAT OFF
BASIC OPERATION
Normal Playback
SF 2x
SF 4X
SF 8X
SR 8x
SR 4X
SR 2X
Normal Playback
SF 1x
SF 2X
Step BWD
SF 3X
Stopping Play
- Brief press the (Stop) button to stop
the unit playback, when press the
(14) button it can continuous normal
playback.
- Press (Stop) button twice, it will stop
the playback and go back to initial
Track/Chapter.
Rapid Forward/Rapid Reverse
Press
FFWD &
FBWD during play.
Each time the button is pressed, the
speed of rapid forward/reverse changes
according to the disc as follow.
DVD:
VCD/CD:
MP3:
Skipping Track
Press
/
on the remote handset or
/
on the front panel during
playback to skip to next track or back
one track.
Note: For some VCD2.0 discs (PBC-
playback control),
and
buttons
may be unavailable.
Slow Motion Play
Press slow button during playback.
Eachtime the button is pressed, the
slow modes are changed according
to the disc as follow.
DVD:
VCD:
Note: For VCD, in any slow mode,
press ENTER button to return to
normal playback.
CHAPTER REPEAT ON
TITLE REPEAT ON
REPEAT OFF
REP-ONE
REP-ALL
REPEAT OFF
Stopping Play
- Brief press the (Stop) button to stop
the unit playback, when press the
(14) button it can continuous normal
playback.
- Press (Stop) button twice, it will stop
the playback and go back to initial
Track/Chapter.
Rapid Forward/Rapid Reverse
Press
FFWD &
FBWD during play.
Each time the button is pressed, the
speed of rapid forward/reverse changes
according to the disc as follow.
DVD:
VCD/CD:
MP3:
Skipping Track
Press
/
on the remote handset or
/
on the front panel during
playback to skip to next track or back
one track.
Note: For some VCD2.0 discs (PBC-
playback control),
and
buttons
may be unavailable.
Slow Motion Play
Press slow button during playback.
Eachtime the button is pressed, the
slow modes are changed according
to the disc as follow.
DVD:
VCD:
Note: For VCD, in any slow mode,
press ENTER button to return to
normal playback.
Normal Playback
2X
4X
6X
8X
Normal Playback
2X
4X
Normal Playback
2X
3X
4X
Stopping Play
- Brief press the (Stop) button to stop
the unit playback, when press the
(Play) button it can continuous normal
playback.
- Press (Stop) button twice, it will stop
the playback and go back to initial
Track/Chapter.
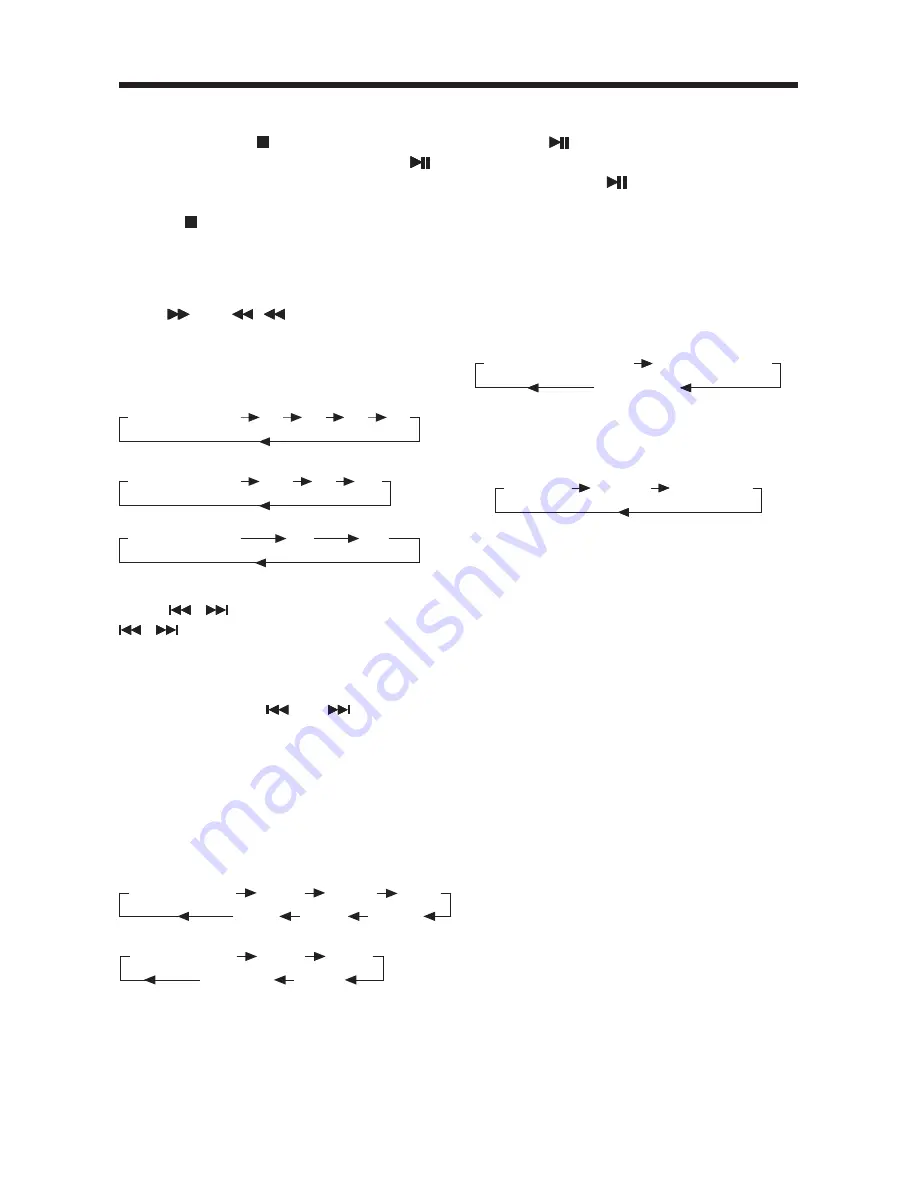
Rapid Forward/Rapid Reverse
Press
FF &
REW during play. Each
time the button is pressed, the speed of
rapid forward/reverse changes according
to the disc as follow.
DVD:
VCD/CD:
MP3:
Skipping Track
Press
/
on the remote handset or
/
on the front panel during
playback to skip to next track or back
one track.
Note: For some VCD2.0 discs (PBC-
playback control),
and
buttons
may be unavailable.
Slow Motion Play
Press slow button during playback.
Eachtime the button is pressed, the
slow modes are changed according
to the disc as follow.
DVD:
VCD:
Note: For VCD, in any slow mode,
press ENTER button to return to
normal playback.


