Pyle view PLVH7IP Instruction Manual Download Page 3

2

About the liquid crystal display (LCD) panel

1. Do not press on the LCD panel on the monitor unit as doing so can distort the picture or cause a 

malfunction, the picture may become unclear, or the LCD panel may be damaged.

2. Notes on cleaning
 -clean the LCD panel with a slightly damp soft cloth.
 - do not use solvents such benzine, thinner, commercially available cleaners or antistatic spray.

o

o

o

o

3. Do not use this unit temperatures under 5 C (41 F) or over 45 C (113 F).
4. If your car was parked in a clod or hot place, the picture may not be clear. The monitor is not damaged.

The picture will become clear after temperature in your car becomes normal.

5.Some stationary blue or red dots may appear on the monitor. These are called bright spots, and happen

 with any LCD.The LCD panel is highly sophisticated, and more then 99.99% of the segments used in

the panel are flawless. However, there is a possibility that less than 0.01% of the segments are defective

and may not light up properly. However, these segments will not interfere with your viewing.
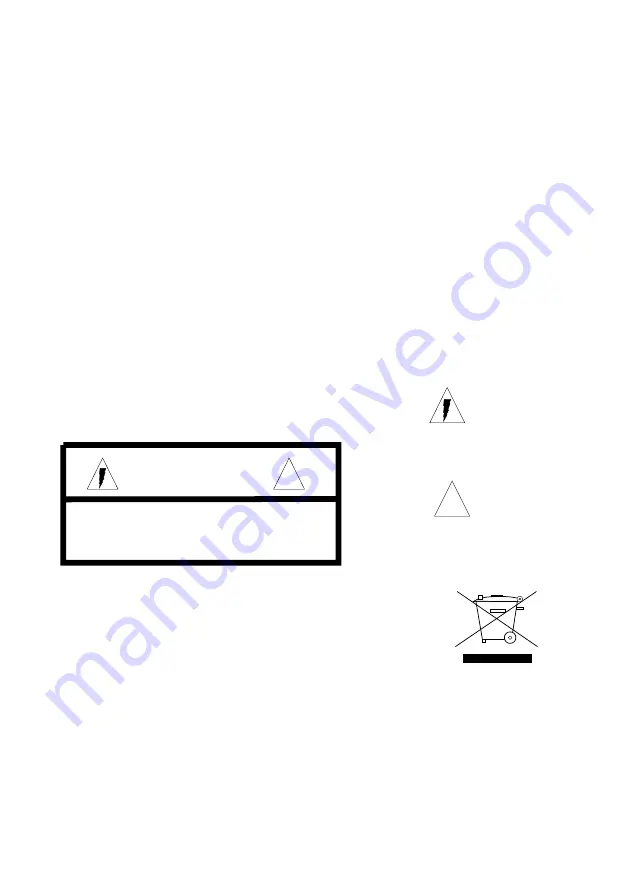
Warning

To Prevent fire or shock  hazard, do not expose the unit to
rain or moisture.

This symbol is intended to alert the user to

the presence of uninsulated 

DANGEROUS

VOLTAGE

 within the product

s enclosure

that may be of sufficient magnitude to

constitute a risk of electric shock to persons.

This symbol is intended to alert the user to

the presence of important operating and

maintenance(servicing) instructions in the

literature accompanying the appliance.

!

!

CAUTION!!

RISK OF ELECTRIC SHOCK

DO NOT OPEN

Caution: To reduce the risk of electric shock
                Do not remove cover (or Back)
                No user-serviceable parts inside
                Refer servicing to qualified service personnel

Disposal of old electrical & electronic equipment

( applicable in the European Union & other European
   countries with separate collection systems)

This symbol on the product or on its packaging indicates that this product shall not be treated

as household waste. In stead it shall be handed over to the applicable collection point for the
recycling of electrical and electronic equipment. By ensuring this product is disposed of

correctly, you will help prevent potential negative consequences for the environment and

human health, which could otherwise be caused by inappropriate waste handling of this

product. The recycling of materials will help to conserve natural resources. For more detailed

information about recycling of this product, please contact your local Civic Office, your

household waste disposal service or the shop where you purchased the product

Safety

To avoid the risk of accident and the potential violation of applicable laws, the fronts tv should

Never used while the vehicle is being driven. Also, rear displays should not be location where

It is a visible distraction to the driver.

In some countries the viewing of image on a display inside a vehicle even by persons other than

The driver may be illegal. Where such regulations, they must be obeyed and this unit

s features

Should not be used.

Summary of Contents for PLVH7IP

Page 1: ...INSTRUCTION MANUAL PLVH7IP 7 Wide LCD Monitor W ith 4 Mounting Options www pyleaduio com...

Page 2: ...ayout for monitor wireless remote Accessories Connection diagram Replacing the remote control battery Installing headrest with shroud Installing sun visor with shroud Installing of headrest case Funct...

Page 3: ...t operating and maintenance servicing instructions in the literature accompanying the appliance CAUTION RISK OF ELECTRIC SHOCK DO NOT OPEN Caution To reduce the risk of electric shock Do not remove co...

Page 4: ...k of electronic shock do not permit any of this equipment to become damp or wet from water or liquid If this does occur immediately unplug the power cord and send the monitor to your local dealer or s...

Page 5: ...educe headphone output volume Reduce Menu This button brings up the on screen menu for adjustment of a range of monitor parameters such as vol con col bri tint Etc Preset Picture preset by factory Adj...

Page 6: ...tand Key for removing the monitor from headrest or visor shroud Remote Control Headrest Sun Visor Shroud 5 Accessories Headrest Bag Instruction Manual INSTRUCTIONMANUAL Earphone Extension Min Din Cabl...

Page 7: ...consult a doctor 10 If the MONITOR does not operate even when you operate the remote control from a close range it is time to replace the battery use CR 2025 lithium battery refer ring to the label o...

Page 8: ...s that would hinder the installation Use paper template to mark the area to be cut Cut the headrest Use an adjustable depth blade start your cut 1 4 inch inside one corner and cut diagonally across st...

Page 9: ...rough the headrest shroud as shown in diagram Place the headrest housing into the opening and secure with correct fasteners Install the headrest Pull the connecting cable through the center of the shr...

Page 10: ...Repeat this procedure for the other two corners Remove foam obstructions Carefully peel off the material Set the adjustable blade to one inch depth and cut around the edges of the hole staying 1 4 inc...

Page 11: ...sor If possible conceal the wires using a shaft covering Connect the power ground and video leads to test the MONITOR Before connecting the monitor pull the connecting cable assembly through the visor...

Page 12: ...of headrest Insert the monitor to the headrest bag Put the monitor with headrest bag at the rear side center of pillow Cut the magic tape to the fit your pillow size then fasten it as X as diagram sho...

Page 13: ...o move the symbol and choose video signal input Press menu button 1 to confirm your selection Move the symbol to RETURN and press menu button 1 to exit input setting 2 1 3 Remote Monitor 12 2 1 3 Remo...

Page 14: ...emote Monitor Press the button 2or3 to adjust the symbol to choose BRIGHT Press menu button 1 to enter BRIGHT setting Brightness Makes black appear darker or lighter 2 1 3 Remote Monitor BRIGHT CONTRA...

Page 15: ...1 to confirm setting Contrast adjustable level 0 100 Preset 50 Press button 2 adjust contrast to brighter level 2 1 3 Remote Monitor PICTURE CONTRAST 50 BRIGHT CONTRAST RETURN COLOR PICTURE Press the...

Page 16: ...button 1 to enter picture parameters setting Press the button 2or3 to adjust the symbol to choose VOLUME Press menu button 1 to enter volume setting VOLUME adjust sound soft or loud 2 1 3 Remote Monit...

Page 17: ...just the symbol to choose desired setting 2 1 3 Remote Monitor Press button 3 adjust sound to more soft level Press button 1 to confirm setting and exit Volume adjustable level 0 100 Preset 50 Press b...

Page 18: ...ormal 4 3 as the diagram show Diagram Normal 4 3 Full 16 9 INVERT 1 SIZE Full 16 9 Language Select RETURN FUNCTION English German French Spanish Portugal Italian Chinese C RETURN FUNCTION 2 1 3 Remote...

Page 19: ...nnected Connect the cord securely Press power on No response when pressing the buttons on the wireless remote The wireless remote batteries may be exhausted Press the volume increase button on the wir...

Page 20: ...ast Ratio 300 1 o o Viewing Angle H V 120 100 o o o o Operation Temperature 20 C 70 C 2 F 158 F Video Color System Input NTSC PAL Compatible On Screen Display Multi Languages English German French Spa...

Reviews: