


YA
LI D
IG
IT
A
L, P
A
R
A
D
A
, R
A
M
O
, I
N
ST
A
LL
AT
IO
N A
N
D O
PE
R
AT
IN
G M
A
N
U
A
L
20
16
-02
-0
1
|
70
GB
GENERAL
INFORMATION
settings with the “
+
” or “
-
” keys and confirm your
adjustment with the “
OK
” key.
To exit the parameter menu, choose the parameter
“
END
” and press “
OK
”.
DEFAULT VALUE & OTHER POSSIBILITIES
00
rF i: WIRELESS RADIO INITIALIZATION (PAIRING)
Press “
OK
” to enter this initialization sequence.
Select with “
+
” or “
-
“ the radio communication type
and validate by pressing “
OK
”:
•
rF.un
: unidirectional communication, the digital
thermostat only receives orders from an LVI RF central
programmer.
•
rF.bi
: bidirectional communication with an LVI Touch E3.
The digital thermostat communicates state and power
consumptions to the LVI Touch E3.
Then the backlight will switch off and the digits will cycle
showing that the digital thermostat is waiting for a radio
link signal from a Central programmer or LVI Touch E3 to
be received (press “
” to cancel radio initialization).
When the radio link signal is received, pairing is saved,
then it will return to Auto mode.
PLEASE NOTE:
Pairing between the devices can be very quick where
cycling of the digits may not be seen.
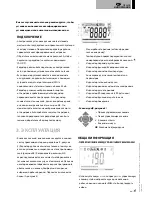
01
dEG: TYPE OF DEGREES DISPLAYED
Press “
OK
” to enter this parameter. Select with “
+
”
or “
-
“ and validate by pressing “
OK
” :
°C = Celsius
°F = Fahrenheit
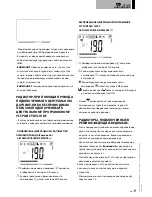
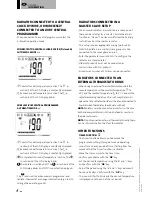
04
__._ : CALIBRATION OF THE INTERNAL PROBE
The calibration must be done after 1 day working with
the same setting temperature in accordance with the
following description:
Put a thermometer in the room at 1.5m distance
from the floor (like the thermostat) and check the real
temperature in the room after 1 hour.
When you enter the calibration parameter screen the
actual temperature value is displayed.
To enter the value shown on the thermometer, use the
“
-
“ or “
+
” keys to enter the real value. At this point the
hand symbol
will be displayed and the value will
blink. Press “
OK
” to confirm and save. If you need to erase
a calibration already saved use the “
-
“ or “
+
” keys to alter
the value, even just by 1°C , then press the left navigation
key “
”. The hand symbol will disappear and the factory
calibrated temperature reading will be displayed.
PLEASE NOTE:
Only the heating elements (including slave radiators)
managed by the thermostat must be used during the
calibration process. Do not have a secondary heat source
in the same room for a period of 24 hours before hand.
05
AF: FROST PROTECTION TEMPERATURE
This frost protection temperature used in holiday mode.
Adjustable from 0.5 to 10.0°C. Default value 7.0°C.
08
SRC : SEQUENTIAL CONTROL OF FRONT AND
BACK PANEL
PLEASE NOTE:
This feature is only applicable to double panel radiators.
Press “
OK
” to enter this parameter. Select with “
+
” or “
-
”
and validate by pressing “
OK
”:
NO
: Sequential control function disabled (Front=Back)
YES
: Sequential control function enabled. Heat output is
prioritized to the front panel to maximize radiant heat.
Thus, the "back" heating element will activate if the
temperature is one degree below the set point, acting as
a booster.
PLEASE NOTE:
The rear panel temperature can be considerably lower
than the front panel when this function is enabled.
09
Clr : FACTORY SETTING
Press and hold the “
OK
” key for 10 seconds to reset Set
point temperatures and user parameters in this menu to
factory default settings.
GB
GENERAL
INFORMATION


