background image

7

Settings

Source Unit Settings

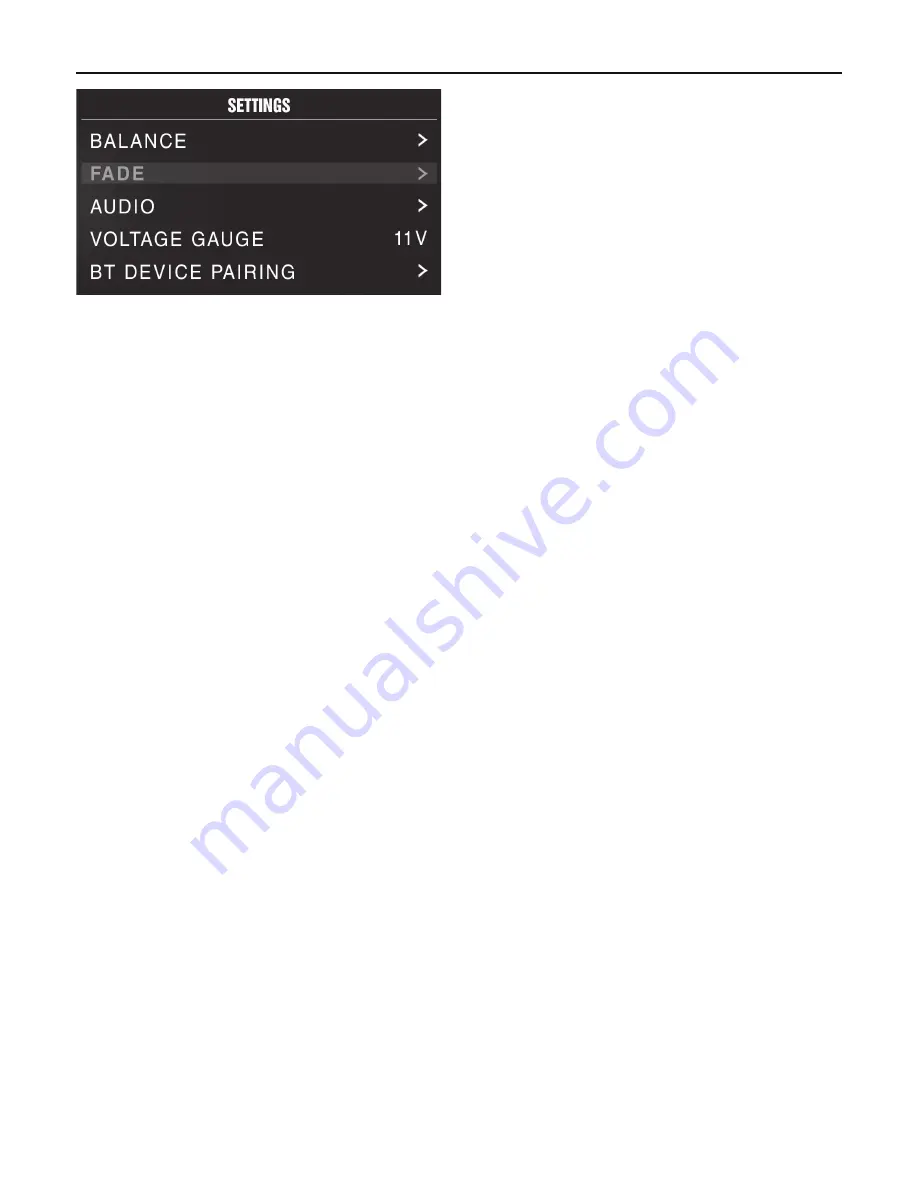
To access the source unit’s settings, long press the MENU button until 
the options appear. Rotate the encoder to scroll through the list of 
settings and short press the encoder button to select the setting you 
wish to change. (BALANCE>FADER>AUDIO>VOLTAGE GAUGE>BT 
PAIRING>BEEP>TUNER REGION>SOFTWARE>FACTORY DEFAULT)

This source unit has a zero current draw when turned off. All of your 
settings and presets will be saved along with your boat’s battery during 
storage.

BALANCE

Short press the encoder button to access BALANCE adjustment settings. 
Rotate the encoder button to set output BALANCE.

FADER

Short press the encoder button to access FADER adjustment settings. 
Rotate the encoder button to set output FADER.

AUDIO

To access the AUDIO settings, short press the AUDIO option from 
the MENU screen. Rotate the encoder to scroll through the list of 
settings and short press the encoder button to select the setting you 
wish to change. (7 BAND EQ>CROSSOVER>PEQ>REAR RCA>AUX 
INPUT>SOURCE GAIN>INTERNAL AMPLIFIER)

7 BAND EQ

Short press the encoder button to access the 7 BAND EQ settings. Use 
the rotary encoder to scroll through the EQ settings. (FLAT > ROCK 
> CLASSIC > ACOUSTIC > DANCE > ELECTRONIC > HIP-HOP > 
CUSTOM) When setting up the CUSTOM EQ, short press the encoder 
button to set the first frequency. Once active, rotate the encoder to adjust 
the frequency settings. Short press encoder button again to access the 
next frequency. Repeat until all EQ settings are complete. Short press the 
MENU button to exit and go back up one level.

CROSSOVER

Short press to access the CROSSOVER settings. Use the rotary 
encoder to select the crossover zone options (FRONT>REAR>SUB). 
Short press the encoder to adjust the frequency of the crossover 
(60Hz>80Hz>120Hz>APF). Short press MENU to exit and go back up 
one level.

REAR RCA

Short press to access the REAR RCA options. Use the rotary encoder to 
select options (LINE OUT>SUBWOOFER).

PUNCH EQ

Short press to access the PUNCH EQ settings. Use the rotary encoder 
to adjust the gain output (0-12). Short press MENU to exit and go back 
up one level.

Punch EQ is an onboard equalizer with up to +18dB @ 45Hz and/or up to 
+12dB boost at 12.5kHz  

AUX INPUT

RENAME – To rename AUX, short press the encoder button to set the first 
letter of the new name. Once active, rotate encoder to adjust letters. Short 
press the encoder button again to set the next letter. Repeat until AUX has 
been renamed. Short press MENU to exit and go back up one level.

ENABLE – The PMX-3 comes with SXM enabled, to change to AUX you 
will need to short press the encoder button to access options. Rotate the 
encoder button to select AUX instead of SXM. (SXM > AUX)

SOURCE GAIN

To adjust the level of device input gain, scroll through the inputs (FM 
TUNER>AM TUNER>WB TUNER>USB>AUX>BLUETOOTH>PANDORA) 
to the device you want to adjust, short press the encoder button to access 
the gain settings. Rotate the encoder button to set the level of gain. (-3dB 
> -2dB > -1dB > 0dB > +1dB > +2dB > +3dB)

INTERNAL AMPLIFIER

Short press to access the INTERNAL AMPLIFIER options. Use the rotary 
encoder to select options (ON>OFF). When using an amplifier to power 
your speakers, select OFF. If you are powering your speakers directly 
from the source unit, select the INTERNAL AMPLIFIER to ON.

VOLTAGE GAUGE

To display the vehicle voltage, short press the encoder button on the 
VOLTAGE GAUGE option.

BT DEVICE PAIRING

Short press the encoder button to access options (DISCOVERABLE > 
DEVICE).

DISCOVERABLE

Rotate the encoder button to select if unit is discoverable for pairing. 
(ENABLE > DISABLE) Once enabled, the source unit is now discoverable 
and ready for pairing to your device. Open the Bluetooth settings on your 
device to find the source unit labeled “Rockford PMX” and select.

DEVICE

Selecting DEVICE by short pressing the encoder button will allow you 
to rename the source unit with up to 16 characters. This gives you 
the ability to have a unique name for easy identification during device 
pairing. Short press the encoder button to select the letter to be changed 
and rotate the knob to change the value. Repeat process until desired 
name is reached.

BEEP

Short press the encoder button to access the BEEP options. Rotate the 
encoder button to turn system beep ON/ OFF.

TUNER REGION

To adjust, short press the encoder button to access. Rotate the encoder 
button to select the TUNER REGION of your preference. (EUROPE > USA 
> RUSSIA > LATIN > ASIA > JAPAN > MIDEAST > AUSTRALIA)

SOFTWARE

VERSION - Short press the encoder button to display the current 
firmware version of the unit.

UPDATE - Short press the encoder button to update the firmware. Follow 
the instructions on the screen when updating.

THEME

To adjust the THEME, short press the encoder to access the feature. 
Rotate the encoder button to select the desired THEME (DAY, NIGHT, 
AUTO)

Summary of Contents for PMX-3

Page 1: ...Installation Operation PMX 3 DIGITAL MEDIA RECEIVER Serial Number Date of Purchase ...

Page 2: ...ide more reasonable protection against harmful interference in a residential installation Operation is subjected to the following two conditions 1 This device may not cause harmful interference and 2 the device must accept any interfer ence received including interference that may cause undesired operation This equipment generates uses and can radiate radio frequency energy and if not installed an...

Page 3: ...32 GB max 255 Folders max 999 Songs max USB Output 1A Made for iPhone Model Names iPhone 6 Plus iPhone 6 iPhone 5S iPhone 5C iPhone 5 iPhone 4S iPhone 4 iPhone 3GS Made for iPod Model Names iPod Touch 5th generation iPod Touch 4th generation iPod Nano 7th generation iPod Nano 6th generation Android Compatibility Bluetooth Only Audio File Compatibility MP3 WMA Compatible Wired Remotes PMX 1R PMX 0R...

Page 4: ... long pressing Short pressing will give you access to the settings for the active source DIMMER button Pressing this button will allow you to select between the two brightness values for the display PLAY PAUSE button Press this button to play or pause your music This button also acts as a MUTE when the source is in AUX TUNER mode SRC Power Button This button allows you to switch between sources sh...

Page 5: ...UB W OUT RED FRONT LINE OUT RIGHT WHITE FRONT LINE OUT LEFT RED AUX IN RIGHT WHITE AUX IN LEFT 13DIN FEMALE 1 4 7 10 2 5 8 11 3 6 9 12 SECTION A A 1 4 7 10 2 5 8 11 3 6 9 12 SECTION B B SPEAKER REAR LEFT REMOTE ACC 12V 1 RED 7 12 11 10 9 8 4 5 6 3 2 BLACK GROUND PURPLE BLACK BLUE WHITE PURPLE GREEN BLACK GREEN ORANGE WHITE GREY BLACK GREY WHITE BLACK WHITE PIN NO WIRE COLOR WIRE DEFINITION ILLUMIN...

Page 6: ...erminal 10 When grounding to the chassis of the vehicle scrape all paint from the metal to ensure a good clean ground connection Grounding connections should be as short as possible and always be connected to metal that is welded to the main body or chassis of the vehicle Seatbelt bolts should never be used for connecting to ground Volt Ohm meter Wire strippers Wire crimpers Wire cutters 2 Phillip...

Page 7: ...e Once active rotate encoder to adjust letters Short press the encoder button again to set the next letter Repeat until AUX has been renamed Short press MENU to exit and go back up one level ENABLE The PMX 3 comes with SXM enabled to change to AUX you will need to short press the encoder button to access options Rotate the encoder button to select AUX instead of SXM SXM AUX SOURCE GAIN To adjust t...

Page 8: ...o be under the PRESET group you want to adjust first FM1 FM2 FM3 Using this feature allows you to remove saved stations on the unit Once selected use the rotary encoder to select the PRESET number 1 6 of the station you want removed FM Short press the encoder button to access the FM PRESET options FM1 FM2 FM3 Using this feature allows you to have separate tuner preset groups to choose from Use the ...

Page 9: ...back from your device directly from the unit Select the USB source option on the source unit To play or pause a song short press the PLAY PAUSE button To skip a track forward short press the FWD button To skip a track backwards short press the REV button To access USB specific settings short press the MENU button for the list of settings BROWSER REPEAT SHUFFLE Use the encoder to select the option t...

Page 10: ...FROM TRACK works similarly by creating a station from the current track being played If you create a station by selecting CREATE FROM GENRE this will give you music genres to select from to create your station Selecting DELETE will delete the now playing station Pandora the Pandora logo and the Pandora trade dress are trademarks or registered trademarks of Pandora Media Inc Used with permission Pa...

Page 11: ...ption to select this feature This feature allows you to search channels based on their CATEGORY type DIRECT TUNING Short press the encoder button on the DIRECT TUNING option to select this feature This feature allows you to directly tune to a channel if you already know the channel number Rotate the encoder until you reach the desired numeral and press to enter your selection Repeat until the chan...

Page 12: ...n a weak signal area Make sure the tuner LOC mode is off USB Devices USB device cannot be inserted The USB device has been inserted in the wrong direction Reversing the connection direction of the USB device try reinserting The USB device connector is broken Replace with a new USB device USB device is not recognized The USB device is damaged Disconnect USB device and reconnect If the device is sti...

Page 13: ...your local car audio retailer or online at www shop siriusxm com Subscription Updated The radio has detected a change in your SiriusXM subscription status Press the encoder button to clear the message In the U S A visit www siriusxm com or call 1 866 635 2349 if you have questions about your subscription In Canada visit www siriusxm ca or call 1 877 438 9677 if you have questions about your subscr...

Page 14: ...ockford s discretion What is Not Covered 1 Damage caused by accident abuse improper installation operations theft water on non Element Ready products 2 Any cost or expense related to the removal or reinstallation of product 3 Service performed by anyone other than Rockford or an authorized Rockford Fosgate service center 4 Any product which has had the serial number defaced altered or removed 5 Su...

Page 15: ...ce available at www rockfordfosgate com rftech R O C K F O R D F O S G AT E C O M 600 South Rockford Drive Tempe Arizona 85281 United States Direct 480 967 3565 Toll Free 800 669 9899 Printed in China 120516 1230 61086 01 D ...

Reviews: