MOUNTING INSTRUCTIONS
ENGLISH
code:
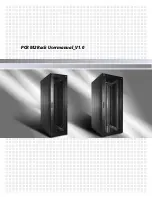
RS4288GD
Name:
RACK cabinet, floor standing, ready-to-assemble
42U/800x800
IM RS4288GD
Edition: 1 from 17.06.2013
Supercedes edition: ------------------
EN**
1. Application:
The RACK 19” cabinet enables integration of the CCTV, KD, SSWiN, RTV, and LAN systems in medium and large companies. It
is designed for mounting of devices in a 19” enclosures. The RACK cabinets ensure an aesthetic mounting of devices and protect them
from mechanical damage.
2. Technical parameters:
TECHNICAL PARAMETERS
Mounting dimensions:
W=19", H=42U
External dimensions:
W=800, H=2055, D=800 [mm, +/-2]
Net/gross weight:
122,5 / 132,5 [kg]
Construction:
- RACK profiles: cold rolled steel SPCC 2mm RAL 9004 – screwed
- transverse profiles: cold rolled steel SPCC 1,5mm RAL 9004 - screwed
- cabinet frame: cold rolled steel SPCC 1,2mm RAL 9004 - welded
- front door: 5mm tempered glass / SPCC 1,2mm RAL 9004 - hinged
- side door: cold rolled steel SPCC 1,2mm RAL 9004 - latched
- rear door: cold rolled steel SPCC 1,2mm RAL 9004 - hinged
Static load:
800 kg (with leveling legs)
Application:
indoor, IP20
Notes:
- the possibility to change the spacing between the front and rear RACK profiles
- ventilation holes in the top and bottom plate of the cabinet and in the front door
- the possibility of mounting a panel of 4 fans to the upper plate – RAWP800
- cable glands in the bottom and top plate of the cabinet
- two vertical cable organizers mounted in front of the cabinet
- the set includes 4 wheels without locking, 4 leveling legs
- the possibility of mounting the plinth with a height of 100mm - RAC188
- front door locked with a key (two included)
- rear door locked with a key (two included)
- side door - the possibility of mounting a lock - RAZB16
- the possibility of mounting a set of grounding conductors in the cabinet - RAPU-S
- cabinet for assembling
Certificates, declarations
RoHS
3. The RACK cabinet construction
Top plate
Rear door
Cabinet frame
RACK profile
Distance
Transverse profile
Side door
Vertical cable organizer
Front door
Bottom plate
Wheel 2” without locking
Leveling leg