4.9)
Screw the
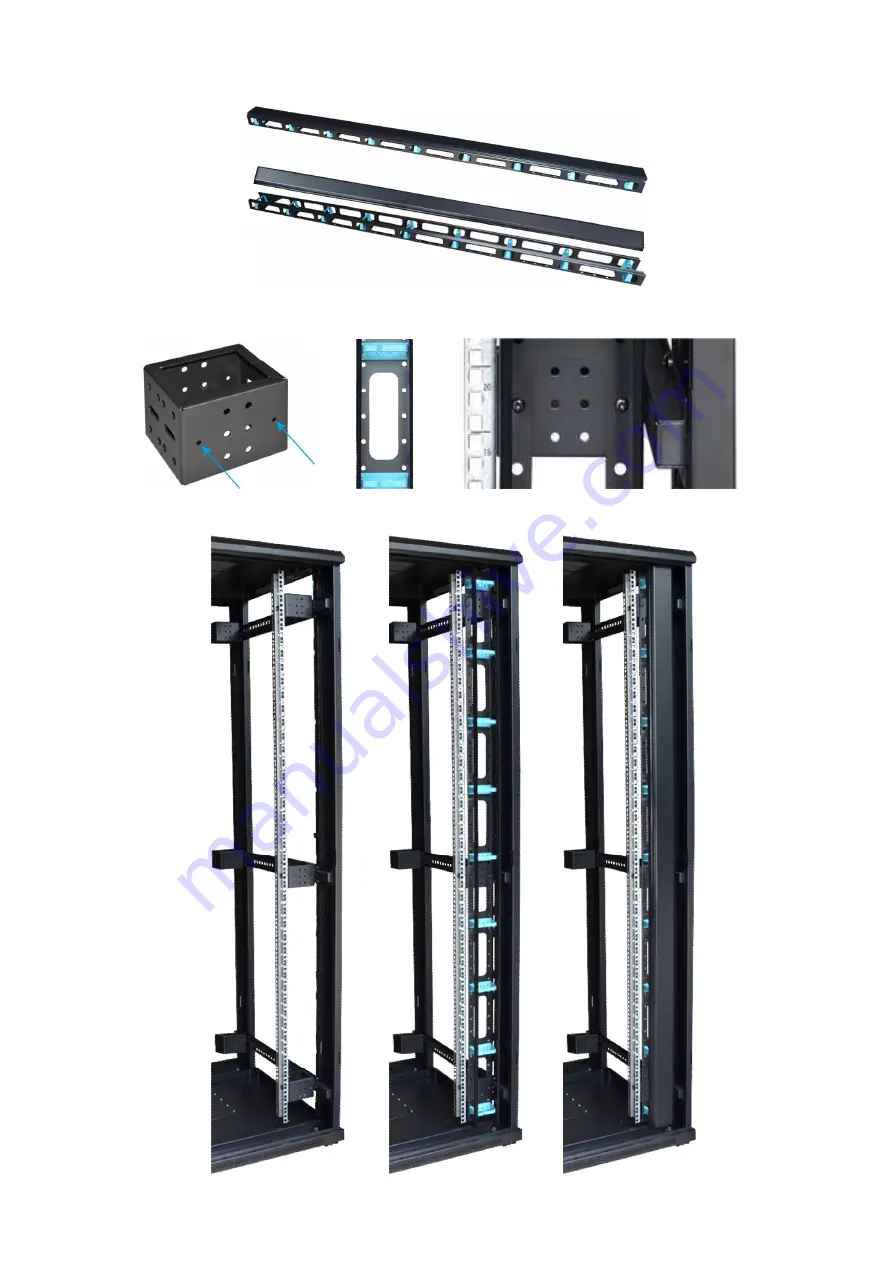
vertical cable organizers to the mounted distances as in the Fig.9
Fig.9
Page 1: ... RAL 9004 latched rear door cold rolled steel SPCC 1 2mm RAL 9004 hinged Static load 800 kg with leveling legs Application indoor IP20 Notes the possibility to change the spacing between the front and rear RACK profiles ventilation holes in the top and bottom plate of the cabinet and in the front door the possibility of mounting a panel of 4 fans to the upper plate RAWP800 cable glands in the bott...
Page 2: ...e RACK cabinet package 2 5 and 3 5 Fig 1 4 2 Connect the bottom plate and the top plate to the cabinet frame from the left side and the right side of the RACK cabinet respectively package 1 5 Use bolts with nuts 16 pcs package 1 5 Mount wheels and leveling legs to the bottom plate of the cabinet package 1 5 Fig 2 4 3 Place the RACK cabinet vertically Fig 3 ...
Page 3: ...t frames at the 1 4 1 2 and 3 4 height of the cabinet as shown in the Fig 4 Fig 4 4 5 Mount two cage nuts at the front and back of the Transverse profiles package 1 5 as in the Fig 5 Fig 5 4 6 Install transverse profiles from the inside as shown in the Fig 6 Fig 6 ...
Page 4: ...4 7 Screw distances to the transverse profiles as shown in the Fig 7 Fig 7 4 8 Screw the RACK profiles to the mounted distances as shown in the Fig 8 Fig 8 ...
Page 5: ...4 9 Screw the vertical cable organizers to the mounted distances as in the Fig 9 Fig 9 ...
Page 6: ...4 10 Mount the side rear and front door to the RACK cabinet Fig 10 Fig 10 ...
Page 7: ...ec 150 32 744 Łapczyca Phone 14 610 19 40 Fax 14 610 19 50 e mail biuro pulsar pl sales pulsar pl http www pulsar pl www zasilacze pl WARRANTY 12 months from the date of purchase WARRANTY VALID only upon presentation of the original invoice ...