Proware PW-RN401 User Manual Download Page 66

PW-RN401/PW-RN401D 

  150M  Wireless  N  Router   


- 60 - 

2.  Please  choose  the  Network  Connection  Type  and  set  the  bandwidth  according  to  your 

Network. If you are not clear about that, please contact with your ISP for help.   

3.  If no IP QoS item is enabled, the Bandwidth Apply won't be effective.   

4.  IP address range for different entries could not have intersection with each other.   

5.  After the configurations, click the 

Save

 button for the change to take effect.   

4.12  IP& MAC Binding 


Figure 4-48 the IP & MAC Binding menu 

There  are  two  submenus  under  the  IP  &MAC  Binding  menu  (shown  in  Figure  4-48)

Binding 

Setting 

and

  ARP  List

.  Click  any  of  them,  and  you  will  be  able  to  scan  or  configure  the 

corresponding function. The detailed explanations for each submenu are provided below. 

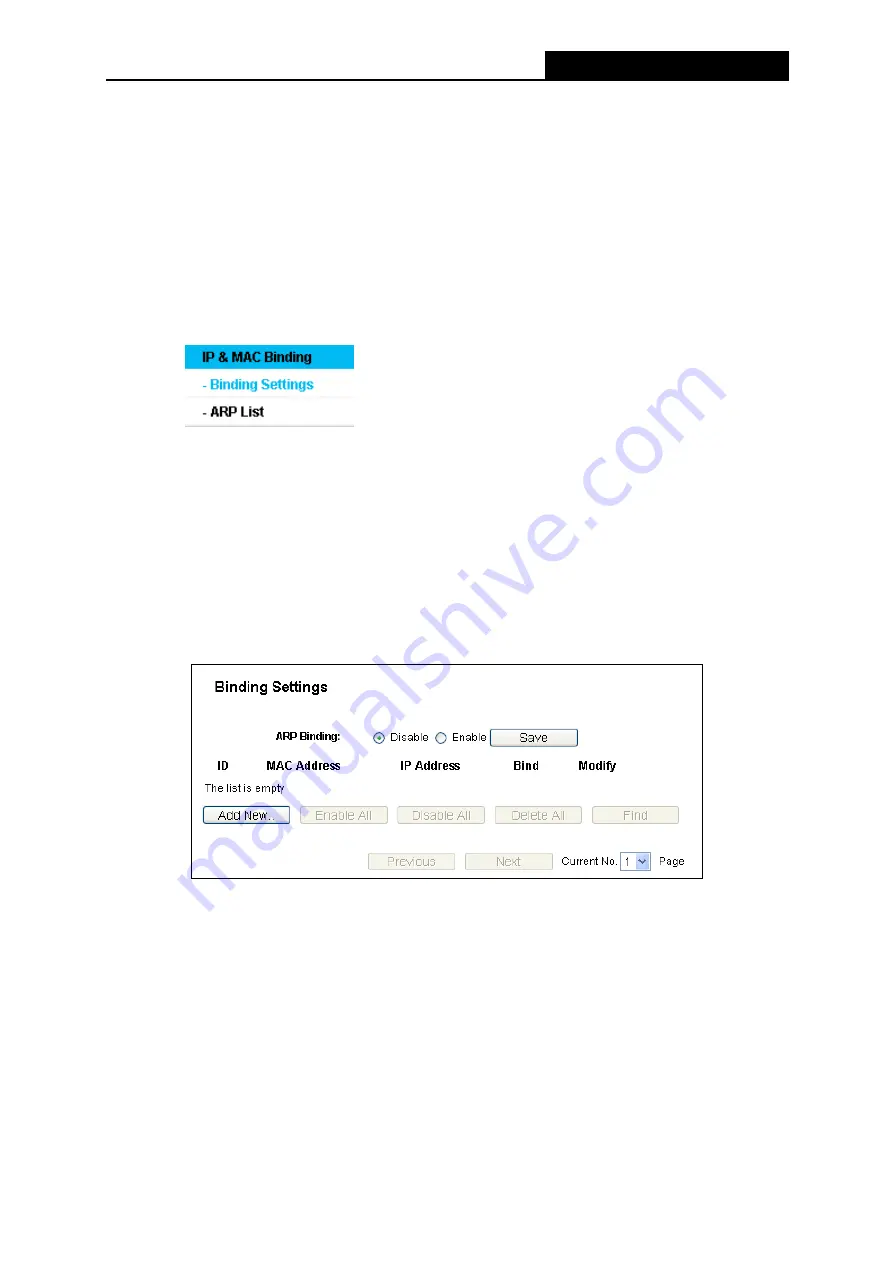
4.12.1  Binding Settings 

This page displays the 

IP & MAC Binding Setting

 table; you can operate it in accord with your 

desire as shown in Figure 4-49.   


Figure 4-49 Binding Settings 


MAC Address


The MAC address of the controlled computer in the LAN.   


IP Address -

 The assigned IP address of the controlled computer in the LAN.   


Bind


-

 Check this option to enable ARP binding for a specific device.   


Modify


To modify or delete an existing entry.   

When you want to add or modify an IP & MAC Binding entry, you can click the 

Add New

 button 

or 

Modify

 button, and then you will go to the next page. This page is used for adding or modifying 

an IP & MAC Binding entry, shown in Figure

 4-50

.   

Summary of Contents for PW-RN401

Page 1: ...PW RN401 PW RN401D 150M Wireless N Router Rev 3 0 0 1910020433...

Page 2: ...experienced radio TV technician for help This device complies with part 15 of the FCC Rules Operation is subject to the following two conditions 1 This device may not cause harmful interference 2 Thi...

Page 3: ...triction Reason remark Bulgaria None General authorization required for outdoor use and public service France Outdoor use limited to 10 mW e i r p within the band 2454 2483 5 MHz Military Radiolocatio...

Page 4: ...2 2 Installation Environment Requirements 6 2 3 Connecting the Router 6 Chapter 3 Quick Installation Guide 8 3 1 TCP IP Configuration 8 3 2 Quick Installation Guide 10 Chapter 4 Configuring the Router...

Page 5: ...rewall 48 4 9 2 IP Filtering 49 4 9 3 Domain Filtering 52 4 9 4 MAC Filtering 53 4 9 5 Remote Management 55 4 9 6 Advanced Security 56 4 10 Advanced Routing 57 4 11 Bandwidth Control 59 4 12 IP MAC Bi...

Page 6: ...Defaults 70 4 14 5 Backup Restore 70 4 14 6 Reboot 71 4 14 7 Password 72 4 14 8 System log 72 4 14 9 Statistics 73 Appendix A FAQ 75 Appendix B Configuring the PC 80 Appendix C Specifications 84 Appe...

Page 7: ...s N Router Power Adapter for PW RN401 PW RN401D 150M Wireless N Router Quick Installation Guide Resource CD for PW RN401 PW RN401D 150M Wireless N Router including This Guide Other Helpful Information...

Page 8: ...cast control and wireless LAN 64 128 152 bit WEP encryption WiFi protected Access WPA2 PSK WPA PSK as well as advanced Firewall protections the PW RN401 PW RN401D 150M Wireless N Router provides compl...

Page 9: ...Negotiation RJ45 LAN ports supporting Auto MDI MDIX Provides WPA WPA2 WPA PSK WPA2 PSK authentication TKIP AES encryption security Shares data and Internet access for users supporting Dynamic IP Stat...

Page 10: ...t On There is a device linked to the corresponding port but there is no activity Flashing There is an active device linked to the corresponding port WPS Slow Flash A wireless device is connecting to t...

Page 11: ...wer socket is where you will connect the power adapter Please use the power adapter provided with this PW RN401 PW RN401D 150M Wireless N Router ON OFF The switch for the power WAN This WAN port is wh...

Page 12: ...erating Temperature 0 40 32 104 Operating Humidity 10 90 RH Non condensing 2 3 Connecting the Router Before installing the Router make sure your PC is connected to the Internet through the broadband s...

Page 13: ...apter to the power socket on the Router and the other end into an electrical outlet Press the power switch and then the router will start to work 7 Power on your PC and Cable DSL Modem Figure 2 1 Hard...

Page 14: ...instructions as to how to do this please refer to Appendix B Configuring the PC 2 Configure the network parameters The IP address is 192 168 1 xxx xxx is any number from 2 to 254 Subnet Mask is 255 2...

Page 15: ...tion between your PC and the Router is failed Figure 3 2 Failure result of Ping command Please check the connection following these steps 1 Is the connection between your PC and the Router correct Not...

Page 16: ...utility open a web browser and type in the default address http 192 168 1 1 in the address field of the browser Figure 3 3 Log in the Router After a moment a login window will appear similar to the F...

Page 17: ...lease make sure of what kind of connection type your ISP provides and then select the very type and click Next to go on configuring 4 Make sure the cable is securely plugged into the WAN port 1 If the...

Page 18: ...N IP address as seen by external users on the Internet including your ISP Enter the IP address into the field Subnet Mask The Subnet Mask is used for the WAN IP address it is usually 255 255 255 0 Def...

Page 19: ...ss point Mode This field determines the wireless mode which the Router works on Channel Width Select any channel width from the pull down list The default setting is automatic which can adjust the cha...

Page 20: ...in Figure 3 10 Click the Finish button to finish the Quick Setup Figure 3 10 Quick Setup Finish If there is something changed on the Wireless page you will see the Finish page as shown in Figure 3 11...

Page 21: ...successful login you will see the thirteen main menus on the left of the Web based utility On the right there are the corresponding explanations and instructions Figure 4 1 the main menu The detailed...

Page 22: ...outer 16 Figure 4 2 Router Status 4 3 Quick Setup Please refer to Section 3 2 Quick Installation Guide 4 4 WPS This section will guide you to add a new wireless device to an existing network quickly b...

Page 23: ...existing network manually by clicking this button b To add a new device If the wireless adapter supports Wi Fi Protected Setup WPS you can establish a wireless connection between wireless adapter and...

Page 24: ...utton of the adapter directly for 2 or 3 seconds Step 3 Wait for a while until the next screen appears Click Finish to complete the WPS configuration The WPS Configuration Screen of Wireless Adapter M...

Page 25: ...choose Push the button on my access point in the configuration utility of the WPS as below and click Next The WPS Configuration Screen of Wireless Adapter Step 3 Wait for a while until the next screen...

Page 26: ...w Device Step 2 Choose Press the button of the new device in two minutes and click Connect Step 3 For the configuration of the wireless adapter please choose Push the button on my access point in the...

Page 27: ...two methods Method One Enter the PIN into my Router Step 1 Keep the default WPS Status as Enabled and click the Add device button in Figure 4 3 then the following screen will appear Step 2 Choose Ent...

Page 28: ...ult PIN code of this adapter is 16952898 as the above figure shown Method Two Enter the PIN from my Router Step 1 Get the Current PIN code of the Router in Figure 4 3 each Router has its unique PIN co...

Page 29: ...igure 4 3 c You will see the following screen when the new device successfully connected to the network Note 1 The WPS LED on the Router will light green for five minutes if the device has been succes...

Page 30: ...hanged IP Address Enter the IP address of your Router or reset it in dotted decimal notation factory default 192 168 1 1 Subnet Mask An address code that determines the size of the network Normally us...

Page 31: ...ase button to release the IP parameters MTU Size The normal MTU Maximum Transmission Unit value for most Ethernet networks is 1500 Bytes It is not recommended that you change the default MTU Size unle...

Page 32: ...decimal notation provided by your ISP Subnet Mask Enter the subnet Mask in dotted decimal notation provided by your ISP usually is 255 255 255 0 Default Gateway Optional Enter the gateway IP address i...

Page 33: ...to connect to the local area network provided by ISP Static IP You can check this radio button to use Static IP as the secondary connection to connect to the local area network provided by ISP Connec...

Page 34: ...ately Click the Disconnect button to disconnect immediately Caution Sometimes the connection cannot be terminated although you specify a time to Max Idle Time because some applications are visiting th...

Page 35: ...l Click the Save button to save your settings 4 5 3 MAC Clone Choose menu Network MAC Clone you can configure the MAC address of the WAN on the screen below Figure 4 11 Figure 4 11 MAC Address Clone S...

Page 36: ...4 6 1 Wireless Settings Choose menu Wireless Wireless Settings you can configure the basic settings for the wireless network on this page Figure 4 13 Wireless Settings SSID Enter a value of up to 32 c...

Page 37: ...bgn mixed 11b only Select if all of your wireless clients are 802 11b 11g only Select if all of your wireless clients are 802 11g 11n only Select only if all of your wireless clients are 802 11n 11bg...

Page 38: ...lient You can also use the search function to select the BSSID to join Survey Click this button you can search the AP which runs in the current channel Key type This option should be chosen according...

Page 39: ...the following modes to enable security WEP It is based on the IEEE 802 11 standard If you check this radio button the page will appear as shown in Figure 4 16 Figure 4 16 Type you can choose the type...

Page 40: ...ted or 13 ASCII characters 152 bit You can enter 32 hexadecimal digits any combination of 0 9 a f A F zero key is not promoted or 16 ASCII characters Note If you do not set the key the wireless securi...

Page 41: ...s the Authentication Type you can select either Automatic or TKIP or AES as Encryption PSK Passphrase You can enter a Passphrase between 8 and 63 characters Group Key Update Period Specify the group k...

Page 42: ...XX XX XX XX XX X is any hexadecimal digit For example 00 0A EB B0 00 0B 2 Give a simple description for the wireless station in the Description field For example Wireless station A 3 Select Enabled or...

Page 43: ...button Deny the stations not specified by any enabled entries in the list to access for Filtering Rules 3 Delete all or disable all entries if there are any entries already 4 Click the Add New button...

Page 44: ...ting and is recommended DTIM Interval This value determines the interval of the Delivery Traffic Indication Message DTIM A DTIM field is a countdown field informing clients of the next window for list...

Page 45: ...station s MAC address Current Status The connected wireless station s running status one of STA AUTH STA ASSOC STA JOINED WPA WPA PSK WPA2 WPA2 PSK AP UP AP DOWN Disconnected Received Packets Packets...

Page 46: ...u must configure the computer manually Start IP Address Specify an IP address for the DHCP Server to start with when assigning IP addresses 192 168 1 100 is the default start address End IP Address Sp...

Page 47: ...C Address The MAC address of the DHCP client Assigned IP The IP address that the Router has allocated to the DHCP client Lease Time The time of the DHCP client leased After the dynamic IP address has...

Page 48: ...XX XX format and IP address in dotted decimal notation of the computer for which you want to reserve an IP address 3 Click the Save button Figure 4 27 Add or Modify an Address Reservation Entry To mod...

Page 49: ...Internet to this service port will be redirected to the computer specified by the server IP Any PC that was used for a virtual server must have a static or reserved IP Address because its IP Address m...

Page 50: ...ne type of available service please select another service and enter the same IP Address for that computer or server To modify or delete an existing entry 1 Click the Modify in the entry you want to m...

Page 51: ...hen necessary the external host will be able to connect to the local host using one of the ports defined in the Incoming Ports field Trigger Port The port for outgoing traffic An outgoing connection u...

Page 52: ...ect Enable in Status field 6 Click the Save button to save the new rule Figure 4 32 Add or Modify a Port Triggering Entry To modify or delete an existing entry 1 Click the Modify in the entry you want...

Page 53: ...HCP function Figure 4 33 DMZ To assign a computer or server to be a DMZ server 1 Check the Enable radio button 2 Enter the IP Address of a local host in the DMZ Host IP Address field 3 Click the Save...

Page 54: ...l active Otherwise the port is inactive Click Refresh to update the Current UPnP Settings List 4 9 Security Figure 4 35 The Security menu There are six submenus under the Security menu Firewall IP Fil...

Page 55: ...y passing through the router Enable Domain Filtering set Domain Filtering is enabled or disabled Enable MAC Filtering set MAC Address Filtering is enabled or disabled You can select the default filter...

Page 56: ...gure 4 38 Figure 4 38 Add or Modify an IP Address Filtering Entry To create or modify an IP Address Filtering entry please follow these instructions 1 Effective Time Enter a range of time in HHMM form...

Page 57: ...Click the Save button to save this entry To modify or delete an existing entry 1 Click the Modify in the entry you want to modify If you want to delete the entry click the Delete 2 Modify the informa...

Page 58: ...dd or Modify a Domain Filtering entry will appear shown inFigure 4 40 Figure 4 40 Add or Modify a Domain Filtering entry To add or modify a Domain Filtering entry follow these instructions 1 Effective...

Page 59: ...o block the PC s on your LAN to access websites www xxyy com cn www aabbcc com and websites with net in the end on the Internet while no limit for other websites you should specify the following Domai...

Page 60: ...ry To add additional entries repeat steps 1 4 When finished click the Return button to return to the MAC Address Filtering page To modify or delete an existing entry 1 Click the Modify in the entry yo...

Page 61: ...but do not use the number of any common service port Remote Management IP Address This is the current address you will use when accessing your Router from the Internet This function is disabled when...

Page 62: ...analysis by SYN Flood UDP Flood and ICMP Flood DoS protection Denial of Service protection Check the Enable or Disable button to enable or disable the DoS protection function Only when it is enabled...

Page 63: ...fault setting is disabled If enabled the ping packet from the Internet cannot access the Router Forbid Ping Packet From LAN Port Enable or Disable Forbid Ping Packet From LAN Port The default setting...

Page 64: ...y This is the IP Address of the gateway device that allows for contact between the Router and the network or host 3 Select Enabled or Disabled for this entry on the Status drop down list 4 Click the S...

Page 65: ...andwidth you get If you are not clear about that please contact with your ISP for help IP Range IP range of this entry Mode There are two types of mode Minimum Bandwidth Guarantee and Maximum Bandwidt...

Page 66: ...ick any of them and you will be able to scan or configure the corresponding function The detailed explanations for each submenu are provided below 4 12 1 Binding Settings This page displays the IP MAC...

Page 67: ...odify or delete an existing entry follow the steps below 1 Find the desired entry in the table 2 Click Modify or Delete as desired on the Modify column To find an existing entry follow the steps below...

Page 68: ...tem to the IP MAC Binding list Delete Delete the item Click the Bind All button to bind all the current items available after enable Click the Load All button to load all items to the IP MAC Binding l...

Page 69: ...Service Provider your select is www dyndns org the page will appear as shown in Figure 4 53 Figure 4 53 Dyndns org DDNS Settings To set up for DDNS follow these instructions 1 Type the User Name for...

Page 70: ...structions 1 Type the User Name for your DDNS account 2 Type the Password for your DDNS account 3 Click the Login button to login the DDNS service Connection Status The status of the DDNS service conn...

Page 71: ...s 1 Type the domain names your dynamic DNS service provider gave 2 Type the User Name for your DDNS account 3 Type the Password for your DDNS account 4 Click the Login button to login to the DDNS serv...

Page 72: ...tatistics Click any of them and you will be able to configure the corresponding function The detailed explanations for each submenu are provided below 4 14 1 Time Settings Choose menu System Tools Tim...

Page 73: ...if you have connected to Internet Note This setting will be used for some time based functions such as firewall You must specify your time zone once you login to the router successfully if not the tim...

Page 74: ...e IP address is successful but pinging tracerouting the domain name is not you might have a name resolution problem In this case ensure that the domain name you are specifying can be resolved by using...

Page 75: ...irmware Upgrade Choose menu System Tools Firmware Upgrade you can update the latest version of firmware for the Router on the following screen Figure 4 60 Firmware Upgrade Firmware Version This displa...

Page 76: ...be damaged 4 The Router will reboot after the upgrading has been finished 4 14 4 Factory Defaults Choose menu System Tools Factory Defaults and you can restore the configurations of the Router to fac...

Page 77: ...onds and the Router will restart automatically Keep the Router on during the upgrading process to prevent any damage 4 14 6 Reboot Choose menu System Tools Reboot you can click the Reboot button to re...

Page 78: ...ult user name and password of the Router because all users who try to access the Router s Web based utility or Quick Setup will be prompted for the Router s default user name and password Note The new...

Page 79: ...ton to clear all the logs 4 14 9 Statistics Choose menu System Tools Statistics you can view the network traffic of each PC on the LAN including total traffic and the value of the last Packets Statist...

Page 80: ...number of bytes received and transmitted by the Router Current Packets The total number of packets received and transmitted in the last Packets Statistic interval seconds Bytes The total number of by...

Page 81: ...pe user name in the User Name field and password in the Password field finish by clicking Connect Figure A 1 PPPoE Connection Type 4 If your ADSL lease is in pay according time mode select Connect on...

Page 82: ...our PC s MAC address will fill in the WAN MAC Address field Or else type the MAC Address into the WAN MAC Address field The format for the MAC Address is XX XX XX XX XX XX Then click the Save button I...

Page 83: ...on the Status page 4 How to enable DMZ Host Log in to the Router click the Forwarding menu on the left of your browser and click DMZ submenu On the DMZ page click Enable radio button and type your IP...

Page 84: ...ment Port field Click Save and reboot the Router Figure A 7 Remote Management Note If the above configuration takes effect configure to the Router by typing 192 168 1 1 88 the Router s LAN IP address...

Page 85: ...er 1 Make sure the Enable Wireless Router Radio is checked 2 Make sure that the wireless stations SSID accord with the Router s SSID 3 Make sure the wireless stations have right KEY for encryption whe...

Page 86: ...e adapter s manual if necessary 1 Configure TCP IP component 1 On the Windows taskbar click the Start button and then click Control Panel 2 Click the Network and Internet Connections icon and then cli...

Page 87: ...ties window will display and the IP Address tab is open on this window by default Now you have two ways to configure the TCP IP protocol below Setting IP address automatically Select Obtain an IP addr...

Page 88: ...items available 2 If the Router s LAN IP address is 192 168 1 1 specify the IP address as 192 168 1 x x is from 2 to 254 and the Subnet mask as 255 255 255 0 3 Type the Router s LAN IP address the de...

Page 89: ...PW RN401 PW RN401D 150M Wireless N Router 83 Figure B 4 Now click OK to keep your settings...

Page 90: ...STP maximum 100m LEDs PWR SYS WLAN WAN LAN 1 4 WPS Safety Emissions FCC CE Wireless Frequency Band 2 4 2 4835GHz Radio Data Rate 11n up to 150Mbps Automatic 11g 54 48 36 24 18 12 9 6M Automatic 11b 11...

Page 91: ...Internet gaming or videoconferencing DNS Domain Name System An Internet Service that translates the names of websites into IP addresses Domain Name A descriptive name for an address or group of addre...

Page 92: ...rd Wi Fi A trade name for the 802 11b wireless networking standard given by the Wireless Ethernet Compatibility Alliance WECA see http www wi fi net an industry standards group promoting interoperabil...

Reviews: