


OSD Menu Setup
Menu button for choice
Move up and down by up and down button
Move horizontally or modify parameter by left and right button
ENTER
:
6.OSD Menu Control
7
8
WDR CONTROL:
Press Enter to show the menu, move the cursor to WDR Control, set MEDIUM,
NORMAL, LOW, HIGH by left and right button; choose the setting for WDR in
accordance with the lighting condition, set High in strong lighting contrast to realize
higher quality image.
WDR ZONE SELECT
:
WD NORMAL/SAFE AREA/ATM/LOW 1/3.
BLC:
move to BLC by Up and Down button, set BLC by Left and Right button: On and Off.
WHITE BALANCE:
Move to White Balance by Up and Down button, set White balance by Left and Right
button: AWB: Auto White Balance; ATW: Auto Tracking White Balance. The color's
temperature are different in different lighting condition, The color's temperature
changes in different lighting condition, so the white color in video image changes if
the lighting condition changes. AWB means cameras can compensate color
temperature automatically. In some special environment, in order to keep the same
color temperature , ATW setting can keep a fixed color temperature
AGC:
Move cursor to AGC by Up and Down button, set AGC by Left and Right Button as :
NORMAL, LOW and HIGH. Setting AGC is better for cameras to work in wider
lighting range, if the illumination is low, can set AGC high to rise the sensitivity of
cameras.
*Specialists press "Left, Right, Left, Right, Down" button enter superior menu.
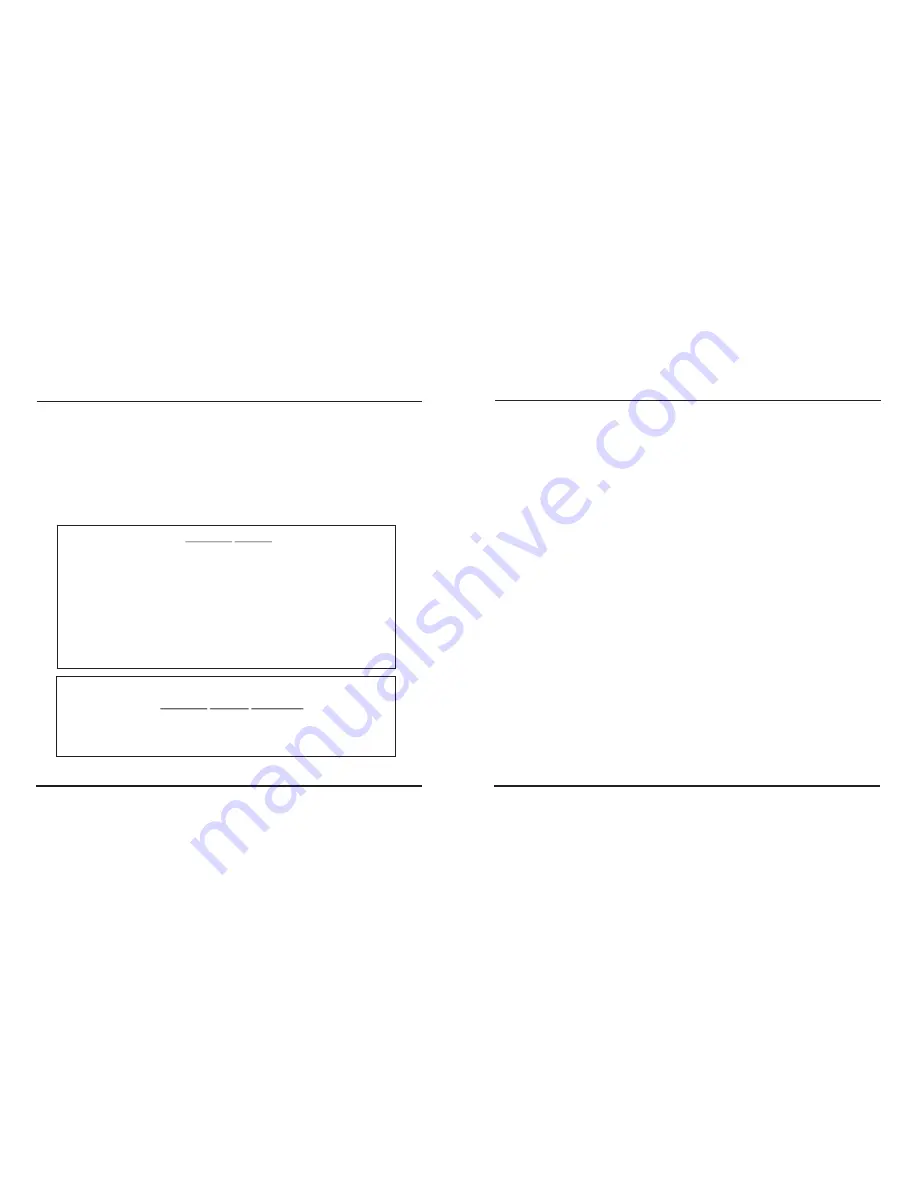
ATW
MEDIUM
OFF
NORMAL
OFF
DC
AUTO
ENGLISH
DEFAULT
WDR CONTROL
NORMAL METER PRESETS
BLC
WHITE BALANCE
LENS SELECT
D/N CONTROL
LANGAGE SELECT
AGC
FLUORESCENT
SAVE
(ATW/AWB)
(LOW/NORMAL/MEDIUM/HIGH)
(OFF/ON)
(LOW/NORMAL/HIGH)
(OFF/CRR/CRR2)
(MANUAL/DC)
(OFF/AUTO/GPIO)
(ENGLISH/CHINESE)
(CANCEL)
CAMERA SETUP
WD NORMAL
SAVE
PRESETS
PRE
WDR ZONE SELECT:
NORMAL METER PRESETS
WD NORMAL/SAFE AREA/ATM/LOW 1/3
CANCEL


