A BASIC DESCRIPTION
GENERAL
The PIRAMID XL2 (Passive Infrared And
Microwave Intrusion Detector) is an outdoor dual
technology sensor designed to provide volumetric
protection in a wide variety of outdoor applications.
The sensor uses the unique combination of
“Stereo Doppler” Microwave and Passive Infrared
technologies.
PIRAMID XL2 is configured for “And Gate”
operation; i.e. both technology portions must activate
simultaneously for the sensor to alarm. The microwave
portion detects the motion of the intruder, whereas the
passive infrared portion detects a change in infrared
radiation. When both technologies activate at the
same time, the sensor initiates an alarm condition.
For optimum performance it is best to use the
PIRAMID XL2 as a motion sensor to protect specific
assets and strategic areas. Generally the sensor is not
used along a perimeter fence area like an outdoor P.E.
Beam unless in a proprietary system with “on-site”
response or with video verification.
SPECIFICATIONS
Nominal Input Voltage: 12VDC
Input Voltage Limits: 9 VDC Min. to 20 VDC Max.
Current Consumption: 150mA@ 12VDC
Temperature:
-30°F to 140°F, -34°C to 60°C
Relay Contact Rating: .1A, 50V
Frequency:
10.525 GHz (USA)
10.587 GHz (Europe)
9.90 GHz (Europe)
9.47 GHz (Europe)
Protection Pattern Coverage
SDI-76XL2 = 50 ft. x 50 ft. (15m x 15m)
SDI-77XL2 = 90 ft. x 50 ft. (27m x 15m)
Optional Protection Patterns with Lens
Module Change:
SDI-77XL2-B = 100 ft. x 35 ft. (30m x 10.5m)
SDI-77XL2-C = 125 ft. x 20 ft. (38m x 6m)
SDI-77XL2-D = 100 ft. x 9 ft. (30m x 3m)
Changing the Lens Module (see inside back cover)
Pet Alley Lens Modules:
Lens A-Pet = Wide Angle
Lens B-Pet = Medium Angle
Lens C-Pet = Narrow Angle
Note: SDI-77XL2 is equipped from the factory with Lens A.
2
QUICK INSTALLATION
REFERENCE
1. Install mounting bracket. (pg. 3)
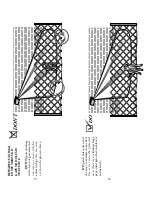
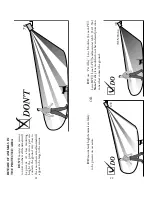
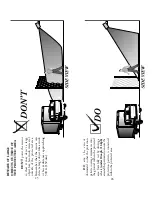
2. Review Application Guidelines—Do’s and Don’ts
for best mounting location. (pg. 10-24)
3. Remove electronic assembly from housing and
install sensor housing/shroud assembly on bracket.
4. Route cable through 1/2” conduit connector
into sensor housing. (pg. 4)
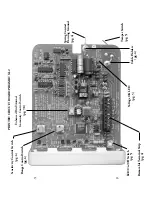
5. Remove Terminal Block from main printed
circuit board and wire according to the
wiring diagram on page 4 .
6.
For initial walk-test only
, set sensor range and
sensitivity at maximum. (pg. 5)
7. Plug-in “wired” terminal block. Route cable under
“cable holders”. (pg. 4)
8. Slide electronic assembly into housing.
Tighten the four faceplate screws. (pg. 5)
9. Loosen swivel slightly so sensor is held in place,
but can be aimed upward, downward and side-to-side
without using the Allen Wrench each time. (pg. 5)
10. Install XL-Sounder audible tester accessory. (pg. 8)
11. Locate protection pattern by walk testing. (pg. 5)
Careful aiming of the sensor can optimize pattern
coverage. (pg. 5-6)
12. Once the desired protection pattern coverage is
obtained, tighten the swivel locking screw to
lock the sensor in place.
13. For best false-alarm-free performance, it is
critical that you reduce the Sensitivity Control
to the lowest possible setting while maintaining
acceptable walk-test performance. (pg. 6-8)
14. If possible, reduce the Range Control.
Note: the “Rule of Thumb” is to adjust the sensor’s
sensitivity and range to the lowest possible settings
to attain the desired coverage.
1


