28
TROUBLESHOOTING
The sensor does not work; the LED’s do not come on.
1. Check input voltage at terminals 2 (-) and 3 (+) or
view the
Voltage OK LED
on PC board to verify
that it is on. You must deliver 8.5 to 20 VDC at the
input terminals.
2. Check to see if the LED switch is in the “ON”
position.
The sensor Alarm LED is on constantly and does not reset.
1. If input voltage is OK, return sensor to manufacturer.
You cannot attain the maximum specified range of the sensor.
1. Refer to “Helpful Hint for Walk-Testing” in the WALK
TESTING section of this booklet.
2. If the passive infrared portion does not detect as
specified, check sensor alignment, as the proper aiming
angle is very critical.
3. If the microwave portion does not detect as specified,
check Range and Sensitivity Control.
4. Check to see if you have the proper Lens Module.
5. Are large objects blocking the protection pattern? If
the sensor only sees 1/2 of an intruder, it is likely only
1/2 the expected range will be attained.
You are experiencing false alarms.
1. Check input voltage as described in item 1. It is best to
check voltage with primary power disconnected from
the main power source and the sensor operating on
standby battery only. This should be the worst case or
lowest voltage situation.
2.
Check Sensitivity Control. PROTECH recom-mends
a setting of 1, 2, 3, 4, or 5 for commercial/industrial
applications.
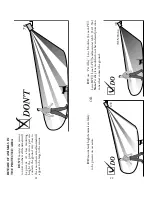
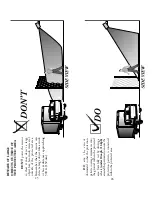
3. Is the sensor angled downward to terminate the
protection pattern into the ground? Did you drive a
vehicle along the perimeter to ensure the sensor is not
seeing a large object (bus, truck, train, etc.) outside the
protected area? Remember that the sensor will see a
man at 100 ft. (30.5m) but may see a bus at 500 ft.
(152.4m) PROTECH highly recommends that the
XL-SOUNDER be utilized for walk-testing.
4. Did you consider mounting the sensor higher so
that a small animal (cat, rat, rabbit, bird, etc.) on the
ground is too small to detect. Or have you considered
using “Pet Alley” Lens Modules and mounting lower
(4-6 ft.)?
Note: If all of the above has been checked out and
the problem persists, please contact PROTECH
Technical Support.
27
INSTALLATION CHECK LIST
❑
Is each sensor individually zoned? More
than one sensor on an alarm zone should not be
considered or tolerated! More than one sensor
on one zone makes it virtually impossible to
troubleshoot intermittent problems. Please advise
your installation supervisor of PROTECH’s position
on this very important matter before proceeding
with the installation.
❑
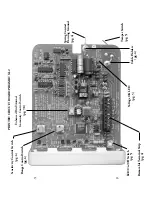
Is the Green
Voltage OK LED
on? The
Voltage OK LED
verifies that proper input voltage
is provided at the sensor. It is best to view the
Voltage
OK LED
with the AC power disconnected and the
sensor powered by standby battery only. This would
be worst case condition and deliver lowest voltage
to sensor.
❑
Did you realize the
SENSITIVITY
CONTROL
rotary switch is the most critical
field setting for false-alarm-free performance?
PROTECH recommends a field setting of 1, 2, 3,
4, or 5 in commercial applications. A field setting
of “1” will provide the greatest false alarm rejection
performance.
❑
Did you realize the
RANGE CONTROL
rotary switch adjusts the overall size of the sensor’s
detection area? Generally, to attain the maximum
specified range of the sensor it will be necessary to
set the
RANGE CONTROL
rotary switch near the
maximum range settings of 80, 90, or 100 percent
of maximum.
❑
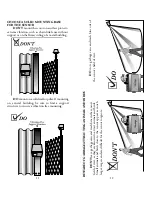
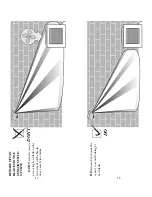
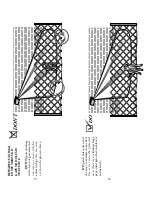
Did you angle the sensor downward to
terminate the protection pattern into ground? Did
you test the perimeter with a vehicle to ensure the
sensor is not seeing a large object (bus, truck, train,
etc.) outside the protected area?
❑
Did you consider a higher mounting
height so that a small animal (cat, rat, rabbit, bird,
etc.) on the ground is too small to detect? Or have
you considered using “Pet Alley” Lens Modules?
Please refer to the specifications on page 3.


