


DSNET USER’S GUIDE
12
3.2
DSNET MANAGER MAIN WINDOW
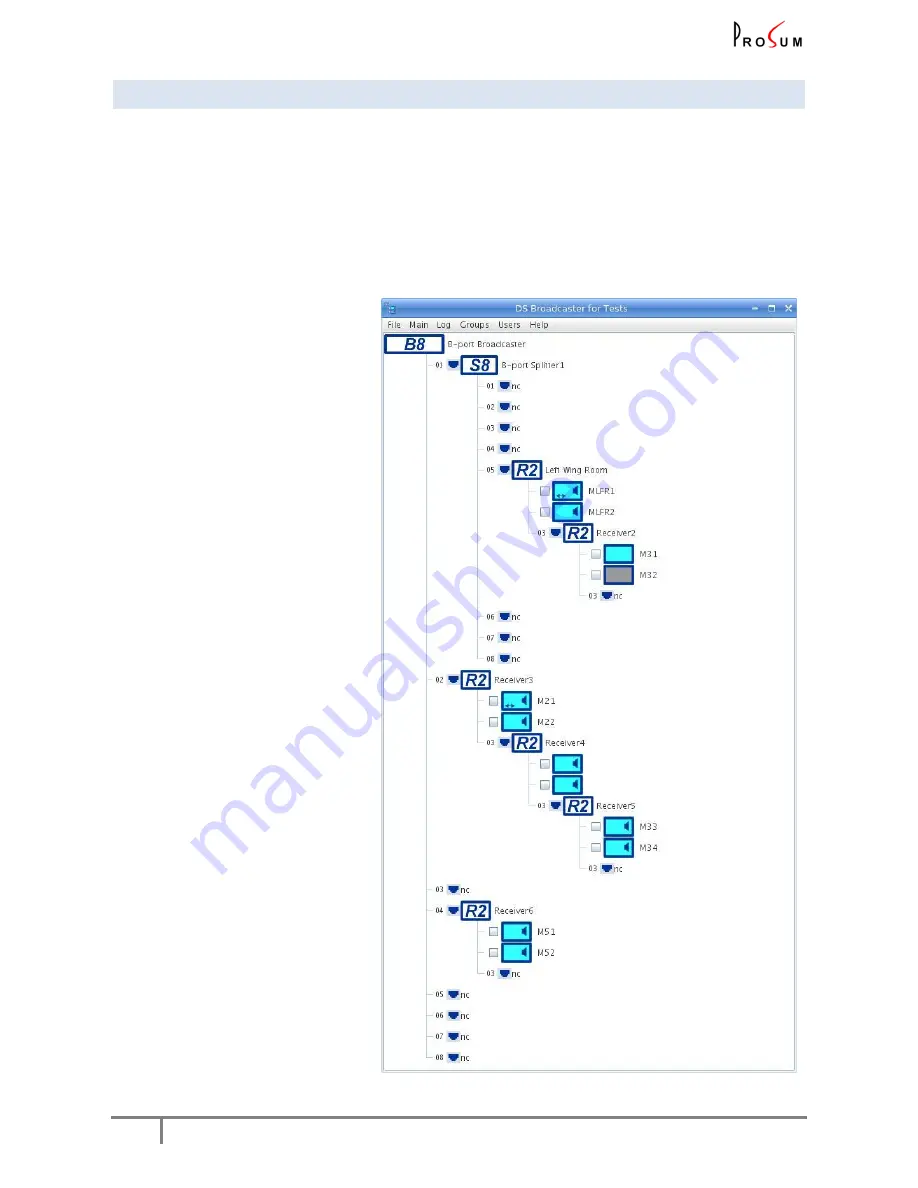
This window shows the architecture of the DSNet network, i.e., a tree starting from the broadcaster.
The title of the window is the name of the broadcaster to which you are connected.
Each device is symbolized by an icon. A bar menu gathers all network-level operations.
All device configuration boxes are accessed by left clicking on the device icon. Left clicking opens a local
menu that depends on the device.
Concerning the broadcaster, local settings such as configuration of serial interfaces, are made by clicking on
the broadcaster icon like other devices. More global settings such as TCP/IP and time settings are accessed
from the window menu.
All device output ports
are symbolized
by a small RJ45 icon attached to the
port number.
“
nc
” means no device connected.
The RJ45 icons get red in case of faulty
cable.
Note that input ports are not drawn
for sake of clarity.
The monitor icons
are dynamic
and
can change according to the state of
each monitor.
The blue color indicates that the video
is enabled.
The grey color indicates that the video
is disabled.
A small loudspeaker indicates that the
audio is enabled.
A double arrow indicates that the
serial connection is bidirectional.
Left click on a monitor icon to proceed
to the monitor settings.
Note that a monitor with disabled
video displays a black screen, but it is
not powered down and the audio can
still work.
A label is bound to each device
. It
permits to work by names. This label is
kept in the device EEPROM so that it
does not change if you modify the
network architecture. If there is no
name already defined, a default name
based on the device type and location
is suggested. You can change it any
time by left clicking on the device icon
and selecting “Change label…”
Figure 4: DSNet Manager Main Window


