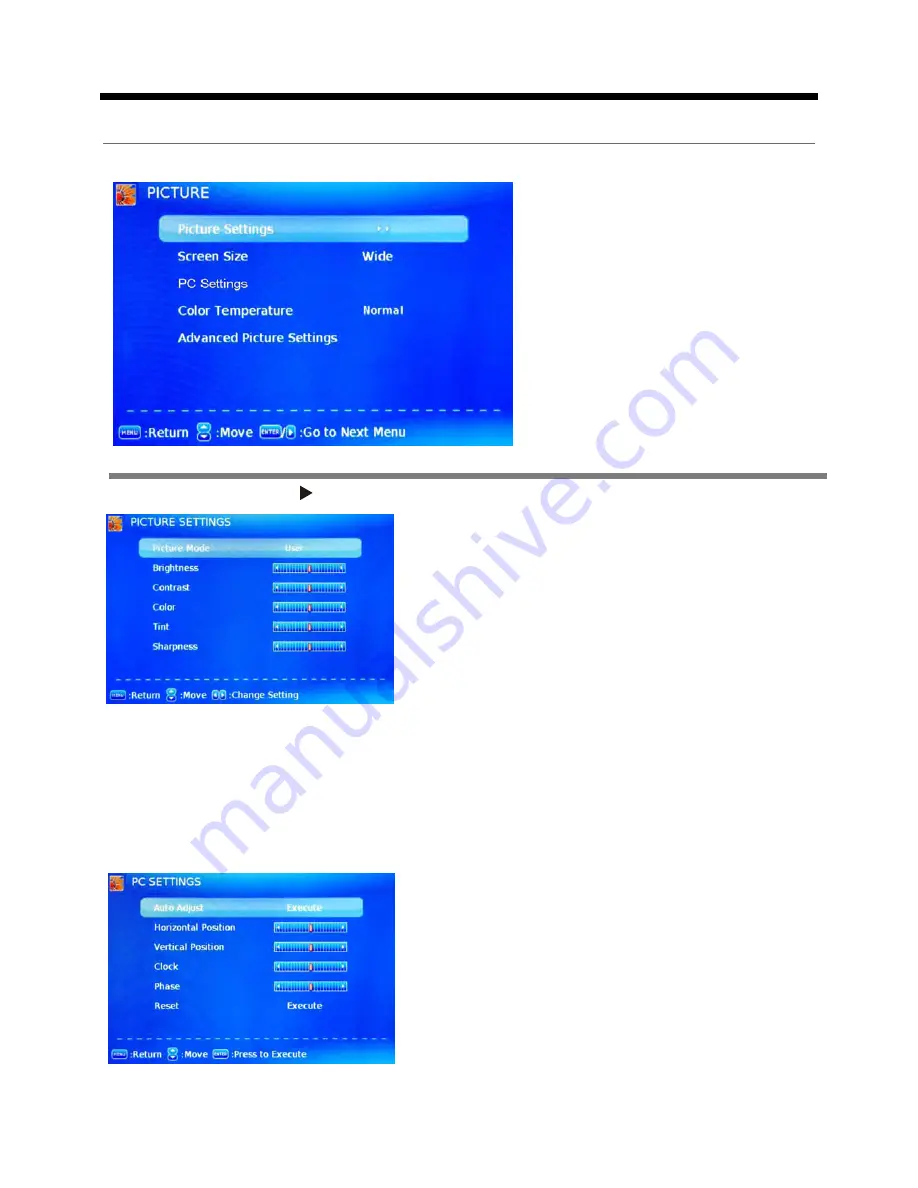
Press button to enter the Picture Settings menu.
OSD Menu
12
1. Picture menu
Description
Picture mode:
Select between Dynamic, Standard,
Movie, and User .
When picture mode is set to user,the following setting
can be mannally adjusted.
You may select the picture mode directly by pressing
the PMODE button on the remote control.
Picture Settings:
Screen Size:
Select the display aspect ratio till the picture is fit onto the screen. The options
are different according to different input source.
PC Settings:
If the video input signal comes from your PC, you may adjust the Vertical Position,
Horizontal Position, Clock, Phase or even perform an Auto adjustment.
Contrast:
Control the difference between the bright and
dark regions of the screen picture.
Brightness:
Adjust brightness of the picture.
Color:
Adjust color of the picture.
Tint:
Control the fresh tones to make them appear natural when analog TV or NTSC - system.
Sharpness:
Set the amount of fine detail in the picture.
Color Temp:
Select the color temperature between Normal, Cool and Warm. That your feel
comfortable.
OSD Menu
Auto Adjust:
Press ENTER button to automatically adjust
Clock, Phase, H-Position and V-Position settings. In order
to get a good result, you should open a “filling the screen”
picture before executing.
Clock:
Adjust the pixel clock frequency.
H/V Position:
Adjust the transverse/vertical position of
the screen.
Phase:
Adjust the phase of the ADC sampling clock
relative to the sync signal, until a stable image is obtained.
Reset:
Press
ENTER
button to reset the settings.


