Chapter 2: SETTING UP
4
October 2021
This equipment can operate on battery or connected to the mains using a DC
adapter. An adapter is also supplied to use with the power connector car
(cigarette lighter).
The equipment comes with the battery half charged. Depending on the time
elapsed from first charge and environmental conditions may have lost some of
the charge. You should check the battery level. It is advisable a first full charge.
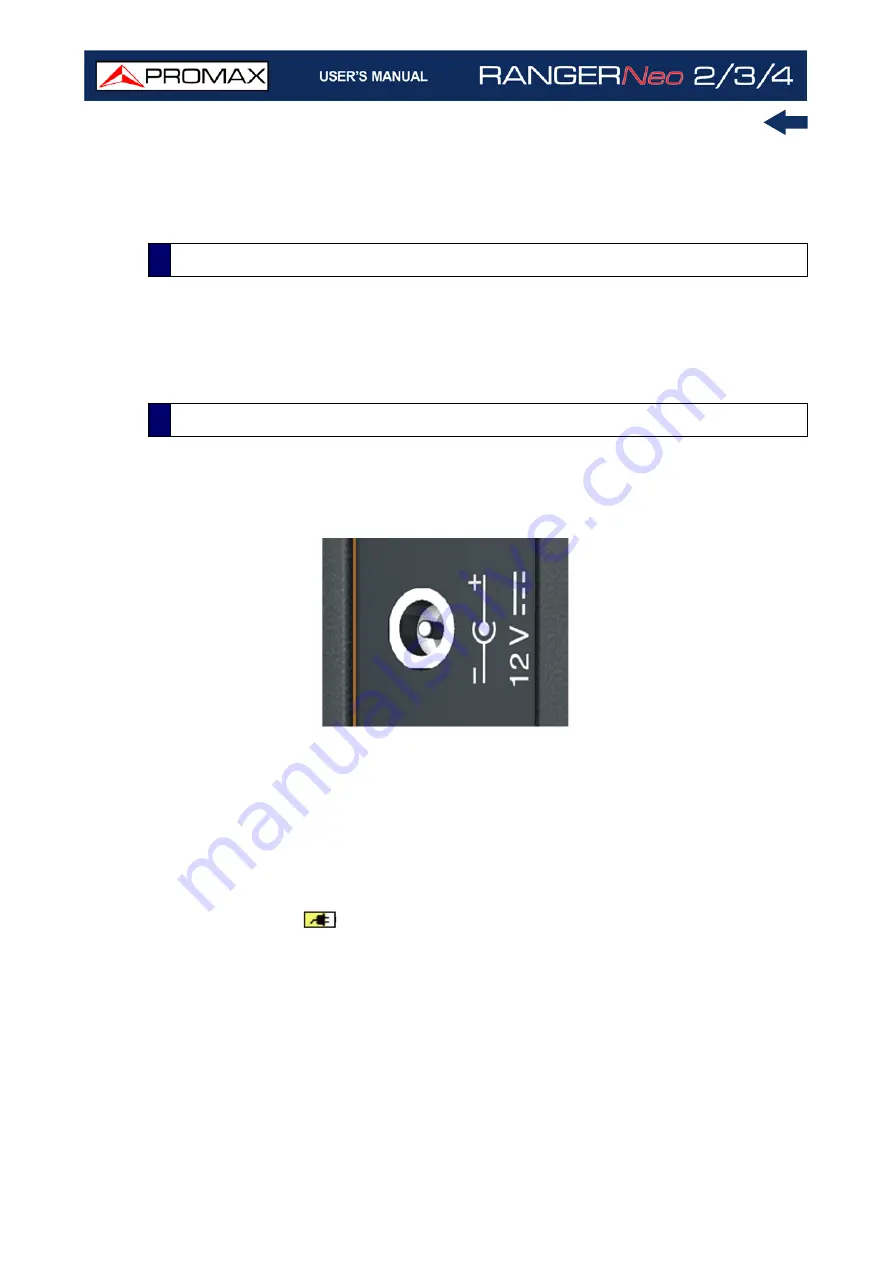
Connect the DC power adapter to the equipment through the power connector
on the side panel (see figure).
Figure 2.
Then connect the DC power adapter to the mains via the mains cord. Ensure that
your mains voltage is compatible with the adapter voltage.
For a
fast
charging is necessary to switch off the equipment.
If the equipment is ON, the battery charge will be slower, depending on the type
of work you are doing. When connecting the equipment to the mains the mains
connected symbol
appears inside the battery icon.
The CHARGER led indicator shows the battery status:
Yellow
: Battery charging.
Green
: Battery full charge.
Blinking
: Battery not detected.
Off
: Battery is not charging.
2.2.1
First Charge
2.2.2
Charging the Battery
Summary of Contents for RANGER Neo 2
Page 1: ...RANGER Neo 2 TV AND SATELLITE ANALYZER 0 MI2130 RANGER Neo 3 RANGER Neo 4 ...
Page 20: ...Chapter 2 SETTING UP 8 October 2021 Figure 4 Side View ...
Page 21: ...October 2021 9 Chapter 2 SETTING UP Figure 5 Top View ...
Page 23: ...October 2021 11 Chapter 2 SETTING UP Figure 7 Side View ...
Page 24: ...Chapter 2 SETTING UP 12 October 2021 Figure 8 Top View ...
Page 26: ...Chapter 2 SETTING UP 14 October 2021 Figure 10 Side View ...
Page 27: ...October 2021 15 Chapter 2 SETTING UP Figure 11 Top View ...
Page 30: ...Chapter 2 SETTING UP 18 October 2021 RF Menu Figure 13 RF Tuning 2 7 Menu Tree ...
Page 31: ...October 2021 19 Chapter 2 SETTING UP Figure 14 Tools Menu ...
Page 32: ...Chapter 2 SETTING UP 20 October 2021 Figure 15 Advanced Menu ...
Page 33: ...October 2021 21 Chapter 2 SETTING UP WiFi Menu Figure 16 ...
Page 34: ...Chapter 2 SETTING UP 22 October 2021 IPTV Menu Figure 17 Figure 18 ...
Page 35: ...October 2021 23 Chapter 2 SETTING UP Installation Management Menu Figure 19 ...
Page 36: ...Chapter 2 SETTING UP 24 October 2021 Preferences Menu Figure 20 ...
Page 37: ...October 2021 25 Chapter 2 SETTING UP Settings Menu Figure 21 Figure 22 ...
Page 336: ...Chapter v RACK OPTION 324 October 2021 Figure 200 Side View Figure 201 Back View ...


