background image

18  

PLG025b

FRANÇAIS

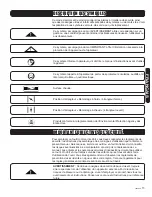
 IMPORTANTE DIRECTIVES DE SÉCURITÉ

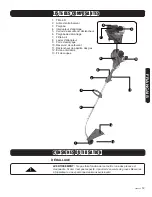
SPÉCIFICATIONS

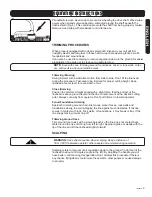
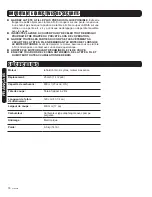
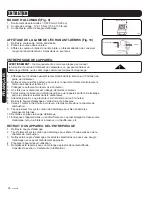
GARDEZ LA TÊTE À FIL LE PLUS PRÈS DU SOL QUE POSSIBLE

. Évitez de 

frapper de petits objets avec la tête à fil. En coupant sur une pente, tenez-vous 

à un endroit plus bas que la position de la tête à fil. Ne coupez JAMAIS sur une 

colline ou une pente, etc. s’il y a un risque de dérapage ou de perdre l’équilibre 

avec les pieds.

INSPECTEZ LA ZONE À COUPER POUR Y DÉCELER TOUT DÉBRIS QUI 

POURRAIT ÊTRE FRAPPÉ OU PROJETÉ LORS DE L’OPÉRATION.

GARDEZ TOUTES LES PARTIES DU CORPS ET LES VÊTEMENTS À 

L’ÉCART DE LA TÊTE À FIL EN DÉMARRANT LE MOTEUR ET LORSQUE 

LE MOTEUR TOURNE.

 Avant de démarrer le moteur, assurez-vous que la tête 

à fil n’entrera pas en contact avec un obstacle quelconque.

ARRÊTEZ LE MOTEUR AVANT D’EXAMINER LE FIL DE COUPE.

ENLEVEZ TOUJOURS DE L’ÉCRAN ANTI-DÉBRIS, DE LA TÊTE À FIL ET 

DU MOTEUR TOUTE ACCUMULATION DE DÉBRIS

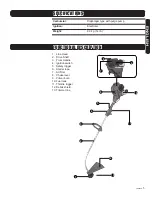
Moteur :

refroidi à l’air, 2-cycles, moteur à essence 

Déplacement :

25 cm3 (1-1/2 po3)

Capacité de carburant :

800 ml (27 oz.liq. US)

Téte de coupe :

Téte à frapper à 2 fils

Longueur de l’arbre 

d’entraînement :

120 cm (47-1/4 po)

Largeur de coupe :

430 mm (17 po)

Carburateur :

Carburateur type diaphragme avec pompe 

purgente

Allumage :

Électronique

Poids :

6,3 kg (14 lb.)

Summary of Contents for PLG025

Page 1: ...damaged or missing most replacement parts ship from our facility in two business days For immediate help with assembly or for additional product information call our toll free number 1 888 267 7713 C...

Page 2: ...se this tool properly you must observe the safety regulations the assembly instructions and the operating instructions to be found in this Manual All persons who use and service the machine have to be...

Page 3: ...rform its intended function Check for alignment of moving parts free running of moving parts breakage of parts proper mounting and any other conditions that may affect the operation of the tool A guar...

Page 4: ...awn or garden areas DON T OPERATE UNIT FOR PROLONGED PERIODS Rest periodically DON T OPERATE UNIT UNLESS DEBRIS SHIELD IS INSTALLED AND IN GOOD CONDITION DON T ADD REMOVE OR ALTER ANY COMPONENTS OF TH...

Page 5: ...Line Head 2 Drive Shaft 3 Front Handle 4 Ignition switch 5 Safety trigger 6 Starter rope 7 Air filter 8 Choke lever 9 Primer bulb 10 Fuel tank 11 Throttle trigger 12 Debris shield 13 Trimmer line 4 12...

Page 6: ...andle Install the flat washer lock washer and wing nut Tighten wing nut securely Debris shield Fig 2 The debris shield must be installed to properly dispense trimming line and protect the operator NOT...

Page 7: ...n surface around fuel cap to prevent contamination Loosen fuel cap slowly Rest the cap on a clean surface Carefully pour fuel into the tank Avoid spillage Prior to replacing the fuel cap clean and ins...

Page 8: ...of debris such as cans bottles rocks etc Striking objects can cause serious injury to operator or bystanders and also damage equipment If an object is accidentally hit immediately TURN ENGINE OFF and...

Page 9: ...a slight tilt so that the bottom of the linehead is above ground level and the line contact occurs at the desired cutting point Always cut away from operator Don t pull trimmer in toward operator Fen...

Page 10: ...ise onto the spindle Tighten the knob securely by hand only Fig 7G Trim the excess line to approximately 13 cm 5 This will minimize load on the engine during starting and warm up AIR FILTER Never oper...

Page 11: ...d Drain fuel from the fuel tank After fuel is drained start engine Run engine at idle until unit stops This will purge the carburetor of fuel Allow engine to cool approx 5 minutes Using a spark plug w...

Page 12: ...ug Clean gap or replace spark plug Runs erratically Incorrect carburetor mixture adjustment setting Have carburetor adjusted by an authorized service centre Smokes excessively Incorrect gasoline oil m...

Page 13: ...Muffler 34 35 Washer 36 Washer 37 Screw 38 Heat shield NO DESCRIPTION 39 Air intake 40 Washer 41 Screw 42 Carburetor heat shield 43 Heatproof washer 44 Gasket 45 Carburetor 46 Screw 47 Choke lever 48...

Page 14: ...tive product to the place of purchase This warranty does not extend to parts deemed consumables such as brad and staple gun driver blades grinding discs welding contact tips etc All warranty claims mu...

Page 15: ...orme la r glementation de l Environmental Protection Agency des tats Unis Pour employer cet outil comme il se doit vous devez respecter les r glements de s curit les directives d assemblage et les con...

Page 16: ...le gros bon sens Ne faites fonctionner aucun outil lectrique lorsque vous tes fatigu que avez bu ou consomm des drogues ou m dicaments SOYEZ TOUJOURS CONSCIENT DE VOTRE ENVIRONNEMENT Soyez l aff t des...

Page 17: ...DDITIONNELLES POUR COUPE HERBES ESSENCE N UTILISEZ AUCUN AUTRE CARBURANT que celui recommand dans le guide de l utilisateur Suivez toujours les directives de la section Carburant et lubrification de c...

Page 18: ...ES PARTIES DU CORPS ET LES V TEMENTS L CART DE LA T TE FIL EN D MARRANT LE MOTEUR ET LORSQUE LE MOTEUR TOURNE Avant de d marrer le moteur assurez vous que la t te fil n entrera pas en contact avec un...

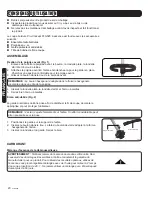
Page 19: ...ir Levier d trangleur Poire d amor age R servoir de carburant D clencheur de papillon des gaz cran anti d bris Fil de coupee 1 2 3 4 5 6 7 8 9 10 11 12 13 4 12 CONSIGNES D UTILISATION D BALLAGE averti...

Page 20: ...ign e Ins rez la rondelle plate la rondelle d arr t et l crou oreilles Serrez bien l crou oreilles cran anti d bris Fig 2 Le garde anti d bris doit tre pos afin de distribuer le fil de coupe de mani r...

Page 21: ...on Ne m langez pas l essence dans une ferm e close ou pr s de sources d ignition flamme nue etc Garantissez une a ration ad quate Commencez par remplir la moiti de la quantit d essence requise dans un...

Page 22: ...ain lorsque le cordon rentre Ne laissez jamais le cordon sauter de la position sortie Ceci risque de faire coincer ou d effilocher le cordon et peut galement endommager l ensemble de d marreur D MARRA...

Page 23: ...LIB RATION DU FIL DE LA T TE FIL Fig 5 et 6 avertissement N utilisez pas de fil d acier ni de fil d acier enduit de plastique de tout genre avec votre coupe herbe t te fil L utilisateur risque de sub...

Page 24: ...ec des roches des murs de brique ou des fondations il peut se briser ou s effilocher Si le fil se coince dans une cl ture il se d tachera Coupe autour des arbres Coupez autour les troncs d arbre en vo...

Page 25: ...e qu il atteigne une longueur d environ 13 cm 5 po Ceci minimisera la charge sur le moteur lors du d marrage et du r chauffage FILTRE AIR avertissement N utilisez jamais le coupe herbe sans le filtre...

Page 26: ...le moteur Faites tourner le moteur au ralenti jusqu ce que l appareil s arr te Cette tape purge le carburant restant dans le carburateur Attendez jusqu ce que le moteur soit refroidi environ 5 minutes...

Page 27: ...ectrodes de la bougie d allumage Nettoyez et cartez les lectrodes ou remplacez la bougie Moteur tourne de fa on irr gulier R glage incorrect du m lange de carburateur Demandez un centre de service aut...

Page 28: ...air 14 Filtre air auxiliaire 15 Buse d aspiration 16 Couvercle de filtre air auxiliaire 17 Joint d tanch it carter 18 Vis 19 Rondelle 20 Rondelle 21 Carter de moteur 22 Joint d tanch it du cylindre 23...

Page 29: ...les becs de soudage etc Toutes les demandes de r clamation doivent avoir une autorisation pr alable et les produits doivent tre exp di s port pay l entrep t de Richmond BC ou de Mississauga ON ou un d...

Page 30: ...30 PLG025b ENGLISH FRAN AIS General Schematic Drawing Sch ma G n ral...

Page 31: ...v 080226 31 ENGLISH FRAN AIS ENGINE Schematic Drawing Sch ma DU MOTEUR...

Reviews: