5a
Angled on Wall
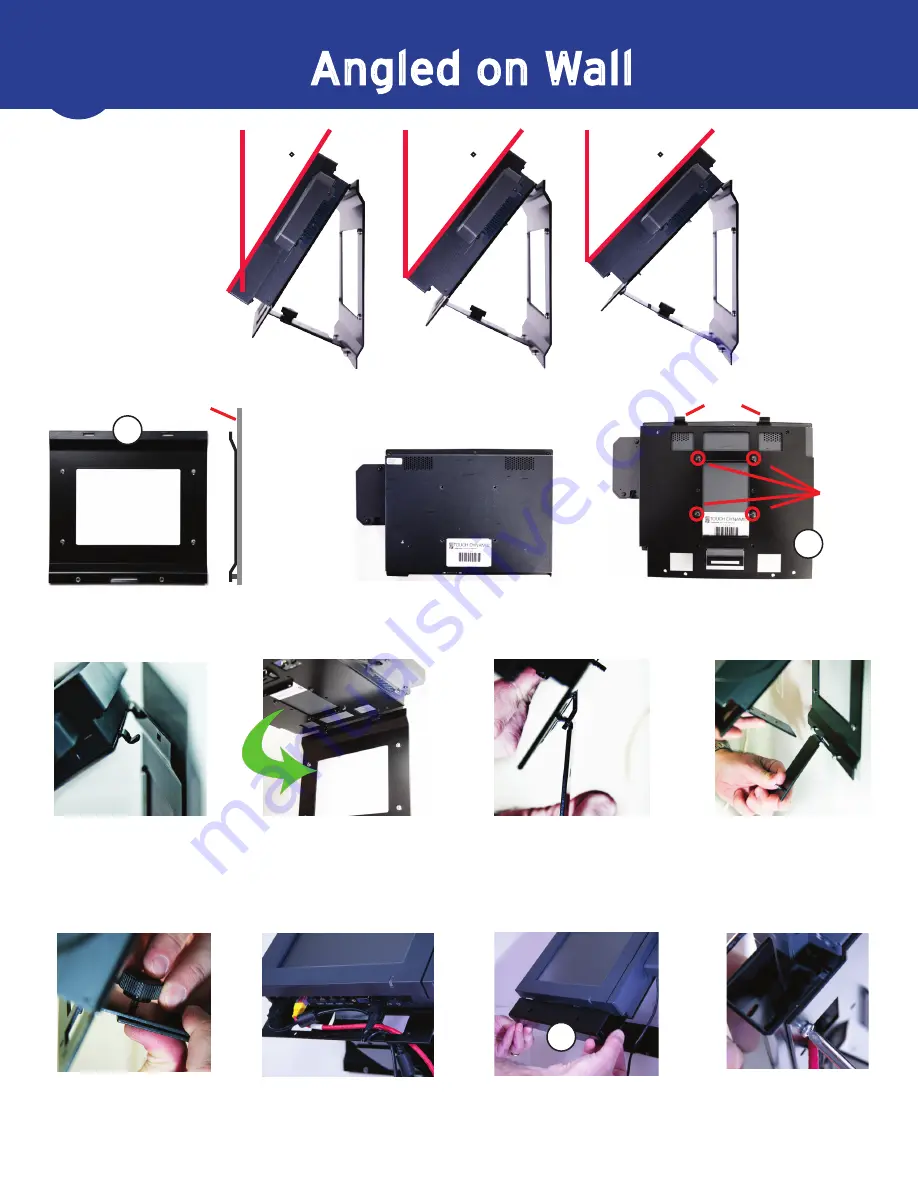
Position the PC face down on a
protected/padded surface.
Tabs
Place the Mount Plate as you see
above. Be sure the TABS are pointed
up. Install screws in the 4 positions
noted.
Run cables through the
cut-outs in the Mount Plate
before installing Cord Guard.
Place the Cord Guard over the
cords and align with the holes
on the Mount Plate.
Secure the Cord Guard by
installing two screws on the
back side of the Mount Plate.
Screws
Begin with the Base Mount
securely fastened to the wall.
(fasteners not included)
Lift the PC/Mount Plate as
shown. Insert the TABS into
the slots at the top of the Base
Mount attached to the wall.
Once both TABS are fully
inserted, lower the PC at an
angle. For safety, do not leave
the PC “hanging” on the
Mount Plate TABS.
Install the Perforated Adjust-
ment Plate (part E) to the
Mount Plate as shown.
Install the Studded Adjust-
ment Plate (part D) to the
Base Mount. Select 1 of 3
angles by inserting the stud
into one of the 3 holes.
Secure the two plates using
the Tension Knob. These
plates are designed to be a
tight fit, you may need
assistance.
Wall
A
B
C
1
2
3
4
5
6
7
8
9
10
11
32
38
44


