CD -2 1 2
PRO WEL D
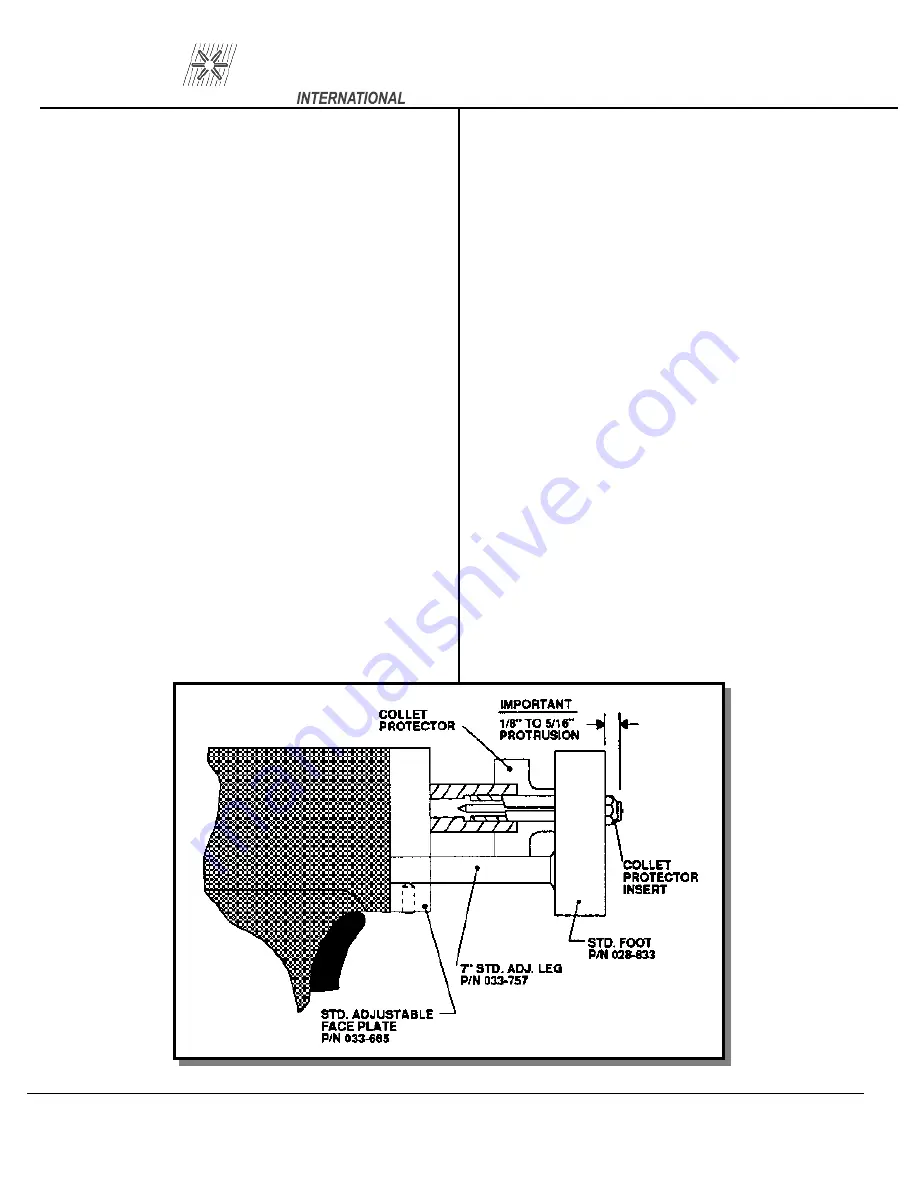
Figure 6 Collet Protector Gun Setup
The gun is now ready to weld. Select the
proper setting for the size stud to be welded. Voltage
is determined by the weld base diameter. Be sure
your power source is set for the proper polarity:
straight for steel, reverse for galvanized.
11.2 INSTALLING OR CHANGING COLLETS
OR CHUCKS
( The terms collet or chuck are different names for
the same device). The collet holds the pin or stud to
be welded. It is secured to the gun shaft by two set
screws. These screws are loosened to remove or re-
place a collet. Tighten these screws snugly to secure
the collet in place.
When you change the size of the stud you are
welding, you must also change to the appropriate
collet. If a collet becomes damaged or broken, it
must be replaced. You may also need a stop.
11.3 GUN SET-UP FOR WELD PINS WITH
COLLET PROTECTOR (see Figure 6)
The collet protector has several advantages
over the standard set-up.
1. It does not require a pin stop.
therefore, the same setup is applicable
for a range of pin lengths.
2. There is a fixed plunge, no gun
adjustments necessary.
3. It provides stability at the weld end
of the pin.
There are two standard sizes available: 12 ga.
And 10 ga. It is used with the round faceplate and
three blunt legs. The collet protector slides over the
collet and fastens to the chuck with three allen set
screws. The insert, which takes the place of the In-
teral stop, is replaceable.
The stud is pushed into the chuck until the flange bot-
toms out on the insert. The collet protector is not
available for studs larger than 10 ga.
The standard adjustable legs and footpiece
combination can alternately be used with the collet
protector as shown in Figure 10.
Page 8
Summary of Contents for CD-212
Page 1: ...OPERATION MAINTENANCE MANUAL ...
Page 2: ......
Page 5: ...CD 212 PRO WELD ...
Page 6: ...CD 212 PRO WELD ...
Page 7: ...CD 212 PRO WELD ...
Page 8: ...CD 212 PRO WELD ...
Page 18: ...CD 212 PRO WELD Figure 9 Light Duty CD Gun Page 10 ...
Page 29: ......


