background image

23

E

N

G

L

IS

h

!

!

!

OPERATING PROCEDURES

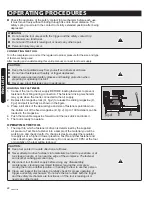
2.  Connect the tool to the air supply. Make sure the air pressure is within the 

60-100 PSI limits mentioned in 

SPECIFICATIONS

.

3.  Hold the hand grip and press tool against the work surface, allowing it to 

push in the safety contact tip, until the bottom of the nose piece contacts 
the work surface, being sure the tool is perpendicular to the surface.

4.  Gently squeeze the trigger to drive the fastener.
5.  Lift the tool off the work surface.

DANGER 


„

Keep fingers away from trigger when not driving fasteners to avoid 

accidental firing.


„

Disconnect tool from air supply before performing maintenance, clearing 
a jammed fastener, leaving work area, moving tool to another location, or 
handling the tool to another person.

RAPID-FIRE OPERATION


„

The tool can also be operated by holding trigger continually depressed and 
pushing contact trip repeatedly against workpiece. A fastener will be driven each 
time the contact trip is pushed against the workpiece. This operating procedure 

provides rapid-fire fastener driving. 


„

Never operate tool unless contact trip is in contact with workpiece.

MAINTENANCE 

CLEAN AND INSPECT BEFORE EACh USE

CAUTION: Disconnect tool from air supply before cleaning and inspection. 
Correct all problems before putting the tool back in service.


„

Wipe tool clean and inspect for wear or damage. Use non-flamable cleaning 

solutions to wipe exterior of tool only if necessary. 

Do not soak

 tool with 

cleaning solutions. Such solutions can damage internal parts.


„

Inspect trigger and safety mechanism to assure system is complete and 
functional: no loose or missing parts, no binding or sticking parts.


„

Keep all screws tight. Loose screws can cause personal injury or damage to 
the tool.


„

If the tool is used without an in-line oiler, place 4-5 drops of air tool oil into 
the air inlet of the tool at the beginning of each workday and after about 1 
hour of continuous use. Frequent but not excessive lubrication is required 
for best performance. Oil added through the airline connection will lubricate 
all internal parts. Use only air tool oil. Do not use oil with detergents or other 
additives. These can cause damage through accelerated wear to the seals 
in the tool.


„

Use a small amount of oil on all exterior moving parts and pivots.


„

Dirt and water in the air supply are major causes of pneumatic tool wear. 
See the section on 

SETUP: AIR SOURCE

  above for more information.


„

Keep tools clean for better and safer performance. Use non-flammable 

cleaning solutions sparingly and only if necessary. Do not soak parts in the 
solutions. 

CAUTION: Such solutions may damage O-rings and other parts.

Summary of Contents for PBN5018

Page 1: ...aff are ready to provide assistance If a part is damaged or missing replacement parts can be shipped from our facility For immediate help with assembly or for additional product information call our t...

Page 2: ...id rapantes est recommand pour le travail Portez un chapeau de protection afin de contenir les cheveux longs 4 UTILISEZ DE L AIR COMPRIM PROPRE SEC ET CALIBR 60 100 lb po2 5 NE BRANCHEZ PAS L OUTIL si...

Page 3: ...E DOIGT SUR LA G CHETTE lorsque vous ne posez pas de clous Ne transportez jamais l outil ni branchez l outil la source d alimentation d air avec le doigt sur la g chette un clou pourrait tre projet si...

Page 4: ...tuyaux endommag s ou us s La long vit de l outil peut en tre compromise 35 LES UTILISATEURS doivent faire respecter toutes les r gles de s curit et autres directives comprises dans ce manuel Gardez l...

Page 5: ...e photos peintures et d autres applications o le collage est n cessaire mais o le serrage avec des serre joints ne convient pas Comprend Bouteille d huile 2 cl s six pans Prise d air Coffre moul Nomen...

Page 6: ...euvent nuire aux composants internes de l outil Un filtre pour conduite d air enl vera la plupart de ces contaminants et prolongera consid rablement la dur e de vie de l outil Assurez vous que l huile...

Page 7: ...ront les composants internes de l outil 4 Apr s avoir ajout l huile faites fonctionner l outil bri vement 5 Essuyez tout exc dent d huile du chapeau d chappement V RIFIEZ l outil Nettoyez et inspectez...

Page 8: ...aillez L agrafe peut ricocher et causer des blessures D branchez l outil de la source d alimentation d air avant de proc der au d montage l entretien au d gagement d une agrafe coinc e et avant de qui...

Page 9: ...ifie toutes les pi ces internes N utilisez que de l huile pour outils pneumatiques N utilisez aucune huile contenant des d tergents ou d autres additifs Celles ci peuvent causer des dommages dus une u...

Page 10: ...nchement de s ret bouge librement vers le haut et le bas sans se coller ni plier 4 Rebranchez l air l outil 5 Retirez le contact de s ret contre la surface de travail sans tirer la g chette L outil ne...

Page 11: ...nt 12 mois suivant la date de l achat Cette garantie n a aucune incidence sur vos droits pr vus par la loi En cas de mauvais fonctionnement de votre outil bris pi ces manquantes etc composez notre num...

Page 12: ...12 PBN5018b FRAN AIS Notes...

Page 13: ...elle 28 Goupille 29 Support 30 Joint torique 31 Piston 32 Ressort NO DESCRIPTION 33 Joint torique 34 Tige de soupape 35 Guide de soupape de d clencheur 36 Joint torique 37 Goupille 38 D clencheur 39 J...

Page 14: ...14 PBN5018b FRAN AIS ENGLISH SCH MA SCHEMATIC DRAWING...

Page 15: ...15 FRAN AIS ENGLISH SCHEMATIC DRAWING SCH MA...

Page 16: ...26 Dust cap 27 Washer 28 Pin 29 Bracket 30 O ring 31 Piston 32 Spring NO DESCRIPTION 33 O ring 34 Valve stem 35 Trigger valve guide 36 O ring 37 Pin 38 Trigger 39 O ring 40 Pin 41 Secondary trigger 4...

Page 17: ...s rated for a minimum working pressure of 150 PSI or 150 of the maximum system pressure whichever is greater Check that connections are tight 7 NEVER USE OXYGEN CARBON DIOXIDE combustible gases or any...

Page 18: ...nal injury 23 FIRE FASTENERS INTO WORK SURFACE ONLY Do not drive nails nor attempt to do so into hard or brittle materials such as steel concrete or tile 24 DO NOT DRIVE NAILS too close to the edge of...

Page 19: ...hat cannot be built into this product but MUST BE SUPPLIED BY THE OPERATOR SPECIFICATIONS Shoots industry standard 18 gauge brad nails in the following sizes 3 8 10 mm 5 8 15 mm 3 4 20 mm 1 25 mm 1 3...

Page 20: ...fitting Operating instructions Setup AIR SOURCE The PRO PULSE nailer is designed to operate on clean dry compressed air regulated at 60 100 PSI The preferred system would include a filter M fig 2 a p...

Page 21: ...t use bottled air or gases CAUTION All air line components including hoses pipe connectors filters regulators etc must be rated for a minimum working pressure of 150 PSI or 150 of the maximum system p...

Page 22: ...t fully as shown in the figure 3 Place a full stick of the desired type and size of fasteners point down on the bottom rail of the fixed magazine E fig 4 Up to 100 fasteners can be loaded in the magaz...

Page 23: ...ng and inspection Correct all problems before putting the tool back in service Wipe tool clean and inspect for wear or damage Use non flamable cleaning solutions to wipe exterior of tool only if neces...

Page 24: ...y a few drops of 30W non detergent oil or equivalent must be added through the air line before testing safety contact trip mechanism This may also be known as the WCE Work Contact Element WARNING 1 Di...

Page 25: ...any service procedure When installing or replacing O rings be sure they are clean and lubricated with an O ring lubricant TROUBLESHOOTING WARRANTY Thank you for investing in a PRO PULSE power tool The...

Page 26: ...26 PBN5018b ENGLISH Notes...

Page 27: ...27 ENGLISH Notes...

Reviews: