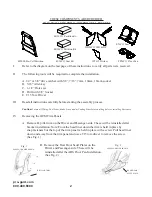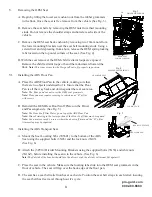
B. Insert the center divider from the passenger side of the vehicle. Be sure to start with the tail of the
divider, aimed toward the rear window and speaker deck area. Once you have inserted the divider,
press the divider against the seat mount brackets, and then to the partition tabs Mark all mounting
hole locations on the divider with a felt tip marker then remove the divider for drilling or drill in
place if desired.
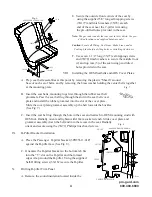
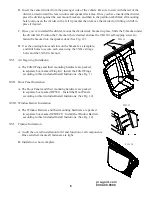
C. Once you’ve installed the divider, mount the divider deck bracket in place. Slide the T-bracket under
the divider tail. Position the T-bracket where desired and use the (3X110) self-tapping screws to
fasten the bracket into the speaker deck (See Fig. 12).
D. Use the existing holes and slots on the bracket as a template,
and drill holes to secure each area using the 3X61 carriage
bolts and the 3X16Z whiz nuts.
XVI. Air Bag wing Installation
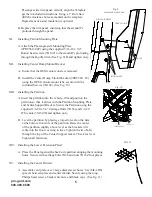
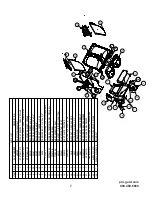
A. The Filler Wings and their mounting hardware are packed
in separate box marked Wing Kit. Install the Filler Wings
according to thier included Install Instrutions. (See Fig. 1)
XVII. Door Panel Instalation.
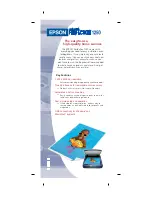
A. The Door Panels and their mounting hardware are packed
in separate box marked DP5611 . Install the Door Panels
according to thier included Install Instrutions. (See Fig. 14)
XVIII. Window Barrier Instalation
A. The Window Barriers and their mounting hardware are packed
in separate box marked WB56C11. Install the Window Barriers
according to thier included Install Instrutions. (See Fig. 14)
XVI. Finalize Instalation
A. Audit the overall installation for fit and function of all components.
Once satisfied, insure all fasteners are tight.
B. Instalation is now complete
pro-gard.com
800.480.6680
6
FIG. 12
FIG. 14
FIG. 13


