Privoro SafeCase iPhone 12 User Manual Download Page 12

P R I V O R O . C O M

SECTION 3.10

PROTECTED MODE:  

FOR FULL PROTECTION

Protected mode is the default audio/video 
surveillance protection mode. In this state:

•   The audio masking and camera 

blocking features are 

engaged

.

•   The corner indicator LEDs 

pulse 

green

 every 10 seconds.

It is normal to hear a soft white noise coming 
from SafeCase when in protected mode, 
a result of the audio masking technology 
adapting to the noise level in the environment 
surrounding SafeCase/iPhone. While in 
protected mode, most phone features – 
including apps, videos, emails, music and 
text messages – can still be accessed.

MAINTAIN PROTECTED MODE

To maintain protected mode, simply 
keep SafeCase powered on.

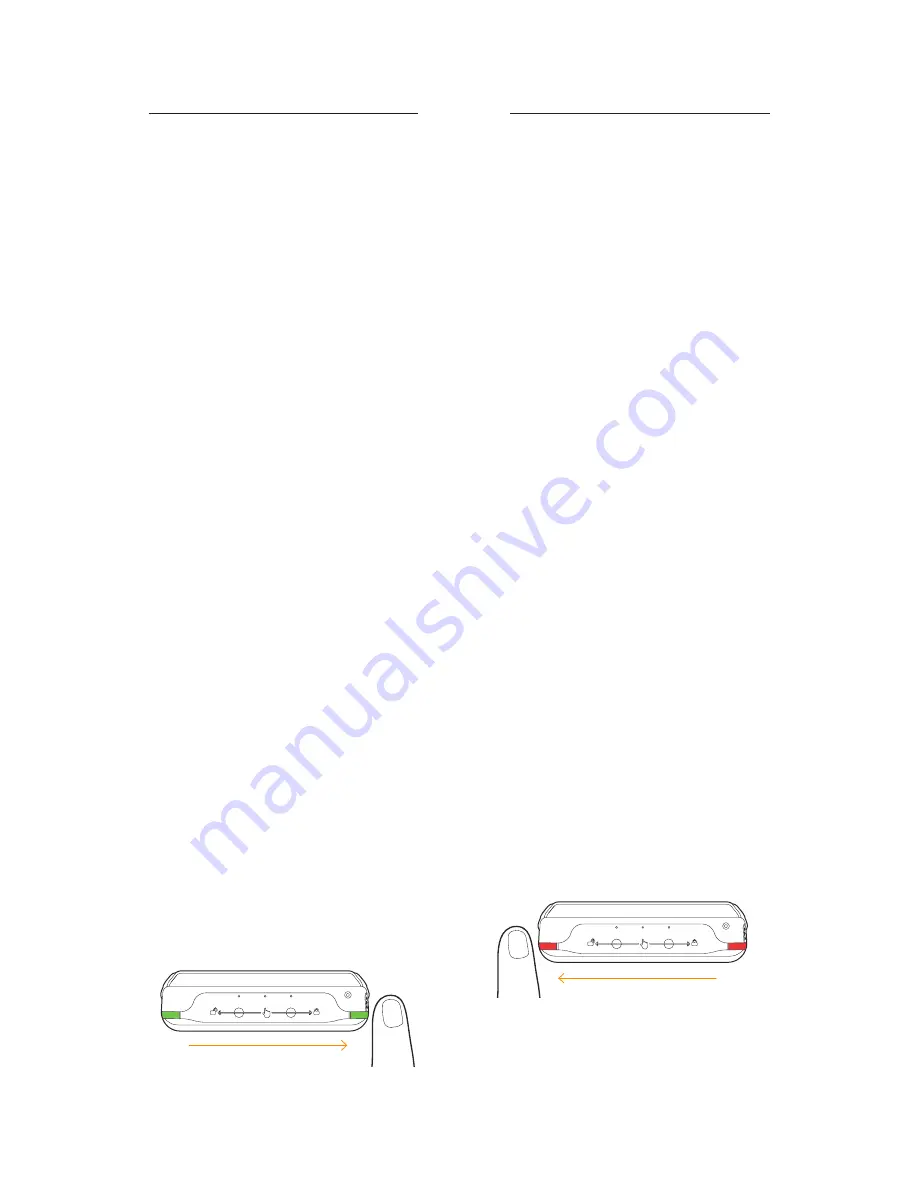
REVERT TO PROTECTED MODE

To change from unprotected mode (

see: 

next section

) back to protected mode, 

swipe right (with the phone facing you) 
across the touch bar, toward the locked 
icon

. As the camera shutter closes, an 

ascending audio tone will play and the corner 
indicator LEDs will blink green five times.

UNPROTECTED MODE: FOR PHONE/VIDEO 

CALLS AND AUDIO/IMAGE CAPTURE

Temporarily changing to unprotected 
mode is necessary for capturing 
images/audio and placing/receiving 
phone/video calls. In this state:

•   The audio masking and camera 

blocking features are 

disengaged

.

•   The corner indicator LEDs 

pulse 

red

 every three seconds.

Entering unprotected mode must take place 
before capturing images/audio; otherwise, 
the recorded photos, videos and audio will be 
indecipherable. Similarly, entering unprotected 
mode must take place before placing/
receiving a phone/video call; otherwise, the 
other participant(s) in the call will not be 
able to understand what you’re saying.

USE THE TOUCH BAR

To change to unprotected mode, 

swipe 

left (with the phone facing you) across the 
touch bar, toward the unlocked icon

. As 

the camera shutter opens, a descending 
audio tone will play and the corner 
indicator LEDs will blink red five times.

To change back to protected mode after  
the call/capture, 

swipe right across the 

touch bar, toward the locked icon

.

  SECTION 3   

Managing audio/video surveillance protections

When SafeCase is powered on, audio/video surveillance protections  

are automatically engaged; this is the default mode, known as 

protected 

mode

. In addition to protected mode, there are two additional modes: 

unprotected mode

 (used when capturing images/audio and placing/

receiving phone/video calls) and 

audio passthrough mode

 (for using  

your voice assistant or recording audio memos with video protections  

still engaged).

Swipe left across the touch bar

Swipe right across the touch bar

Summary of Contents for SafeCase iPhone 12

Page 1: ...SafeCase iPhone 12 User manual for Face ID users P R I V O R O C O M M0009 10 19 2022...

Page 2: ...on 10 Maintain Protected Mode 10 Revert to Protected Mode 10 Unprotected Mode for Phone Video Calls and Audio Image Capture 10 Use the Touch Bar 10 Audio Passthrough Mode for Siri and Audio Memos 11 U...

Page 3: ...and video surveillance resulting from the remote hijacking of your smartphone s cameras and microphones Audio capture is prevented via randomized audio masking for each of your smartphone s microphon...

Page 4: ...sertion removal T OUCH B A R Controls how audio video surveillance protections are engaged and disengaged L AT CH SL IDE Unlocks the base tray B AT T ERY S TAT US L ED Indicates battery charge level P...

Page 5: ...ectors may prevent your iPhone from fitting into the device and may disrupt audio protections TURN ON BLUETOOTH As communication between SafeCase and the Privoro app occurs over a Bluetooth connection...

Page 6: ...ivoro in the search field and then tap the Search key 3 Once the Privoro app is displayed tap the Get button to download and install You may be asked to authenticate using Face ID before downloading 4...

Page 7: ...ompted to allow the app to access your location tap the Allow While Using App option a If your organization requires continuous location validation you can select this setting using the following step...

Page 8: ...ss your camera tap the OK option Once access has been granted tap the Next button 3 Notification settings Next tap the Stay aware field When prompted to allow the app to send you notifications tap the...

Page 9: ...from a list On the QR code scanner tap the select from a list option opening a selection screen Tap your device s SafeCase ID which can be found in the MAC field on the label on the tray You will rece...

Page 10: ...e tray with one hand slide the base tray until it s fully extended 1 Unlock the base tray Use your finger to pull the latch slide to the left looking at the back side unlocking the base tray 3 Insert...

Page 11: ...om of the base tray until it clicks into place You can verify that the base tray is closed by inspecting the latch slide which should be all the way in the right position with no red visible on the la...

Page 12: ...this state The audio masking and camera blocking features are disengaged The corner indicator LEDs pulse red every three seconds Entering unprotected mode must take place before capturing images audio...

Page 13: ...lse red every three seconds USE THE PUSH TO TALK BUTTON To change to audio passthrough mode press and hold the push to talk button When first pressed the corner indicator LEDs will blink red five time...

Page 14: ...ness is disabled To check into a facility double click the push to talk button If required by policy you must also turn off cellular data on your iPhone You can do so using the following steps 1 Open...

Page 15: ...y charge level and firmware version Verification Provides an interface for validating the audio masking functionality of your SafeCase Help Provides tools and tips to help you maximize SafeCase featur...

Page 16: ...the screen In protected mode the waveform should maintain its general shape in the presence of environmental noise signifying a constant audio masking noise produced by SafeCase b You can introduce n...

Page 17: ...d recording tap the Stop Recording button 4 Tap the playback icon to listen to the recording Audio captured while in protected mode should be unintelligible only audio masking noise will be heard Tap...

Page 18: ...he power button for three seconds until the corner indicator LEDs and battery status LED and power button blink white SafeCase can also be turned on by connecting the device to a power source using th...

Page 19: ...two in one charging cable USB A split to Lightning and USB C allowing you to simultaneously charge your SafeCase and iPhone In the first 30 seconds of charging the battery status LED and power button...

Page 20: ...le through the brightness settings high low and off until the desired setting is reached With each press of the power button the corner indicator LEDs and battery status LED and power button will illu...

Page 21: ...he way down until it meets the opened base tray 1 Unlock the base tray Use your finger to pull the latch slide to the left looking at the back side unlocking the base tray 3 Remove the iPhone from the...

Page 22: ...e current charge level for three seconds Charging Connect SafeCase to a power source using the charging cable Battery status LED and power button pulse to indicate the current charge level When chargi...

Page 23: ...exceeds normal operating temperatures for example in a hot car or in direct sunlight for extended periods of time Radio frequency RF interference Observe signs and notices that prohibit or restrict t...

Page 24: ...imits for Radio Frequency RF energy set by the Federal Communications Commission FCC of the U S Government These FCC RF exposure limits are derived from the recommendations of two expert organizations...

Reviews: