background image


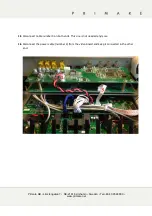
1.5


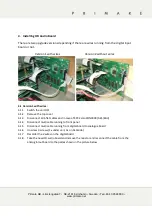
Disconnect cable number 3 on both ends. This one is not needed anymore


1.6


Disconnect the power cable (number 4) from the video board and keep it connected in the other 
end.


Primare AB • Limstengatan 7 •  SE-21616 Limhamn • Sweden • Tel +46 40 6548800 • 

www.primare.net


Summary of Contents for SP32

Page 1: ...his Go to step 4 Installing HD Audio Board on page 9 1 Dissemble and assemble the video boards 1 1 Make sure the unit is turned OFF and no AC chord is connected to the unit 1 2 Start with unscrewing t...

Page 2: ...on both ends This one is not needed anymore 1 6 Disconnect the power cable number 4 from the video board and keep it connected in the other end Primare AB Limstengatan 7 SE 21616 Limhamn Sweden Tel 4...

Page 3: ...with the four screws to the rear panel 1 9 Connect FFC number 1 and power cable number 4 to the HDVB 1 10 Included together with your new HDVB is a new 12 pin FFC which will be connected between the H...

Page 4: ...e using the FTDI chipset those usually works best with this kind of applications 2 2 Hold down the Select button 2nd from the left on the front panel while simultaneously turning ON the mains switch T...

Page 5: ...hich com port is active can be determined from Windows control panel and device manager If you get a timeout error instead of link okay double check the RS232 connection and turn OFF the main switch O...

Page 6: ...sn t start just try one more time Note We recommend that you don t use the computer to anything else while the firmware is being downloaded to the unit If the program stops to answer if not responding...

Page 7: ...he programming is completed the text write complete will appear Exit the downloader remove the RS232 cable and restart the unit Primare AB Limstengatan 7 SE 21616 Limhamn Sweden Tel 46 40 6548800 www...

Page 8: ...2 Hold down the Standby Mute button 4th from the left on the front panel while simultaneously turning ON the mains switch The unit should appear dead that is normal and an indication that it is in pr...

Page 9: ...case of SP32 also CON3009 AES EBU 4 1 4 Disconnect multi cable running to front panel 4 1 5 Disconnect multi cable running from digital board to analogue board 4 1 6 Unscrew 3 screws 1x under unit 2x...

Page 10: ...009 aes ebu Disconnect multi cable running to front panel 4 2 4 Disconnect multi cable running from digital board to analogue board 4 2 5 Unscrew 3 screws 1x under unit 2x on backside 4 2 6 Take the D...

Reviews: