background image


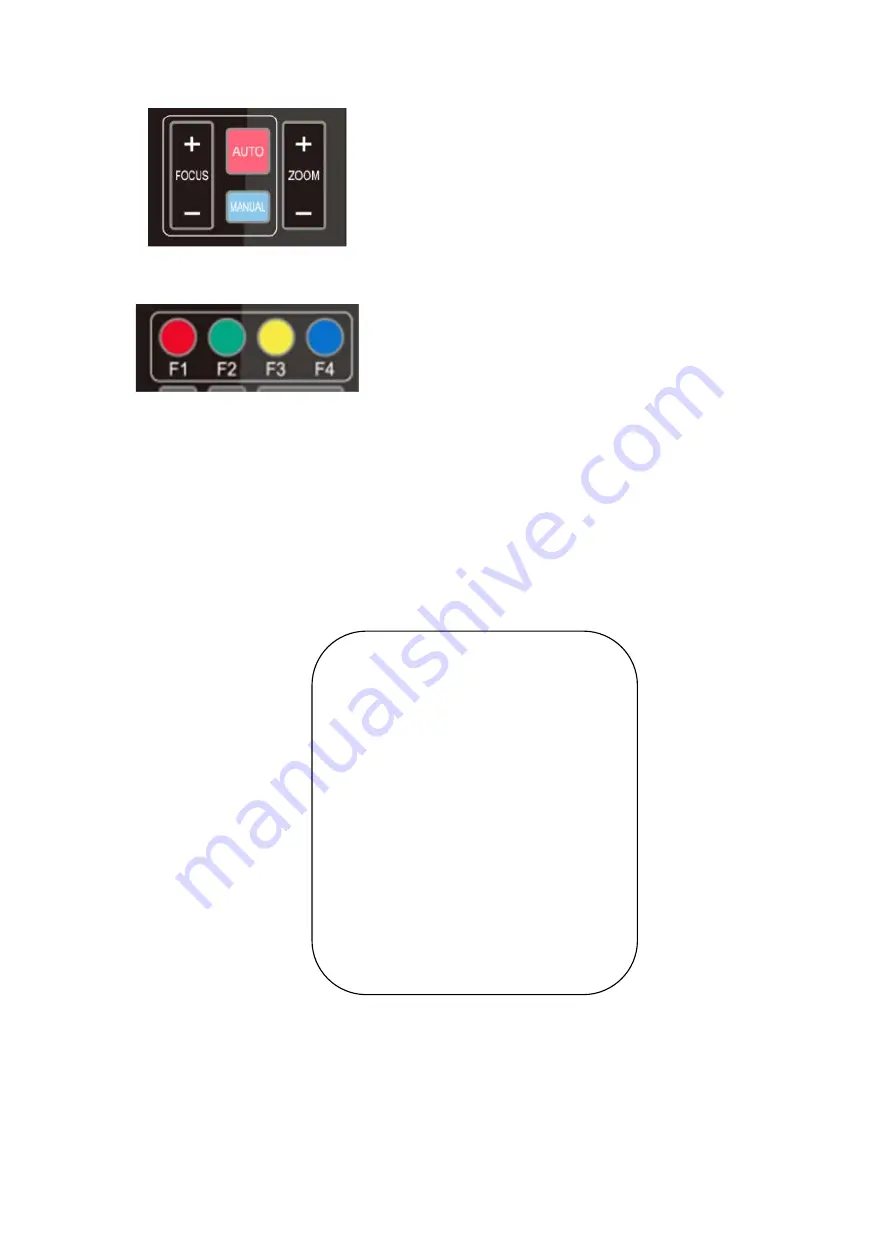
Focus + (near): Press

FOCUS +

  None 

Focus - (far): Press

FOCUS -

  None 

Auto focus: not supported      

Manual focus: not supported 


6) Camera Remote Control Address Setting 


*

+

【#】

+

F1

:Camera Address No.1   

*

+

【#】

+

F2

:Camera Address No.2 

*

+

【#】

+

F3

:Camera Address No.3   

*

+

【#】

+

F4

:Camera Address No.4 


3.2


Menu Introduction 

3.2.1 Main Menu 

Press 

MENU

  key under 

MJPG, YUY2, NV12 or H264 compression encoding format output

 to display the 

menu, using scroll arrow to point at or highlight the selected items. 


1)


Language 

1.


Language Setting

press 

← →

key to select Language


MENU


=================


Language


    English


Setup


Exposure


Color


Image


Noise Reduction


Version


Restore Default


[

↑↓

]Select [


]Change Value 


Summary of Contents for 4K-F4U3W

Page 1: ...Auto Framing 4K EPTZ Camera Prestel 4K F4U3W User Manual V1 0 ...

Page 2: ... with a mild detergent if needed Do not use strong or corrosive detergents to avoid scratching the lens and affecting the image 1 7 This product contains no parts which can be maintained by users themselves Any damage caused by dismantling the product by user without permission is not covered by warranty 2 Electrical Safety Installation and use of this product must strictly comply with local elect...

Page 3: ... 3 Accessory 4 2 2 Main Features 4 2 3 Technical Parameter 5 2 4 Interfaces Instruction 6 2 4 1 External Interface 6 3 Application Instruction 7 3 1 Remote Control 7 3 1 1 Keys Introduction 7 3 1 2 Applications 7 3 2 Menu Introduction 9 3 2 1 Main Menu 9 4 Maintenance and Troubleshooting 14 4 1 Camera Maintenance 14 4 2 Troubleshooting 14 5 Copyright Statement 14 ...

Page 4: ...ration 1 Product Installation Fix the device on LCD screen top of computer directly put it on desk or on tripod mounting 2 Connect camera via USB cable to computer video conference terminal or other USB input device log in the video conference software and select a video device to have image output 2 Product Overview 2 1 Product Introduction 2 1 1 Model Model No XX 100 Fixed Lens Figure 2 1 Produc...

Page 5: ... It has perfect functions and superior performance which employs advanced ISP processing algorithms so as to provide vivid images with evenly clear brightness strong color layering high resolution and fantastic color rendition Easy and convenient to install and maintain stable and reliable Ultra HD 4K Resolution 1 2 8 inch high quality CMOS sensor Resolution is up to 4K with frame rate up to 30fps...

Page 6: ...eter Model Camera Parameter Sensor 1 2 8 inch high quality 4K CMOS sensor Effective Pixels 8 28MP 16 9 Video Interface 1 Channel USB 3 0 output Type B Support audio signal output Audio input 2 Built in MIC pickup Video Format MJPG 3840 2160 30 2560 1440 30 1920 1080 30 1600 896 30 1280 720 30 1024 576 30 960 540 30 800 600 30 800 448 30 720 576 30 720 480 30 640 480 30 640 360 30 480 270 30 352 28...

Page 7: ...ameter Input Voltage 5V Input Current 1A max Power Consumption 5W max Stored Temperature 10 60 Stored Humidity 20 90 Working Temperature 10 50 Working Humidity 20 80 Dimension 180 mm 42 5 mm 46 3 mm Weight Around 0 3kg Working Environment Indoor Accessory User Manual USB 3 0 cable 2 4Interfaces Instruction 2 4 1 External Interface Figure 2 4 Wiring Diagram ...

Page 8: ...ress the number key 0 9 to clear preset positions 8 Pan Tilt Control Up press Down press Left press Right press Press and hold the up down left right key the pan tilt movements will keep running HOME Camera lens back to the middle position Enter next menu 9 BLC ON OFF Turn on or off the back light compensation 10 Menu Setting Enter exit the OSD menu or return to the previous menu 11 Camera Remote ...

Page 9: ...eased 3 Set and Clear Presets Save Preset press SET PRESET button and then press the number key 0 9 to set preset positions Note 10 presets via remote control Call Preset Press a number key 0 9 directly to call a preset position Note If the number key is not preset it is invalid Clear Preset press CLEAR PRESET button and then press the number key 0 9 to clear preset positions Note press the key th...

Page 10: ...a Address No 3 F4 Camera Address No 4 3 2Menu Introduction 3 2 1 Main Menu Press MENU key under MJPG YUY2 NV12 or H264 compression encoding format output to display the menu using scroll arrow to point at or highlight the selected items 1 Language 1 Language Setting press key to select Language MENU Language English Setup Exposure Color Image Noise Reduction Version Restore Default Select Change V...

Page 11: ...ME and enter the EXPOSURE SET as follows Mode Auto Manual Shutter priority and Brightness priority EV On Off only available in auto mode Compensation Level 7 7 only available in auto mode when EV is ON BLC ON OFF for options only available in auto mode Anti Flicker OFF 50Hz 60Hz for options only available in Auto Iris priority Brightness priority modes EXPOSURE Mode Auto EV OFF BLC OFF Flicker 50H...

Page 12: ...ority mode 4 Color Move the pointer to the COLOR in the Main Menu click the HOME and enter the COLOR sub menu as follow WB Mode Auto Manual One Push Specified color temperature Saturation 60 70 80 90 100 110 120 130 140 150 160 170 180 190 200 AWB Sensitivity high middle low only available in automatic mode Chroma 0 8 5 Image Move the pointer to the IMAGE in the Menu click the HOME and enter into ...

Page 13: ...se Reduction Move the pointer to the NOISE REDUCTION in the Menu click the HOME and enter the NOISE REDUCTION as follow 2D Noise Reduction Auto close 1 7 3D Noise Reduction Close 1 8 NOISE REDUCTION NR 2D OFF NR 3D 4 Select Change Value IMAGE Brightness 7 Contrast 7 Sharpness 5 Flip H OFF Flip V OFF B W Mode Color Gamma Default Low Light Mode Close Select Change Value ...

Page 14: ...or style and video format cannot be restored to factory default Note If the address of former remoter is not 1 but another one from 2 3 4 the corresponding camera address will restore to 1 when all parameters or system parameters are restored User should change the remoter address to be 1 press No 1 according to the camera so to get normal operation VERSION Camcra Version 1 0 0 2020 12 16 Select C...

Page 15: ... the machine could do self check after restarted c Restart the computer to check whether it is normal d Check whether the video output cable or video display is normal f Check whether the camera is well recognized by PC 2 No image sometimes a Check the USB cable quality and whether connected well 5 Copyright Statement All the contents in this manual and its copyright are owned by the company No on...

Reviews: