3
Connecting to a Computer
3.1
Mapping your PS49 Controls in Studio One
PS49
Owner’s Manual
5
3
Connecting to a Computer
No driver installation is required for your PS49 USB MIDI Keyboard. Simply connect
it to a free USB port on your computer. If you do not have enough free USB
connections for your PS49, connect it to your computer using a powered USB hub.
You PS49 is preconfigured for use in Studio One so no
setup is required to use it as a controller.
3.1
Mapping your PS49 Controls in Studio One
The controls on your PS49 can be easily mapped to control any plug-
in using Studio One’s innovative Control Link system. You can map an
individual controller to many different functions in many different plug-ins.
The controller will follow the plug-in that is currently active. For example,
your C1 control knob can be mapped both to the Attack control of a
compressor plug-in and to the Feedback control for a delay plug-in.
Complete information about Studio One’s Control Link system can be found in
your Studio One user manual. This is a brief tutorial to get you started. By default,
the four controller knobs and the fader on your PS49 are already setup for Control
Link. All you have to do is pick the plug-in parameters you want them to control.
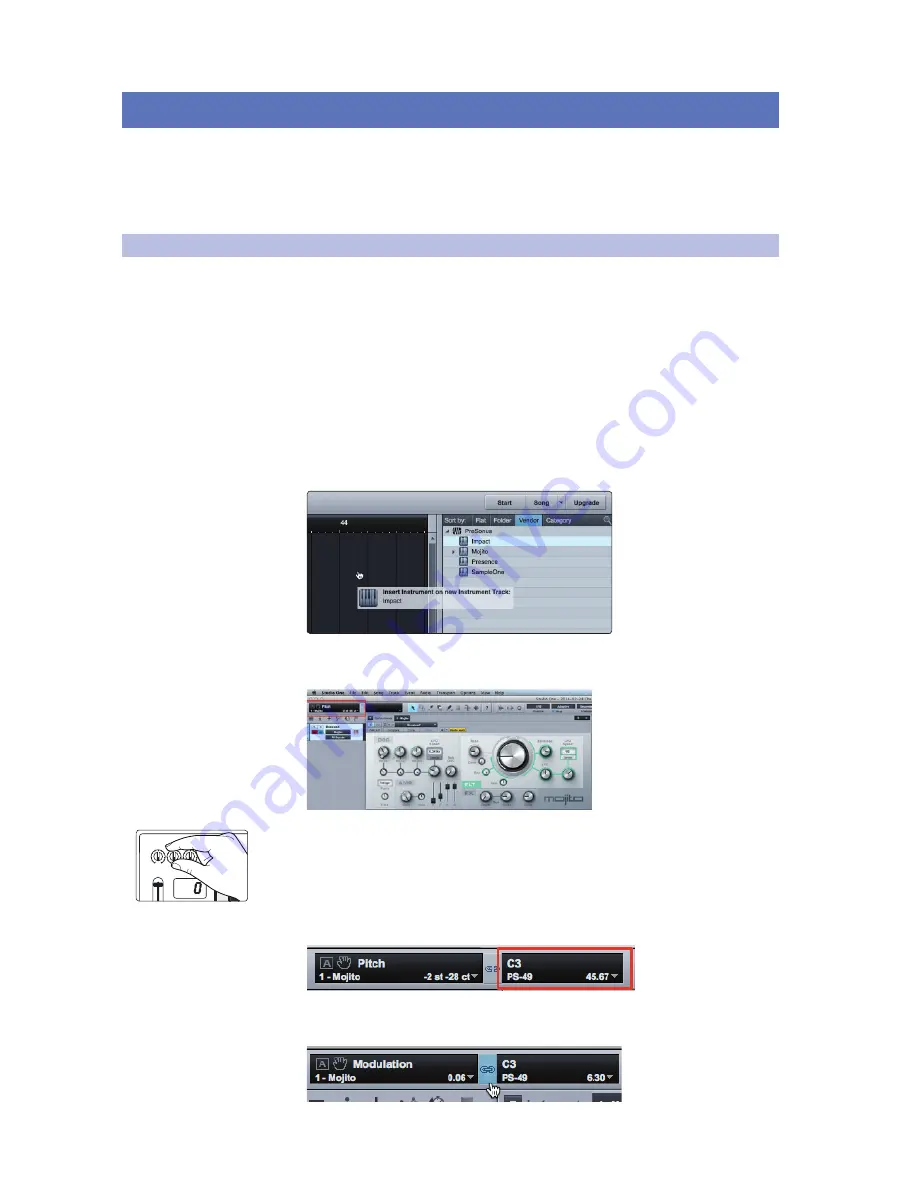
1. Drag-and-drop the virtual instrument or effects plug-in you
want your PS49 to control into your Studio One session.
2. Using your mouse, move the parameter you want your PS49 to control. You
will see it displayed in the upper left-hand corner of the Arrange window.
3. Move the PS49 control you want to assign to that parameter.
4. You will see the control displayed next to the parameter in
the upper left-hand corner of the Arrange window.
5. Click the Link button between the parameter and control displays. You can
now use the control on your PS49 to move the parameter in Studio One.
Summary of Contents for Music Creation Suite
Page 41: ...PS49 USB MIDI Keyboard Owner s Manual www presonus com English ...
Page 56: ......


