background image

GETTING STARTED 


9

 | 

PreSonus 2009


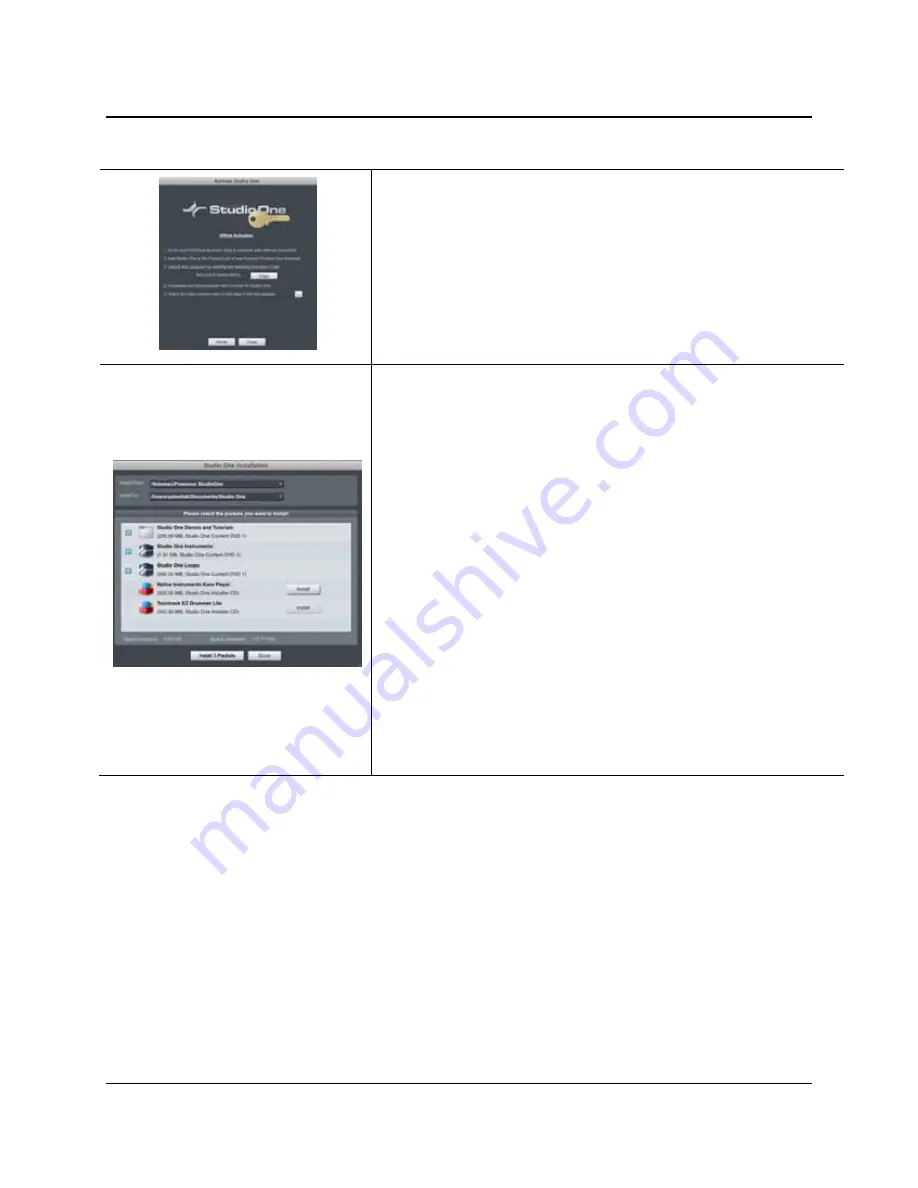
Activating Studio One Artist Offline 

 
Once you have created a user account, launch Studio One Artist. From the 
Activate Studio One Menu, click on the Activate Offline link. Follow the 
instructions to log in to your previously created user account, register the 
product, and obtain a license file.  
 
Next, copy the license file to the computer on which Studio One has been 
installed, and locate the license file as instructed in the Activate Studio One 
menu. The activation process is now complete. 


Installing Bundled Content for Studio One Artist 


Studio One Artist comes bundled with an array of demo and tutorial material, 
sampled instruments, loops, samples, and unique third-party content. The Studio 
One Artist bundle includes all that you need to begin producing music.  
 
Upon completing the Studio One Artist installation and activation process, the 
Studio One Content Installer will appear. If it does not appear, navigate to 
Help/Studio One Installation.  
 
At the top of the installation menu, select the source from which the content will 
be installed, as well as the location where you wish to install the content. The 
source of the content will be the same DVD from which you installed Studio One 
Artist. By default, Studio One Artist will point to your DVD drive as the content 
source. Listed in the installation menu are separate entries for each available 
item. Click in the checkbox next to each item you wish to install, then click on the 
Install Packets button at the bottom left of the menu to install the selected 
content.  
  
When finished installing content, click on the Done button to exit the menu. 
  
Studio One Artist content can be installed at any time by accessing the 
Help/Studio One Installation menu. If you choose not to install any portion of the 
content, you can install it at a later time. 


2.2.2 Enabling the FireStudio Project Driver 

Studio One and Studio One Artist were designed with PreSonus interfaces in mind. Your FireStudio Project 
is already integrated into Studio One Artist, so setup is quick and easy. When Studio One Artist is launched, 
by default you will be taken to the Start page. On this page, you will find document-management and device-
configuration controls, as well as a customizable artist profile, a news feed, and links to demos and tutorials 
from PreSonus. If you have an Internet connection on your computer, these links will be updated as new 
tutorials become available on the PreSonus Web site. 
 
Complete information on all aspects of Studio One Artist is available in the Reference Manual PDF located 
on the Studio One Artist Installation disc. The information in this manual covers only the most basic aspects 
of Studio One Artist and is intended to get you set up and recording as quickly as possible.


Summary of Contents for Firestudio Project

Page 1: ...ersion 2 0 60 20 20 0 60 20 20 0 60 20 20 0 60 20 20 0 60 20 20 0 60 30 10 0 60 30 10 0 10 80 11 1 1 2 3 4 60 20 20 0 5 6 7 8 Phones Main Mic Instrument 1 2 Mic Line 3 4 5 6 7 8 FIRESTUDIO 10X10 FireW...

Page 2: ...at any time without prior notice This warranty does not cover claims for damage due to abuse neglect alteration or attempted repair by unauthorized personnel and is limited to failures arising during...

Page 3: ...and will extend the life of your product Protect the power supply and its cord from being walked on wheeled over or pinched If the power supply becomes damaged purchase a new one Unplug your FireStud...

Page 4: ...5 Creating a New Song 14 2 2 6 Cue Mix and the FireStudio Project 17 2 3 Sample Hookup Diagrams 20 2 3 1 Recording a Band with a FireStudio Project 20 2 3 2 Using Multiple FireStudio Projects with the...

Page 5: ......

Page 6: ...duct improvement and we value your suggestions highly We encourage you to contact us at 225 216 7887 with questions or comments about your PreSonus FireStudio Project We believe the best way to achiev...

Page 7: ...OS X and Windows compatible The FireStudio Project includes PreSonus Studio One Artist recording software which comes with over 4 GB of plug ins loops and samples giving you everything you need for m...

Page 8: ...FireStudio Universal driver installation disc o Studio One Artist installation DVD PreSonus warranty card 60 20 20 0 60 20 20 0 60 20 20 0 60 20 20 0 60 20 20 0 60 30 10 0 60 30 10 0 10 80 11 1 1 2 3...

Page 9: ...ssor or better 2 GB or more RAM DVD drive Windows PC o Operating Systems Windows XP or Vista o Hardware Minimum Intel Pentium 4 1 6 GHz processor or AMD Athlon 64 Turion 1 GB RAM DVD drive Recommended...

Page 10: ...ity alerts click Install this driver software anyway Vista or Continue anyway XP At the end of the installation you will be prompted to reboot your computer to complete the installation Click Finish t...

Page 11: ...To Install Studio One Artist insert your Studio One Artist installation DVD into your computer s DVD drive PC Users Launch the Studio One Artist installer and follow the onscreen instructions Mac User...

Page 12: ...rive as the content source Listed in the installation menu are separate entries for each available item Click in the checkbox next to each item you wish to install then click on the Install Packets bu...

Page 13: ...2 4 2 2 3 Configuring Your MIDI Devices From the External Devices window in Studio One Artist you can configure your MIDI keyboard controller sound modules and control surfaces This section will take...

Page 14: ...nput from which Studio One Artist will receive MIDI data In this case choose Project MIDI In the Send To drop down menu select the MIDI interface output from which Studio One Artist will send MIDI dat...

Page 15: ...y entering the manufacturer and device names Specify which MIDI channels will be used to communicate with this keyboard For most purposes you should select all MIDI channels If you are unsure of which...

Page 16: ...pty session 3 To begin a new Song select Empty Song from the Templates list At this point you should give your Song a name and select your preferred sample rate and bit depth You can also determine th...

Page 17: ...tudio Project At this time you can add the number of output buses to which you would like to have access and can give them custom names In the lower right corner you will see the Audition select menu...

Page 18: ...m without clipping Connect a set of headphones to the FireStudio Project headphone output You may also wish to connect monitors to the FireStudio Project s Main Outs You are now ready to record For co...

Page 19: ...l editor depending on what type of track is selected The Mix button opens and closes the mixer window The Browse button opens the Browser window which displays all of the available virtual instruments...

Page 20: ...t bus and enable Cue Mix To begin create a new Song open the Song Song Setup Click on the Audio I O Setup icon switch to the Outputs tab and add a new Stereo Output channel 2 Specify that this output...

Page 21: ...At any time you can lock the cue mix level and pan back to the channel settings by clicking on the Lock to Channel button Zero Latency Switch Enables Zero Latency Monitoring for FireStudio Project Inp...

Page 22: ...will hear the live zero latency input straight from your FireStudio Project as opposed to through software As such you will no longer hear the effects of any inserts on the channel However you will st...

Page 23: ...icrophones to the FireStudio Project along with S PDIF digital input to record a full band This makes recording extremely easy All you need are microphones cables and monitor speakers This is a typica...

Page 24: ...ch unit are then connected to the two Mix inputs on an HP60 The General Purpose outputs are shown as connected to the External input on each channel of the HP60 In this way each musician can create a...

Page 25: ...hardware mixer so most of the features may already be familiar to you From this mixer you can create a zero latency mix for each output and can route playback streams from your host application 3 1 1...

Page 26: ...on Mode Changes How the FireStudio Project Driver s Buffer Size is Set Normal Mode Input and Output buffers are both identical to the Buffer Size setting Safe Modes 1 3 Increases the Output buffer siz...

Page 27: ...l Control application Periodically a driver update will require that the firmware on your FireStudio Project be updated Whenever you install an update for the Universal Control or add a new FireStudio...

Page 28: ...will remain in the foreground when other applications are active rather than being in the background behind the current application s window 3 1 3 WDM Settings PC only Like the rest of the FireStudio...

Page 29: ...if you want to route a track in your DAW to a physical output on your interface you assign this output in your host application Because the FireStudio Project Device window provides much more flexibl...

Page 30: ...Solo Clear Clears All Active Channel Mutes or Solos The Master Mute and Solo Clear buttons are only active when a channel s mute or solo button is active Mixer Section Channel Pan Sliders Moves the Ch...

Page 31: ...uting a channel silences the channel s audio Soloing a channel mutes all other unsoloed channels Input Selectors Changes the Source of the FireStudio Project Mixer Channels Choosing No Input will hide...

Page 32: ...tton activates Phantom power for channels 1 and 2 3 and 4 5 and 6 and 7 and 8 XLR connector wiring for phantom power Pin 1 Ground Pin 2 48V Pin 3 48V o 14 dBu Headroom The FireStudio Project microphon...

Page 33: ...These knobs provide the following gain structure o XLR Microphone Inputs 54 dB of variable gain 4 dB to 50 dB o TS Instrument Hi Z Inputs 54 dB of variable gain 4 dB to 50 dB o TRS Line Inputs 32 dB o...

Page 34: ...This is where you connect your headphones to the FireStudio Project Red Blue Power Sync Light This light is a clock source sync indicator It lets you know if your unit is receiving word clock correct...

Page 35: ...dio devices The S PDIF standard allows two channels of audio to be transmitted at rates up to 24 bit 96 kHz The S PDIF input also allows the FireStudio Project to receive word clock You should select...

Page 36: ...y take precedence over the corresponding Mic Instrument input on the front of the FireStudio Project This means that if a cable is plugged into the channel 1 return input on the rear of the FireStudio...

Page 37: ...ices or a limit of 52 inputs and outputs whichever comes first to any one system at a time However the ability to use more than two units simultaneously depends on your computer s specifications and o...

Page 38: ...is it is important to cascade your FireStudio interfaces in the proper order from your computer so that you know which input belongs to which unit Please note The order of the inputs and outputs in yo...

Page 39: ...the case ensure your FireStudio Project and external digital device are properly synced Please consult your external device s user manual for details on syncing it to your FireStudio Project Flashing...

Page 40: ...these models still employ a chipset in the above list prior to purchasing At the time of the publication of this manual PreSonus only recommends the following Express cards ADS Pyro 1394a StarTech EC...

Page 41: ...ance Balanced 10 K THD N unwtd 1 kHz 4 dBu Output Unity Gain 0 003 S N Ratio Unity Gain unwtd Ref 4 dBu 20 Hz to 22 kHz 101 dB Gain Control Range 1 dB 16 dB to 16 dB Maximum Input Level Unity Gain 1 k...

Reviews: