background image

2.1 Level-Setting 

Procedure

O

ver

view

Getting Star

te

d

Getting Star

te

d

2

2

 Getting 

Started

Before you begin, here are a few general rules of thumb:


Always turn down the Main, Control Room, and Phones 
level controls before making connections.


Before plugging or unplugging a microphone while other channels 
are active, mute the channel to which you are connecting.


Channel levels should be set on or near the “U” mark whenever possible. The “U” 
indicates unity gain, meaning the signal is neither boosted nor attenuated.


Do not allow your inputs to clip. Watch the signal indicators and make sure 
the red Clip indication illuminates rarely, if ever. Clipping (overloading) 
the inputs can result in digital distortion, which sounds terrible.

Warning:

 Engaging phantom power or connecting sources without muting the channels 

can result in a very loud pop that can potentially damage your sound equipment. 
Always mute your channels before engaging Phantom power or connecting sources.

P.A. and studio equipment should be powered on in the following order:


Sound sources (keyboards, direct boxes, microphones, 
etc.) connected to the StudioLive AR inputs


StudioLive AR mixer


Computer (if applicable)


Power amplifiers or powered monitors

When it’s time to power down, your system should be turned off in the reverse 
order. Now that you know what not to do, let’s get some audio going!

2.1 

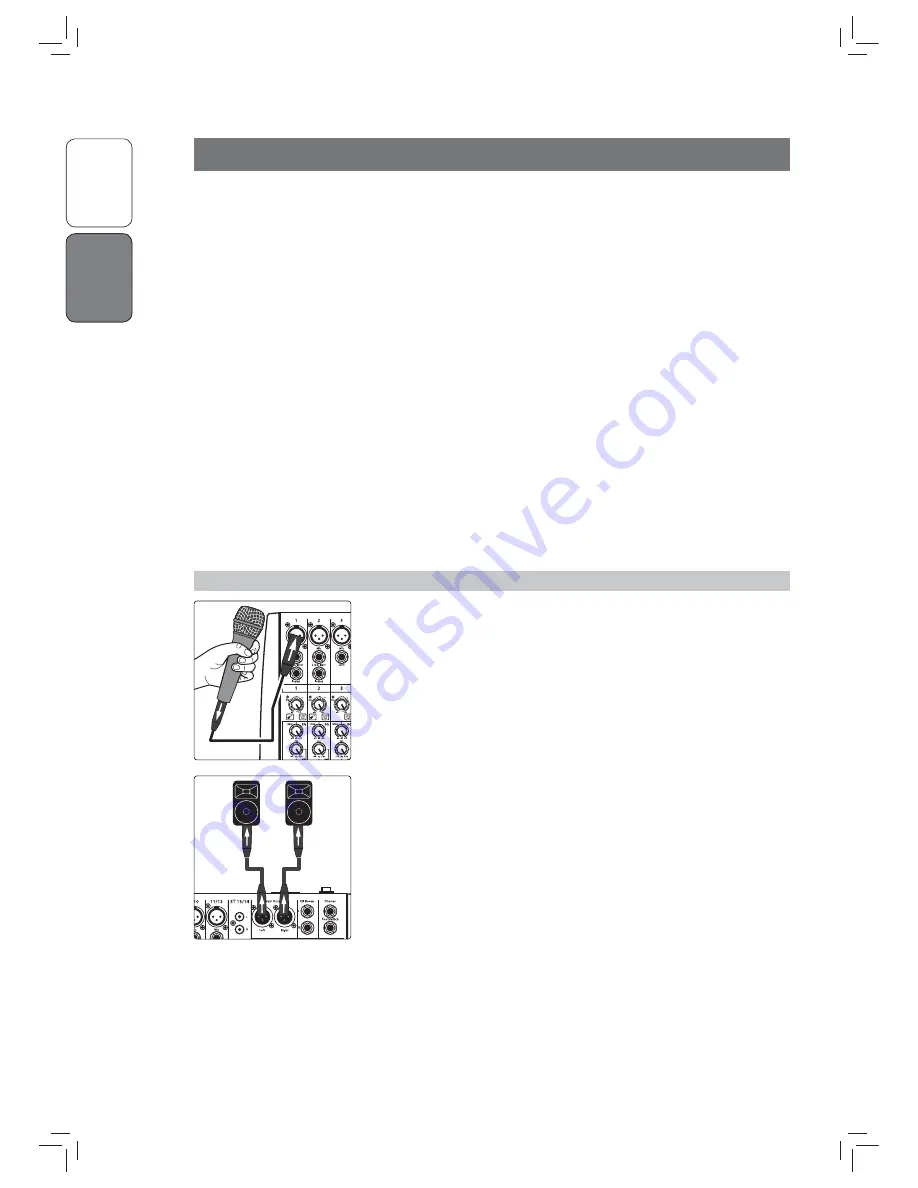
Level-Setting Procedure

1.   Grab a microphone and a mic cable and plug them into the  

Channel 1 mic input. 


2.  Connect the Main outputs of your StudioLive AR to your power amplifier or 

powered monitors.

3.  Bring down all the level controls on your StudioLive AR to the lowest setting.

4.  Make sure that the Mic/Line knob on Channel 1 is 

turned all the way counter-clockwise.

5.  Plug your StudioLive AR-series mixer into a power outlet and turn it on. 


Summary of Contents for AR-Series

Page 1: ...Overview Getting Started English Fran ais Espa ol Deutsch StudioLive AR Series Hybrid Digital Analog Production Mixers Quick Start Guide www presonus com...

Page 2: ...s 1 Overview 1 1 1 What is in the Box 1 1 2 What is in your My PreSonus Account 1 2 Getting Started 2 2 1 Level Setting Procedure 2 2 2 Pairing a Bluetooth Device 4 2 3 SD Recording 4 2 4 Typical Band...

Page 3: ...wing software available for download in your user account StudioLive AR Series Owners Manual StudioLive AR Series Software Reference Manual Capture multitrack recording software Studio One Artist DAW...

Page 4: ...channels can result in a very loud pop that can potentially damage your sound equipment Always mute your channels before engaging Phantom power or connecting sources P A and studio equipment should b...

Page 5: ...ately the same volume you expect during the performance 9 Turn the trim knob on Channel 1 clockwise while watching the signal indicator Adjust the Channel 1 trim knob until the signal clip indicator i...

Page 6: ...times per second while the Bluetooth module detects connected devices and will illuminate solid when it is successfully paired 2 3 SD Recording This section explains on how to record the main mix as a...

Page 7: ...e Overview Getting Started English Fran ais Espa ol Deutsch Getting Started 5 2 4 Typical Band Setup Diagram Front of house speakers Floor wedges Keyboard Lead vocal Drum kit Bass Electric guitar amp...

Page 8: ...occasionally Break up red sh into bite size chunks and stir in Add pepper or hot sauce to taste Do not cover 7 Serve over rice Serves 6 8 While not one of Southeast Louisiana s more famous dishes Red...

Page 9: ...Part 70 22000031 B 18011 Grand Bay Ct Baton Rouge Louisiana 70809 USA 1 225 216 7887 www presonus com StudioLive AR Series Hybrid Digital Analog Production Mixers Owner s Manual...

Page 10: ...dio andTelevision Interference If these symbols are marked on the product the device complies as follows Any Changes or modi cations not expressly approved by the party responsible for compliance coul...

Reviews: