27
English
d)
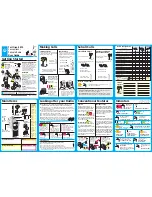
To install your equipment, use the cradle (
1
) and the self-tapping screws [
2
]
provided (drilling diameter 3.2 mm). Take care not to damage the vehicle’s
electrical system while drilling the dash board.
e)
Do not forget to insert the rubber joints [
3
] between the CB and its support as
these have a shock-absorbing effect which permits gentle orientation and
tightening of the set.
f)
Choose where to place the microphone support and remember that the
microphone cord must stretch to the driver without interfering with the controls
of the vehicle.
-
N.B. :
As the transceiver has a frontal microphone socket, it can be set into
the dash board. In this case, you will need to add an external loud speaker
to improve the sound quality of communications (connector EXT.SP situated
on the back panel:
C
). Ask your dealer for advice on mounting your CB radio.
MOUNTING DIAGRAM
Welcome to the world of the new generation of CB ra-
dios. The new PRESIDENT range gives you access to top
performance CB equipment. With the use of up-to-date
technology, which guarantees unprecedented quality,
your PRESIDENT JACKSON II ASC Classic is a new step
in personal communication and is the surest choice for
the most demanding of professional CB radio users. To
ensure that you make the most of all its capacities, we
advise you to read carefully this manual before installing
and using your PRESIDENT JACKSON II ASC Classic.
A) INSTALLATION
1) WHERE AND HOW TO MOUNT YOUR MOBILE CB RADIO
a)
You should choose the most appropriate setting from a simple and practical
point of view.
b)
Your CB radio should not interfere with the driver or the passengers.
c)
Remember to provide for the passing and protection of different wires (e.g.
power, antenna, accessory cabling) so that they do not in any way interfere
with the driving of the vehicle.


