Center Mount
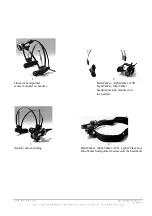
You can also mount the headpointer on the center of the headset. (See the illustration above.) To do this
you will use the small center mount mounting plate and and the small mounting screw that are part of
your headset kit. You will need a Phillips screwdriver.
Find the small center mount mounting plate and the small black screw. The mounting plate has two small
holes in it.
Place the mounting plate over the front metal band on the headset. (You may have to use your fingers to
pry the edges of the mounting plate apart; or, you may be able to just push it onto the headset so that
one side is above and one side below the metal band.) It doesn't matter which direction the mounting
plate faces. Place the black screw into the holes in the mounting plate from the underside. The shaft of
the screw will now be poking up through the holes in the mounting plate.
Find the clamp. Place the hole in the clamp on top of the mounting screw. Using the Phillips
screwdriver, tighten the black screw until the clamp and the mounting plate are secure on the metal band.
You can also attach the cable-holder now. The cable-holder is designed to work with the center-mount.
It holds the cable and helps to remove any strain on the cable. It also keeps the cable from hanging
awkwardly around the user's head or face.
Place the headpointer cable in the holder then place the cable-holder over the back hole in one of the
earpieces. Take the remaining small screw, and, from the back of the earpiece (the side that fits against
the head), look for the spot where there is a small piece of rubber missing. Push the screw through the
hole in this spot. Place the small nut over the end of the screw and tighten the nut. You can see a picture
of the cable-holder in the picture on the facing page.


