


track progress
ripping
CD RIP
SUMMARY
The file has existed
Replace it or not?
track01 04:36
track02 03:34
total progress
OK
CANCEL
Selected track
CANCEL
track progress
ripping
CD RIP
SUMMARY
now ripping
track 01/02
Selected track
track01 50%
track02 03:34
total progress
speed Normal
OPTIONS
CD RIP
SUMMARY
selected track 2
selected time 08:10
start
exit
select all
select none
track01 04:36
track02 03:34
track03 05:01
track04 03:26
track05 04:46
track06 03:32
track07 04:00
track08 03:08
bitrate 128kbps
Create ID3 Yes
device USB
TRACK
Page 20
Basic Playback
CD ripping is a process of copying audio from a CD/HDCD disc and saving the audio
content into the compressed digital audio format MP3.
With this function, you can copy the tracks of a CD/HDCD disc to the connected USB drive.
Place a CD or HDCD disc in the disc tray and insert a USB drive into the player. Press
[RIPPING] on the remote control to display the CD Ripping menu. Use the direction keys
to navigate the cursor in the menu.
CD RIPPING
In the
Track
window, all the tracks of the disc and their
playback time are listed. Highlight the track that you want
to copy to the connected storage device, then press
[ENTER] to make selection; highlight it again and press
[ENTER] to cancel the selection. Highlight Select all and
press [ENTER] to select all the tracks in the disc. Highlight
Select none
and press [ENTER] to cancel all the selection
of tracks.
In the
Summary
window, you can check the information of
the number of the selected tracks and the total playback
time of selected tracks.
In the
Options
window, set your desired ripping speed, ripping bitrate, set
Created ID3
to
YES
to do ripping along with the ID3 information if available or
NO
to disable this function.
Highlight these setting entries respectively, then press [ENTER] to switch the options.
After you finished setting, move the highlight to
START
and press [ENTER] to begin the
ripping procedure.
If you want to cancel, move the highlight to
EXIT
, then press [ENTER] or just press
[RIPPING] on the remote control to exit the procedure.
After the CD ripping procedure begins, the system will
proceed to the next menu page.
In
Ripping
window, there are a track progress bar and a
total progress bar showing how much the ripping
procedure for the current track has been done and how
much the total task has been finished respectively.
During ripping, the option
CANCEL
is highlighted, so
whenever you want to cancel ripping, just press [ENTER].
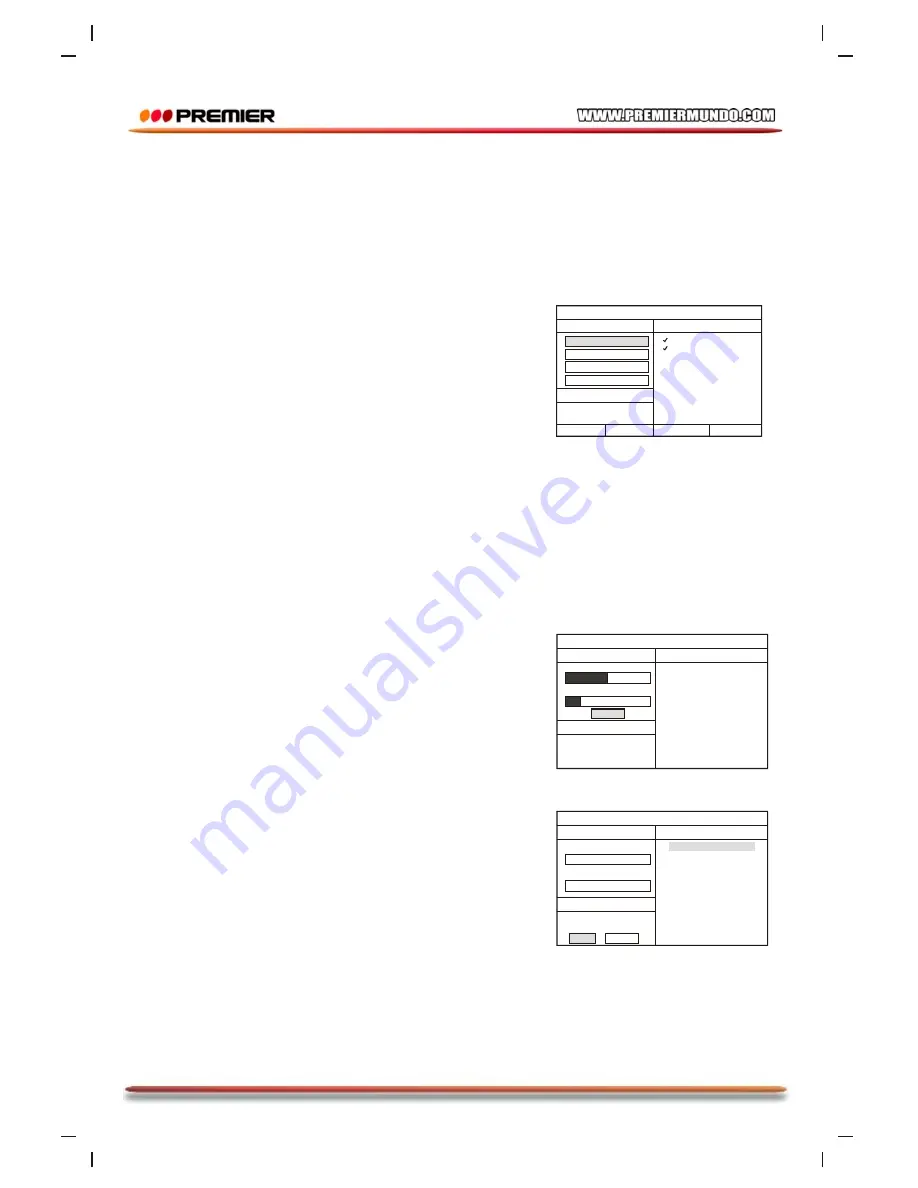
The ripped tracks from CD or HDCD discs will be stored in
a folder created automatically by the system in the
connected USB drive. If the selected track shares the
same file name with the existing one in that folder, the
system will pop up a dialogue box to warn you of that.
Press [ENTER] to continue and replace the existing one
with the selected track. Select option
Cancel
to quit. And
you can choose to create another folder in the connected
USB drive for ripping this track.
Create a new folder for ripping
If you want to create another folder in the connected USB
drive to save the ripped tracks, you need to open the disc
tray and then close it. The tracks ripped afterwards will be
saved in a newly created folder.
Summary of Contents for SX-4659DSD
Page 22: ...Pagina 21 DIAGRAMA DE CIRCUITOS...
Page 23: ...Pagina 22...
Page 24: ...Pagina 23...
Page 26: ......
Page 49: ...Page 23...
Page 50: ...Page 24...
Page 51: ...Page 25...


