PD6600 Series Loop-Powered Process Meters
Instruction Manual
22
Setup and Programming
The meter is factory calibrated prior to shipment to display
0.00 to 100.00, which corresponds to the 4-20 mA input.
The calibration equipment is traceable to NIST standards.
Overview
There are no jumpers to set; setup and programming
is done through the front panel buttons or PC-based
software.
The meter may be powered via the micro-USB
connection located on the right side of the meter for
the purposes of programming only. The backlight will
not work while the meter is powered via the USB
connection.
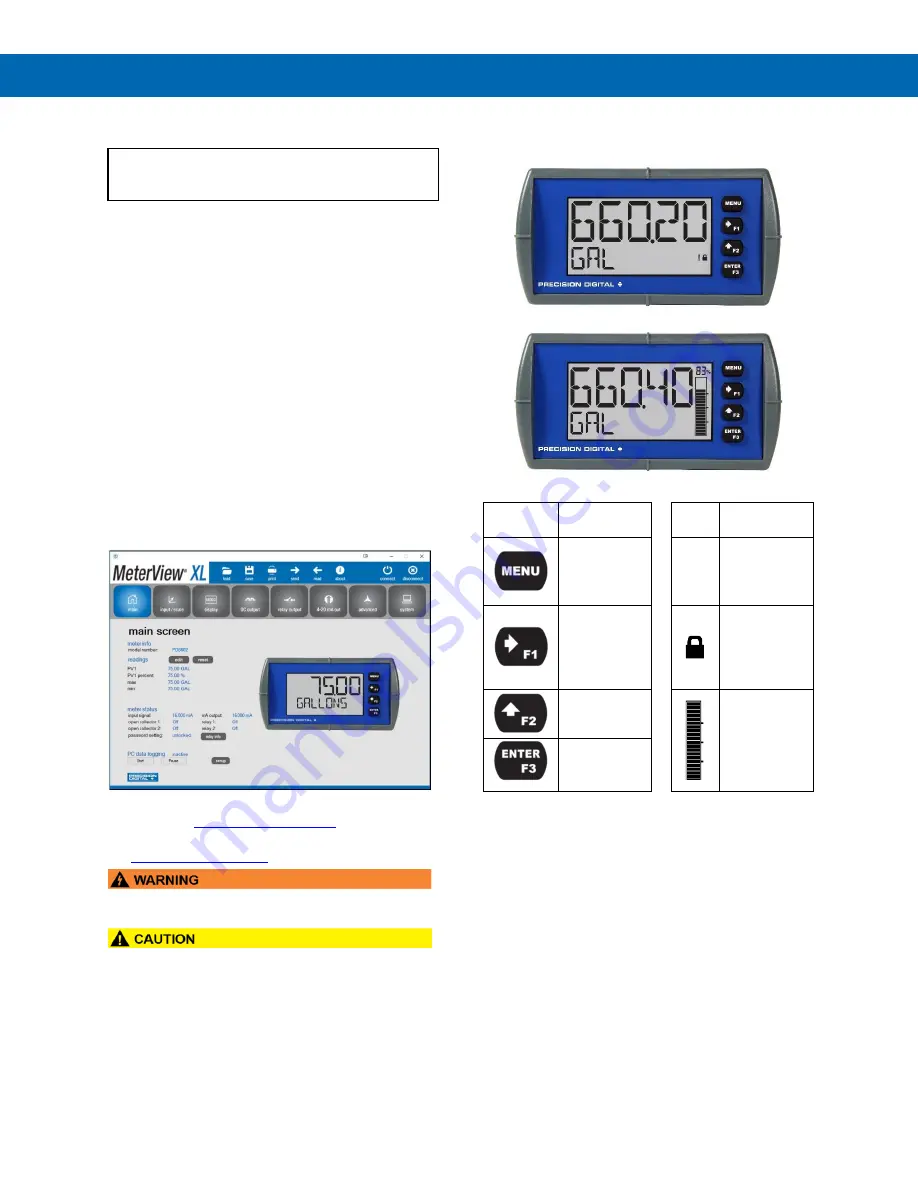
MeterView XL Programming
Software
The fastest and easiest way to program the meter is
using the free Meterview XL programming software.
This software greatly simplifies the programming pro-
cess and allows the user to save configuration files for
later use.
The meter connects to the PC via a provided micro-
USB cable and is powered by the USB connection, so
no additional power is needed during programming.
To download the MeterView XL programming
software, visit
For detailed programming software instructions,
see
•
The meter should only be connected to a
computer while it is located in a safe area.
•
Care should be exercised to avoid ground loops
when connecting the USB to an active loop (e.g.
power supply, transmitter, loop-powered meter,
etc.). It is recommended to connect the (mA+)
terminal of the meter to the (-) terminal of a two-
wire transmitter and the (mA-) to the (+) of the
next device in the loop or to the (-) terminal of the
power supply.
Front Panel Buttons and Status
LCD Indicators
PD6602/PD6606
PD6604/PD6608
Button
Symbol
Description
LCD
Status
Menu
!
Alarm
Indicator
(PD6602/6
Only)
Right-
Arrow/F1
Password
Protection
Indicator
(PD6602/6
Only)
Up-
Arrow/F2
PV Bargraph
(PD6604/8
Only)
Enter/F3
1. Press the
Menu
button to enter or exit the
Programming Mode at any time.
2. Press or hold the
Right-Arrow
button to
scroll forward through the menus, select
digits during numeric programming, select
characters during text programming, or
decrement the value of a digit or character
selected with the
Up-Arrow
button.
3. Press and hold the
Right-Arrow
button to
zero or clear digits/characters while in data-
entry mode.
4. Press or hold the
Up-Arrow
button to scroll
backwards through the menus or to
increment the value of a digit or character.
5. Press the
Enter
button to access a menu or
to accept a setting or programmed
digit/character value.


