background image

U250 – Traveling Disk Series


                User’s 

manual


Page 5 


Main Features 
 

DiskSafe Feature 

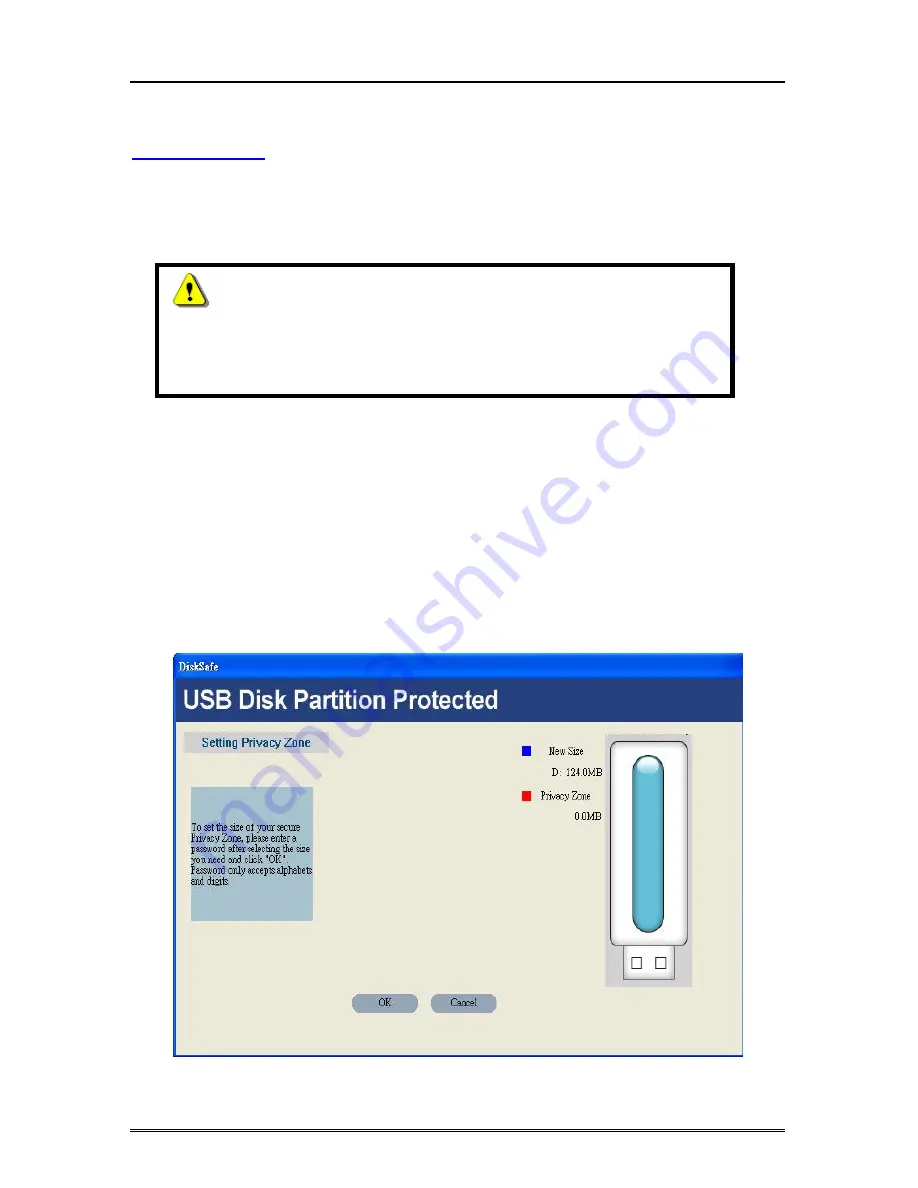
A. Creating the Privacy Area 


!                                                                                           

When you create your Privacy Zone, the Hi-Speed USB Flash Disk is 
formatted and ALL data will be lost. Please back up your files before 
you create your Privacy Zone.


1.  Please select the removable disk drive that was assigned to your Hi-Speed USB 

FlashDisk, and double click the DiskSafe software icon. 

2.  After you read the DiskSafe Welcome window, move the Hi-Speed USB Flash Disk 

slide bar (up or down) to set the capacity of your secure Privacy area. The secured 
Privacy area will be shaded red, and the unprotected public area will be shaded blue.   


Summary of Contents for Traveling Disk U250

Page 1: ...Hi Speed USB Flash Disk USB2 0 Storage User Manual Version A01 Last updated 2005 10 03 Copyright C 2005 Power Quotient International CO Ltd All Rights ...

Page 2: ...Revision History Rev no DATA DESCRIPTION A01 2005 10 03 First edition issued ...

Page 3: ......

Page 4: ......

Page 5: ......

Page 6: ......

Page 7: ......

Page 8: ... to use Hi Speed USB Flash Disk 2 A Plug Hi Speed USB Flash Disk 2 B Read and Write data file 3 C Unplug Hi Speed USB Flash Disk 3 Main Features 5 DiskSafe Feature 4 A Create the Privacy Area 5 B Using the Privacy Area 6 C Change Password 8 D Change the capacity of Privacy Area 10 E Security Feature 11 ...

Page 9: ...hat instantly becomes essential lifestyle accessory A Features Full Compliance with the USB Specification v2 0 and v1 1 Different capacity 256MB 512MB and 1GB High performance in write and read speed Plug Play connection No extra power supply is needed Support USB Bus Power The data remains up to 10 years No driver is needed in Windows ME 2000 XP MAC 9 X or above Windows 98 requires a driver B Sys...

Page 10: ...ash Disk you just need to plug it into your computer s USB port Windows ME 2000 XP and above versions can support the USB Mass Storage driver Hi Speed USB Flash Disk will be automatically detected and running well If you are running Windows 98 you will need to install the driver You can download the 98 driver from WWW RITEK COM Then select Install Remove Driver to start installation A Plug Hi Spee...

Page 11: ...procedure You can find a safe removal icon in your computer s notification area Double click the safe removal icon the Unplug or Eject Hardware window will pop up You can select the device you want to remove Then click the Stop button After that you may unplug the device from the USB port of your computer Caution Do not unplug or remove the device if the read write LED of the Hi Speed USB Flash Di...

Page 12: ...U250 Traveling Disk Series User s manual Page 4 ...

Page 13: ... your files before you create your Privacy Zone 1 Please select the removable disk drive that was assigned to your Hi Speed USB FlashDisk and double click the DiskSafe software icon 2 After you read the DiskSafe Welcome window move the Hi Speed USB Flash Disk slide bar up or down to set the capacity of your secure Privacy area The secured Privacy area will be shaded red and the unprotected public ...

Page 14: ...he following information and click OK A New Password required B Confirm Password required C Hint optional 4 The windows will show Password changed Device will lock automatically after remove from USB port Please click OK to continue 5 Setup password success please re plug Hi Speed USB Flash Disk ...

Page 15: ...rea 1 After creating a Privacy Area DisSafe automatically prompts you to login Please enter your password and click OK 2 If you enter the wrong password an error message will show up If you forget the password click Hint to display the hint field in DiskSafe login Window ...

Page 16: ... you remove the device Caution Hi Speed USB Flash Disk will be formatted automatically after six incorrect attempts and ALL data will be lost C Change Password Change Password Button 1 To change the password please enter your password and click Setting The Window will show All the data in the disk will be destroyed if you do not want so please close it ...

Page 17: ...box is displayed enter the following data and click OK A Password required B New Password required C Confirm Password required D Hint optional 3 The window will show Password changed Please click OK to complete the process The device will lock automatically after remove from USB port ...

Page 18: ...anging the capacity of Privacy Area will format Hi Speed USB FlasDisk that will cause ALL privacy and non privacy data lost Please backup your data first before setting the secured Privacy Area Change the capacity of Secured Privacy Area 1 Enter your password and click Setting to login DiskSafe window ...

Page 19: ...ide bar to set the capacity of your Privacy Area A Password required B New Password required C Confirm Password required D Hint optional 3 Click OK The DiskSafe Format Warning window is displayed 4 Click OK to reformat the Hi Speed USB Flash Disk Remove the Privacy Area 1 Follow the steps 1 to 2 above 2 Set the capacity of Privacy Zone to 0 using the slide bar with your password 3 Click OK the win...

Page 20: ...tempts IMPORTANT When using Hi Speed USB Flash Disk with the DiskSafe application program only ONE Hi Speed USB Flash Disk is allowed at once DO NOT PLUG IN TWO OR MORE HI SPEED USB FLASH DISK AT THE SAME TIME Windows 2000 User Since Windows 2000 only can support ONE removable disk drive Please install Windows Service Pack 3 or above version then you can see two devices when you are using DiskSafe...

Reviews: