page no. 25 of 36
OUH Range Users, Installation & Servicing Instructions Doc Ref M105 issue 5.8 Apr 2020.
removing the four hexagon headed bolts that secure the
fan to the rear panel.
6. Reassemble in reverse order.
1. Inspect the fan blades to see that they are not damaged
and that there is no build up of excessive deposits that
could give rise to an imbalance. Should it be necessary to
remove the assembly for cleaning proceed as follows.
2. Slacken the cable gland on the casing through which
the fan electrical cable passes.
3. Disconnect the fan leads from the electrical terminals
in the contactor enclosure.
4. Withdraw cable through entry grommet.
5. Remove the complete fan assembly by removing the
fixings securing the fan to the rear panel of the heater.
6. Reassemble in reverse order.
1. Release the securing bolt, or unscrew the filter bowl, to
access the filter.
2. Clean the filter or replace as deemed necessary.
3. Refit bowl ensuring that seals are correctly in place.
Only parts supplied via or authorised by Powrmatic
should be used. A short list of parts and part numbers are
detailed in section 3.2 of this manual. If in doubt, please
contact Powrmatic.
Refer to the burner instructions supplied with the heater
for information regarding replacement of individual
components within the burner
If a burner has been replaced or substituted complete, the
burner must be set up correctly.
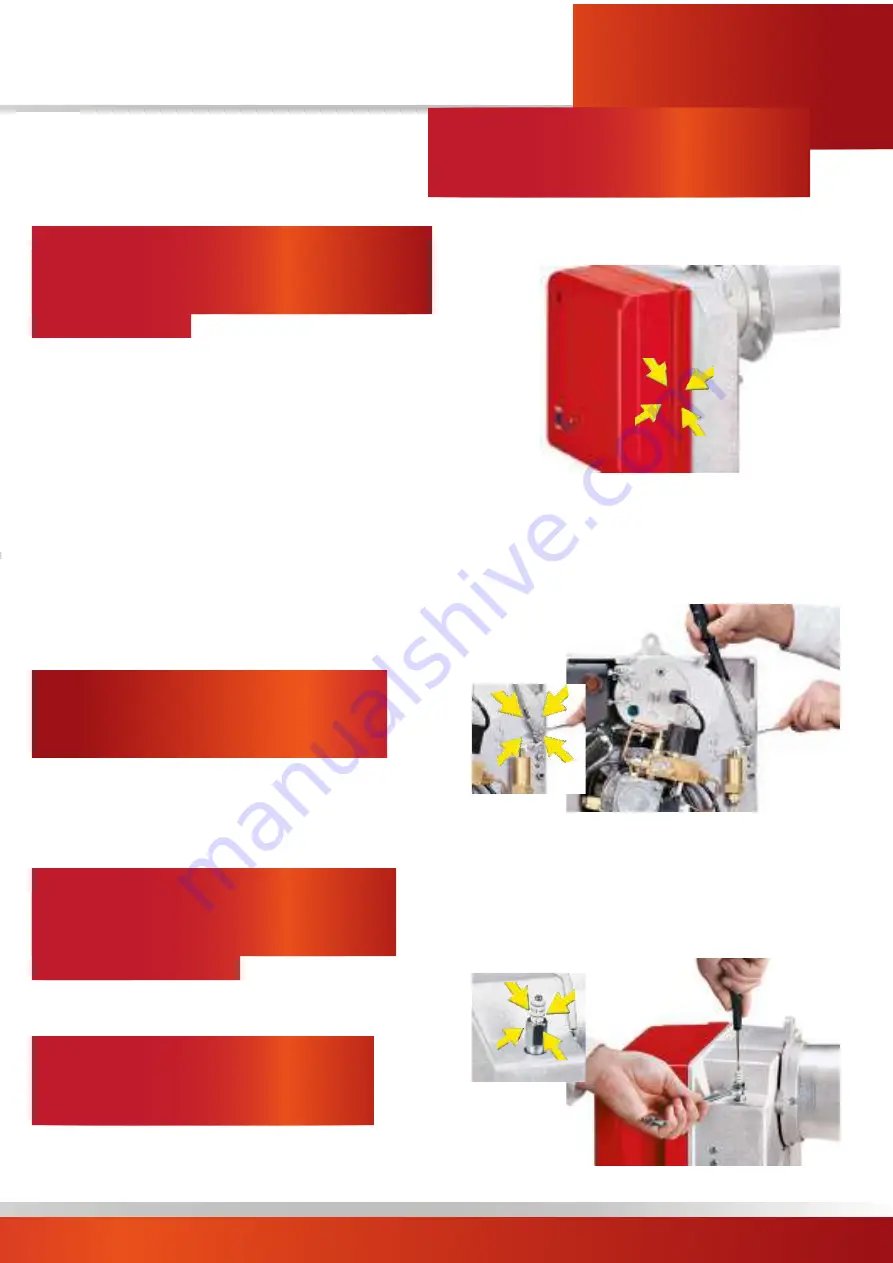
1. Remove the burner cover by undoing the two screws
either side of the housing.
Adjustment of the first stage air damper position is
carried out by setting the air damper.
2. Loosen locknut (clockwise) and adjust by turning screw
to the required setting as indicated on the adjacent
scale. Once the setting is achieved, tighten locknut
(anticlockwise).
Adjustment of the second stage air damper position is
carried out by setting the air damper indicator.
3. Slightly loosen locknut (clockwise) and adjust by turning
screw till the required setting is shown level with the
locknut. Once the setting is achieved, tighten locknut
(anticlockwise) (may require re-adjust when the nut is
locked down).


