background image

4

English

Guidelines for Using Extension Cords

•  If you are using an extension cord outdoors, be sure it is marked with the suffix “W-A” (“W” in Canada) 

to indicate that it is acceptable for outdoor use.

•  Be sure your extension cord is properly wired and in good electrical condition. Always replace a 

damaged extension cord or have it repaired by a qualified person before using it.

•  Protect your extension cords from sharp objects, excessive heat, and damp or wet areas.

DOUBLE-INSULATED INSTRUCTIONS

WARNING:


In a double-insulated vacuum, two systems of insulation 

are provided instead of grounding.  No means of grounding is provided on a double-

insulated appliance, nor should a means for grounding be added.  Servicing a double-

insulated Vacuum requires extreme care and knowledge of the system, and should be 

done only by qualified service personnel.  Replacement parts for a double-insulated 

Vacuum must be identical to the parts they replace.  Your double-insulated Vacuum is 

marked with the words "DOUBLE INSULATED" and the symbol                                                                                                   

(square within a square) may also be marked on the appliance.

POLARIZED PLUG

Double insulated products are equipped with a polarized plug 

(one blade is 

wider than the other). This plug will fit in a polarized outlet only one way. If the plug does not 

fit fully in the outlet, reverse the plug. If it still does not fit, contact a qualified electrician to 

install a polarized outlet. Do not change the plug in any way. Double insulation eliminates the 

need for the three wire grounded power cord and grounded power supply system.

SAVE THESE INSTRUCTIONS

SPECIFICATIONS

Model #:--------------------------------  PAVC102
Rated Voltage:--------------------------  120V AC, 60Hz
Rated Input Power:---------------------  10 Amp
Canister Ash Capacity:-----------------  4 Gallons
Power Cord Length:--------------------  16 Foot
Noise Level:----------------------------  79 dB
Net Weight:-----------------------------  12.4 lbs.

Recommended Minimum Wire Gauge for Extension Cords (120 Volt)

Nameplate 

Amperes  

(At Full Load)

Extension Cord Length

25 Feet

50 Feet

75 Feet

100 Feet

150 Feet

200 Feet

0–2.0

18

18

18

18

16

16

2.1–3.4

18

18

18

16

14

14

3.5–5.0

18

18

16

14

12

12

5.1–7.0

18

16

14

12

12

10

7.1–12.0

18

14

12

10

8

8

12.1–16.0

14

12

10

10

8

6

16.1–20.0

12

10

8

8

6

6

Summary of Contents for PAVC102

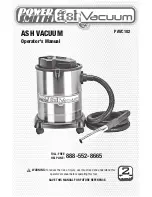
Page 1: ...VACUUM Operator s Manual SAVE THIS MANUAL FOR FUTURE REFERENCE WARNING To reduce the risk of injury user must read and understand this operator s manual before operating this tool 888 552 8665 Toll Fr...

Page 2: ...not run this vacuum unattended at anytime Keep hair loose clothing and all parts of the body away from openings and moving parts Always wear safety goggles complying with ANSI Z87 1 or in Canada CSAZ...

Page 3: ...enclosed space Allow the motor to cool and remove ash from canister before storage When using as a blower Direct air discharge only at work area Keep children away when blowing Do not direct air at by...

Page 4: ...e insulated Vacuum is marked with the words DOUBLE INSULATED and the symbol square within a square may also be marked on the appliance POLARIZED PLUG Double insulated products are equipped with a pola...

Page 5: ...Metal Nozzle 14 Brush Nozzle 15 Crevice Tool 16 Pellet Stove Hose 17 Adaptor 18 Storage Bag 1 18 8 16 15 14 13 12 2 4 6 11 3 5 7 10 9 17 FIG 1 5 English KNOWING YOUR ASH VACUUM UNPACKING AND CONTENT...

Page 6: ...outer surface of the filter is smooth with a silver like shiny appearance while the inner surface has a gray woven fabric look 2 Lower the filter bag into the metal canister with the shiny silver sur...

Page 7: ...FIG 6 FIG 5 FIG 4 FIG 3 FIG 2 FIG 7 15 14 16 17 12 7 English...

Page 8: ...the relative humidity of the air is low Vacuuming fine debris with your Ash Vacuum can cause static charge on the hose or on the vacuum There is a static discharge chain underneath the canister to re...

Page 9: ...r filter have been cleaned of ash and the vacuum is properly assembled with the metal nozzle in place 2 Ensure the On Off switch is in the O OFF position 3 Insert the power cord plug into an outlet ne...

Page 10: ...st into the canister 2 Remove the filter bag from the canister and remove remaining dust by tapping the filter s interior or lightly brushing off the outside of the bag 3 NOTE If necessary the filter...

Page 11: ...not seated or secured 4 Reinstall motor housing Or lock down both clamps Metal nozzle hose or canister become HOT Ash is too warm or hot Allow ash to cool before vacuuming Reduced or no suction 1 Clo...

Page 12: ...not transferable Prior to returning your tool to store location of purchase please call Toll Free Help Line for possible solutions ACCESSORIES INCLUDED IN THIS KIT ARE NOT COVERED BY THE 2 YEAR WARRAN...

Page 13: ...essure l utilisateur doit lire et doit comprendre ce manuel de l op rateur avant de fonctionner cet outil CONSERVER CE MANUEL POUR FUTURE R F RENCE PAVC102 ASPIRATEUR DE CENDRES Manuel d utilisation 8...

Page 14: ...ts amples et toutes les parties du corps loign s des ouvertures et des pi ces en mouvement Toujours porter des lunettes de s curit conform ment la norme ANSI Z87 1 ou au Canada CSAZ94 3 pour faire fon...

Page 15: ...teur si les ouvertures d a ration sont bloqu es Elles doivent tre exemptes de poussi re de peluches de cheveux ou de toute autre chose pouvant r duire la circulation d air Ne pas ranger l aspirateur i...

Page 16: ...n est fourni sur un appareil double isolation et il ne faut pas en ajouter un Pour r parer un aspirateur double isolation il faut exercer un soin extr me et bien conna tre le syst me ce que seuls des...

Page 17: ...Embout m tallique 14 Buse brosse 15 Suceur plat 16 Tuyau pour po le pastilles combustibles 17 Adaptateur 18 Sac de rangement 1 18 8 16 15 14 13 12 2 4 6 11 3 5 7 10 9 17 FIG 1 17 Fran ais SP CIFICATI...

Page 18: ...tige de la roulette dans l un des trous de petit diam tre se trouvant dans les coins de la base En exer ant une pression ferme et constante appuyer sur la roulette jusqu ce qu elle ne puisse pas alle...

Page 19: ...ermoirs 7 Aligner la bosse de l extr mit du gros tuyau avec l encoche en haut de l ouverture du bac de l aspirateur Pousser l extr mit du tuyau vers l int rieur et le tourner dans le sens des aiguille...

Page 20: ...r la sant provenant des vapeurs ou poussi res ne pas aspirer des mati res toxiques COMMUTATEUR MARCHE ARR T Apr s avoir branch le cordon lectrique dans une prise il faut pousser le commutateur de la p...

Page 21: ...embout et le tuyau D placer l embout suceur sur la brique r fractaire en un mouvement circulaire ou de va et vient Ceci aidera d loger les cendres accroch es la brique et permettra aux cendres de pass...

Page 22: ...que le commutateur MARCHE ARR T est en position O ARR T 3 Regarder o se trouve l orifice de sortie Installer l extr mit du gros tuyau et la faire tourner dans le sens des aiguilles d une montre pour...

Page 23: ...t un d tergent doux puis essor l g rement la main pour enlever l exc s d eau et laisser s cher l air S assurer que le filtre est bien sec avant de l utiliser NE PAS laver s cher le filtre la machine 4...

Page 24: ...Fermer les deux fermoirs L embout suceur de m tal le tuyau ou le bac devien nent chauds Les cendres sont trop chaudes Laisser refroidir les cendres avant d aspirer Succion r duite ou pas de succion 1...

Page 25: ...nt de renvoyer votre l outil au magasin d achat s il vous pla t appelez sans frais la ligne d aide pour les solutions possibles LES ACCESSOIRES COMPRIS DANS CE KIT NE SONT PAS COUVERTS PAR LA GARANTIE...

Page 26: ...ario ADVERTENCIA Para reducir el riesgo de la herida el usuario debe leer y deber comprender el manual de este operario antes de operar este instrumento GUARDE ESTE MANUAL PARA FUTURAS CONSULTAS PAVC1...

Page 27: ...lcance de los ni os No permitir que usen la aspiradora como juguete No dejar la aspiradora abandonada cuando est en funcionamiento Mantener alejado el cabello ropa suelta y otras partes del cuerpo ale...

Page 28: ...turas de ventilaci n bloqueadas Limpiar el polvo las pelusas cabellos y cualquier otro residuo que pueda impedir la circulaci n de aire No guardar la aspiradora inmediatamente despu s de haberla usado...

Page 29: ...ne puesta a tierra ni debe instalarse en el mismo una puesta a tierra La reparaci n de una aspiradora con doble aislamiento exige cuidado y conocimiento del sistema por ello debe ser ejecutada nicamen...

Page 30: ...quilla de met lica 14 Boquilla con cepillo 15 Boquilla para rincones 16 Manguera para estufa de pellets 17 Adaptador 18 Bolsa de almacenamiento 1 18 8 16 15 14 13 12 2 4 6 11 3 5 7 10 9 17 FIG 1 30 Es...

Page 31: ...io ubicado en una esquina de la base Hacer presi n firmemente hasta que el v stago no entre m s V ase la Figura 2 3 Repetir el paso 2 para colocar una rueda en cada uno de los 3 orificios restantes 4...

Page 32: ...la en posici n V ase la Figura 5 8 Introducir la boquilla met lica de admisi n en el otro extremo de la manguera Girar la boquilla en sentido horario y al mismo tiempo empujarla hacia adentro de la ma...

Page 33: ...on muy baja humedad ambiente es com n que se produzcan descargas electrost ticas La aspiraci n de residuos finos puede generar carga est tica en la manguera o la aspiradora Hay una cadena de descarga...

Page 34: ...tenga colocada la boquilla met lica 2 El interruptor de encendido debe estar en la posici n O apagada 3 Enchufar la aspiradora y encenderla con el interruptor de encendido 4 De vez en cuando mirar el...

Page 35: ...filtro para que el polvo caiga al colector 2 Quitar el filtro del colector y limpiar el resto del polvo golpeando suavemente el interior del mismo o pasando un cepillo al lado externo de la bolsa 3 N...

Page 36: ...ver a instalar correctamente el alojamiento del motor Enganchar ambas abrazaderas Boquilla met lica manguera o colector se calientan excesiva mente Cenizas muy calientes Dejar enfriar las cenizas ante...

Page 37: ...rlo su herramienta para almacenar la ubicaci n de la compra por favor llame gratis a la l nea de ayuda para las posibles soluciones LOS ACCESORIOS INCLUIDOS CON ESTE JUEGO NO TIENEN 2 A OS DE GARANT A...

Page 38: ...38 NOTES...

Page 39: ...39 NOTES...

Page 40: ...Richpower Industries Inc 736 Hampton Road Williamston SC USA www richpowerinc com 2015 05 V 01...

Reviews: