background image

23

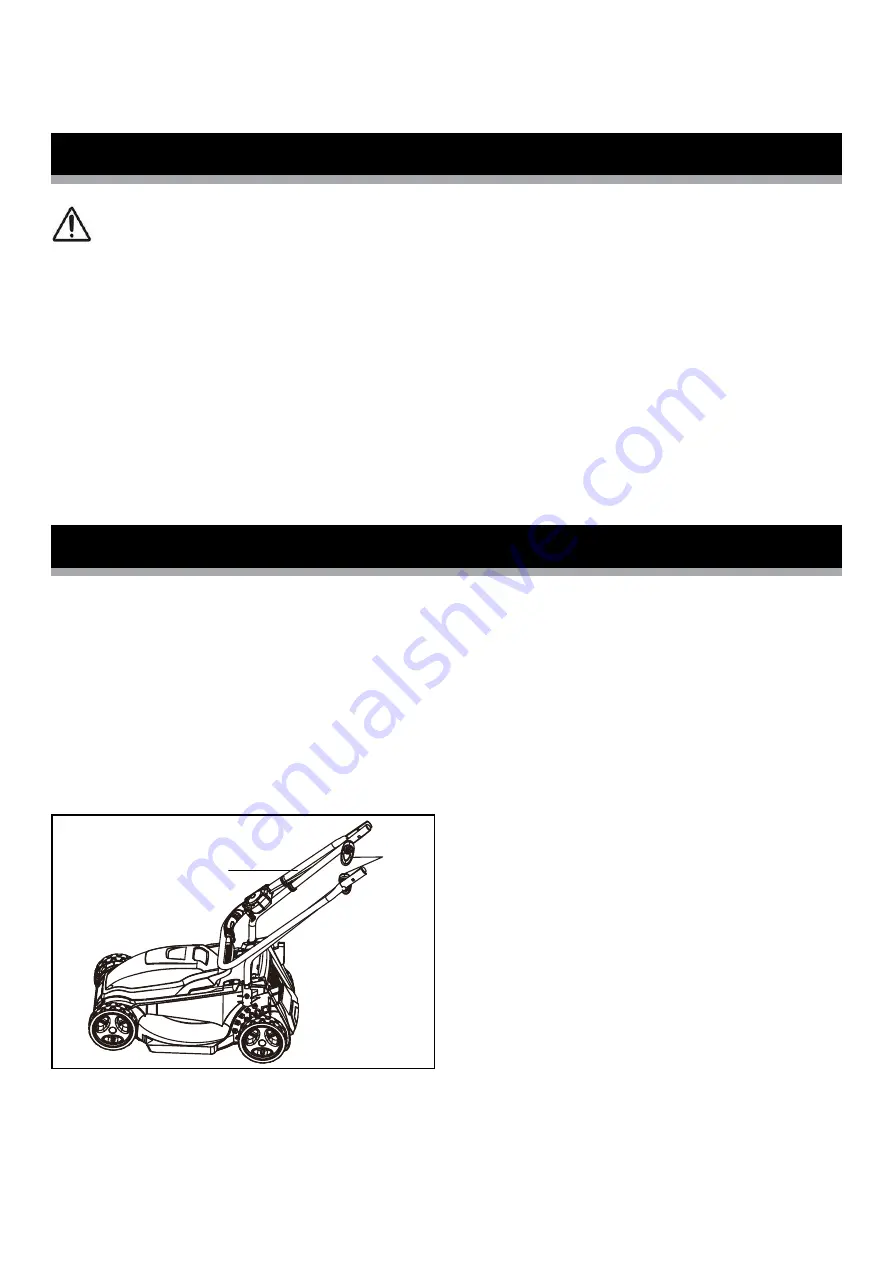
The handles can be folded for easy storage (Fig. 16).
1.  Keep the equipment dry and out of reach of children. Loosen the wing 

knobs (13) and fold down the upper handle bar (1) so the equipment 
takes up less space. Ensure that the cable is not caught.

2.  Allow the motor to cool before storing the equipment in a confined 

space.

3. Do not cover the equipment with nylon bags as moisture could build up.

Storing

Cleaning

Maintenance and Storage


WARNING!

 Always switch the product off, disconnect it from 

power supply and let the product cool down before performing inspection, 
maintenance and cleaning work!

1. Keep all safety devices, air vents and the motor housing free of dirt and 

dust as far as possible. Wipe the equipment with a soft brush or blow it 
with compressed air at low pressure after usage.

2.  Clean the mower regularly with a soft nylon-bristled brush. Do not use 

cleaning agents or solvents; these may damage plastic components.

3. Ensure that no water can seep into the device.

Fig. 16

13

1

Summary of Contents for 577136

Page 1: ...mation that will help you get the best from your product ensuring it is assembled correctly and safely If you need help or have damaged or missing parts call the Customer Helpline on 0343 515 1905 IMP...

Page 2: ...al Safety Warnings 3 Intended Use 11 Warning Symbols 12 In the Box 14 Assembly 16 Operation 18 Maintenance And Storage 23 Troubleshooting 26 Technical Data 27 Disposal 28 Getting Help 28 Warranty 28 C...

Page 3: ...lf with the machine its correct usage and all safety requirements Keep this manual in a safe place so that the information is available to the operator at all times If you give the equipment to any ot...

Page 4: ...r with these instructions to use the mower Local regulations may restrict the age of the operator In areas where the mains supply is weak or bearing a high load this mower may cause further voltage fl...

Page 5: ...lts and the entire cutting unit for any signs of wear or damage To prevent imbalance or vibration worn or damaged cutting blades and fastening bolts must always be replaced in full Damaged parts on th...

Page 6: ...th the grass collection box correctly fitted Check the site on which you intend to use the lawn mower and remove all objects that may be caught or thrown up by the mower Foreign bodies must be removed...

Page 7: ...is not fitted The safety distance from the moving blade produced by the push handle must be maintained at all times If you use the mower on a small incline mow across the slope not in an up and down d...

Page 8: ...Do not leave the mower out in the rain The lawn must not be wet or very damp Only push the mower at a normal walking pace Be particularly careful when you change the direction of the mower or pull it...

Page 9: ...ins supply A damaged cord could allow parts to become live and cause a risk of electrocution Do not attempt to touch the blades before the machine is disconnected from the supply and the blades have c...

Page 10: ...o contact with live parts Disconnect from the mains supply i e remove the plug from the mains socket Whenever leaving the machine unattended Before cleaning a blockage After striking a foreign object...

Page 11: ...must not be used for any purposes other than those described Any use of the machine that deviates from its intended use and is not included in these instructions is considered unauthorised use and re...

Page 12: ...ting this machine Wear eye and ear protection PPE Do not expose to rain Keep bystanders away Beware of sharp blades Blades continue to rotate after the motor is switched off Remove plug from mains bef...

Page 13: ...and packaging should be sorted taken to the local recycling centre and disposed of in an environmentally safe way Cutting width The product complies with the applicable European directives and an eva...

Page 14: ...14 In the Box 19 18 18 17 1 16 15 14 20 13 12 11 10 2 3 4 5 7 8 9 6 6a...

Page 15: ...Grass collection box top 14 Switch box housing 6 Grass collection box 15 Cable strain relief 6a Grass collection box full indicator 16 Safety button 6b Insert 17 Switch lever 7 Support x 2 18 Wheel ax...

Page 16: ...ts 2 and the wing knobs 13 on the lower handle bar 3 Fig 3 There are two possible positions Select the position appropriate for the height of the user 4 Secure the cable against the handle frame with...

Page 17: ...collection box handle 4 into the grass collection box top 5 Fig 5 2 Align the front ends of the top and the bottom of the grass collection box 6 Clip the two halves together starting at the front Fig...

Page 18: ...used lawn NOTE A higher cut height should be selected for the first cut of the season WARNING Keep the front and rear wheels at the same height The electric lawn mower can be adjusted to the following...

Page 19: ...n press the safety button 16 on the handle then activate the switch lever 17 Release the safety button 16 Fig 11 2 To switch off release the switch lever 17 WARNING After switching off the equipment t...

Page 20: ...cts out at high speed Always ensure the deflector guard and grass collection box fit securely Always switch off the motor before you remove these items A safe distance between the blade deck and the u...

Page 21: ...ower Fig 12 The blades can cause damage to the power cord if contact is made and risk electrocution Grass collection box full indicator 6a 1 When this flap remains open as you work it means that the g...

Page 22: ...the deflector guard 11 with one hand and remove the grass collection box 6 holding its handle 4 with your other hand Fig 15 To maintain safety the deflector guard automatically closes to the rear dis...

Page 23: ...toring Cleaning Maintenance and Storage WARNING Always switch the product off disconnect it from power supply and let the product cool down before performing inspection maintenance and cleaning work 1...

Page 24: ...he blade is damaged or showing signs of imbalance it must be replaced Carry out the following steps to change the blade 1 Turn the mower over and rest it carefully on its side 2 Use sturdy gloves and...

Page 25: ...loured black The brown wire must be connected to the terminal marked L or coloured red Connecet Blue to N Neutral Outer sleeve firmly clamped 13AMP fuse approved to BS 1362 Brown L Live Cable grip WAR...

Page 26: ...e after sales helpline Defective motor Grass too long Set at a higher cut setting Lift the front wheels slightly by pressing down on the handle bar Motor stops Blade is blocked Disconnect from the mai...

Page 27: ...d speed 3400min 1 Cutting width 32cm Cutting height 20mm 40mm 60mm Volume of grass collection box 33L Measured sound pressure level LpA 80dB A K 3dB A Measured sound power level LWA 90 6dB A K 2 08dB...

Page 28: ...this is possible or a replacement or a refund Your statutory rights remain unaffected in particular any rights you may have under the Consumer Rights Act 2015 This warranty is given by HHGL Limited MK...

Reviews: