Visit www.princessauto.com for more information
11
8507667
V 3.05
Mini Milling Machine
BEFORE SWITCHING ON THE UNIT
1. Remove all adjusting keys and wrenches.
2. Confirm that the power voltage is suitable for the tool.
3. Remove any obstacles in the work area that could obstruct the usage of the tool.
4. Before the first use, remove any oil that was used during the initial setup.
5. Check that the angle of the fuselage is in the desired position and make sure that the fixtures have
been secured.
6. Check the chuck, chuck holder and fixing pin on the spindle to make sure that they are unloaded.
7. Check the High/Low speed on the spindle to see if it is set to the correct speed setting.
8. Turn on the machine and check the direction of the spindle rotation (clockwise).
NOTE:
If you are uncertain which direction the spindle is rotating, turn the tool off and as the spindle slows
down, the direction of rotation can be observed.
9. Check the operating condition of the longitudinal axis (working table), the cross axis (saddle seat) and the
vertical axis (fuselage) to ensure that the controls are operating correctly.
10. During operation, if any suspect situations occur, stop the machine immediately and have the suspect
components serviced by a qualified service technician.
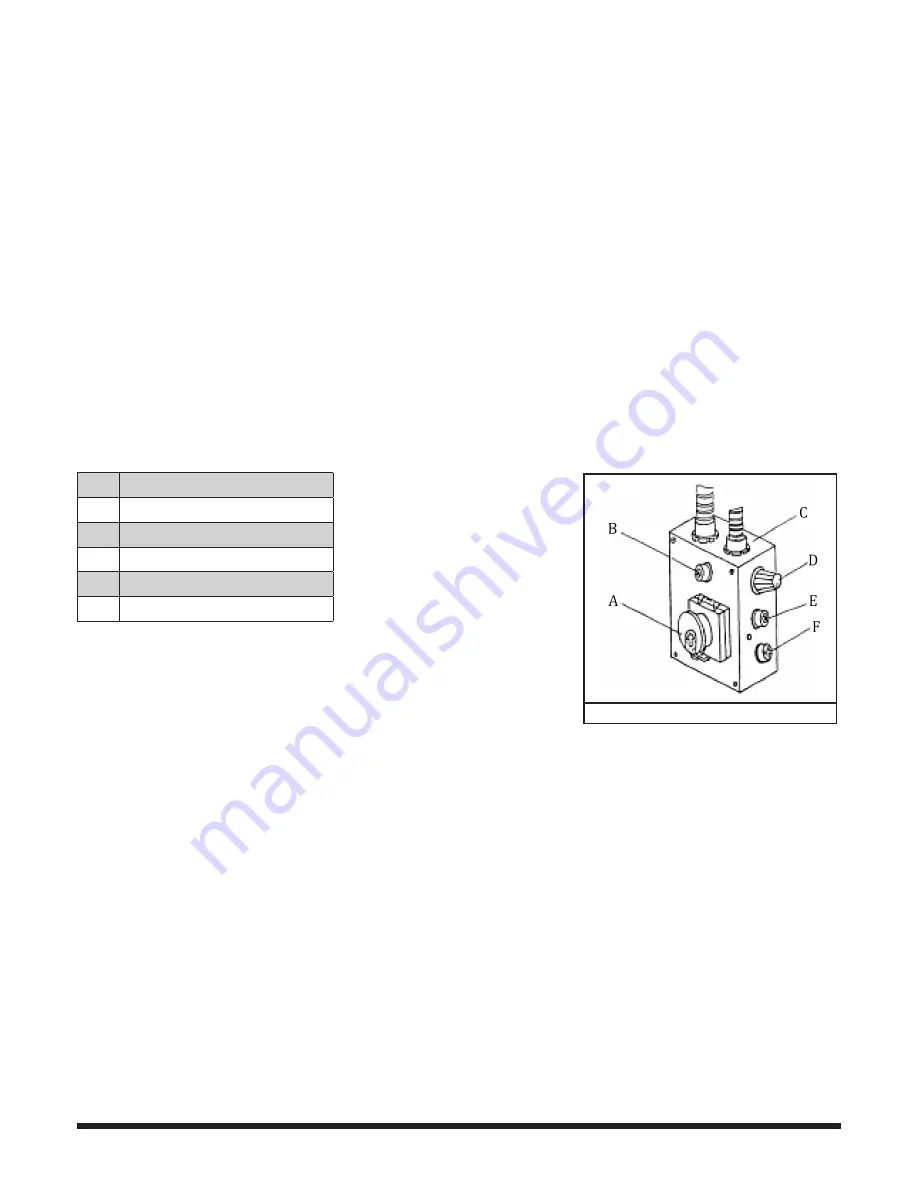
INITIAL START
A
Emergency Stop Switch
B
Yellow Lamp
C
Electric Control Box
D
Variable Speed Control Knob
E
Green Lamp
F
Fuse Box
CAUTION! Make sure that the emergency stop switch (A) (on the left
beside the electrical box) is in the OFF position before connecting the
unit to a power source.
1. Set the High / Low switch to Low.
2. Connect the unit to its power source.
3. Release the emergency stop switch (A) by pushing down on
the red knob slightly and pushing it up, as indicated by the arrow on the top of the red knob.
4. Switch on the machine by gently turning the variable speed control knob (D), clockwise. A click sound will
be heard as the motor power is turned on, but the spindle will not rotate until the knob has been turned
clockwise a little further. The speed will increase progressively the further the knob is turned.
5. Run the unit for a total of five minutes during which time gradually increase the spindle speed to its
maximum. Run the unit for at least two minutes at the maximum speed before stopping the unit and
disconnecting it from the power source.
AFTER THE INITIAL START
1. Check all of the components to make sure that they are still secure and working freely and correctly.
2. Check all mounting fixtures to make sure that they are secure.
3. Repeat the steps in the Initial Start section at the High setting.
Fig. 6


