background image

8760654 

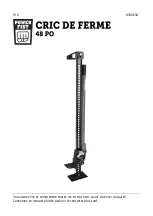
48 in. Farm Jack 

V1.0 

For technical questions call 1-800-665-8685 

4. 

Pump the handle until the large runner saddle contacts the load.  

5. 

Pause at this stage and check to ensure there are no obstacles to a clean lift.  

6.  Pull down firmly and evenly on the handle. You will hear the climbing pin 

(#13) click into place as it enters a hole in the steel bar (#3). At this point, 
relax the handle allowing the pin (#15) to take the load. 

7. 

Raise the handle to the top of its stroke and repeat until the load is at the 
desired height. 

RAISING A VEHICLE  

Take these additional steps before following steps 1 to 7 in 

Raising a Load

.  

1. 

Make sure both the jack and the load are on a hard level surface.  

2.  Apply the parking and emergency brake.  
3. 

Use wheel chocks to block all wheels to prevent any movement when the 
vehicle is lifted.  

4. 

Check in your vehicle owner’s manual for the location of the recommended lift 
points and position the jack under one of those locations.  

LOWERING THE LOAD  

DANGER! The jack must have a minimum load of 110 lb (50 kg) to engage the 
ratchet system when Iowering the load. Otherwise the large runner  and load 
wiII drop without resistance and may cause a serious injury.  
WARNING! Before lowering the load or vehicle, ensure that there are no 
obstructions underneath and that all people are standing clear. 
WARNING! The load transfers to the handle when it is returning to the upright 
position. If the handle is released before the climbing pin is in position, the load 
will force the handle to snap upwards abruptly and could cause an injury.  

1. 

Place the jack beneath the load and position the saddle beneath the 
desired contact point. 


2.  Raise the load slightly with the jack, and return 

the handle to the fully upright position.  

3. 

Carefully remove the jack stands or support 
structures without placing your body beneath 
the load. 

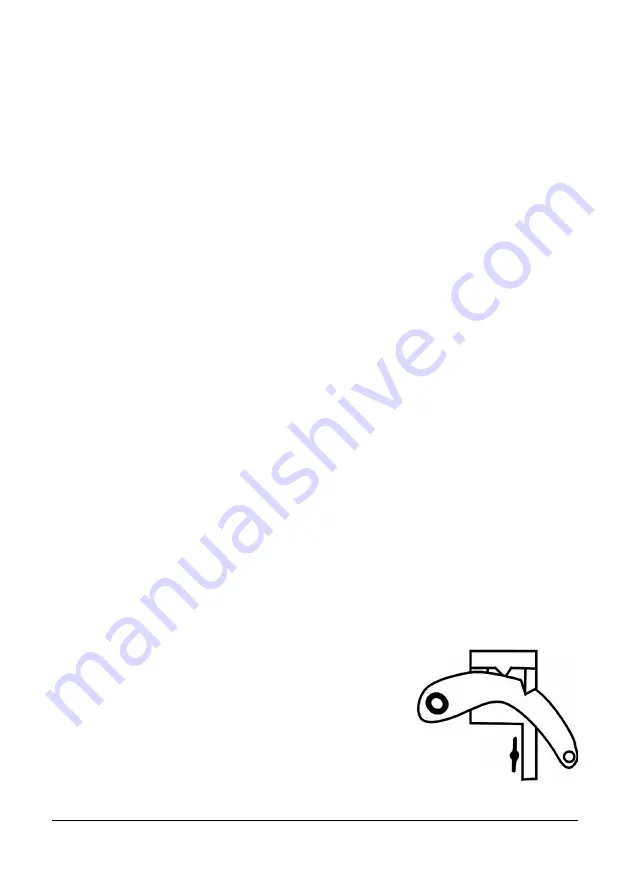
4. 

Release the reversing latch (#17), so that it is in 
the DOWN position. The reversing switch tooth 
is no longer in the indentation (see Fig. 2).  

Fig. 2 

Summary of Contents for 8760654

Page 1: ...V1 0 8760654 Please read and understand all instructions before use Retain this manual for future reference...

Page 2: ...damage injury or death if certain instructions are not followed DANGER This notice indicates an immediate and specific hazard that will result in severe personal injury or death if the proper precauti...

Page 3: ...work area 3 Store unused tools properly in a safe and dry location to prevent rust or damage Lock tools away and keep out of the reach of children PERSONAL SAFETY WARNING Wear personal protective equ...

Page 4: ...ot modify or alter this tool or use it for an unintended purpose 2 Do not use the tool if any parts are damage broken or misplaced Repair or replace the parts 3 Do not overload the jack beyond its rat...

Page 5: ...nd accessories from the packaging and inspect for damage Make sure that all items in the contents are included Contents Farm Jack ASSEMBLY INSTALLATION Numbered references in parenthesis 1 refer to th...

Page 6: ...ded lift points and position the jack under one of those locations LOWERING THE LOAD DANGER The jack must have a minimum load of 110 lb 50 kg to engage the ratchet system when Iowering the load Otherw...

Page 7: ...e metal clamp clevis and saddle can damage the item use pieces of wood or another buffer material between them to prevent damage 6 Engage the reversing latch and follow the steps in Raising a Load to...

Page 8: ...teps 6 to 10 if the winching job is not complete CARE MAINTENANCE 1 Maintain the tool with care A tool in good condition is efficient easier to control and will have fewer problems 2 Inspect the tool...

Page 9: ...ncessauto com for more information 9 TROUBLESHOOTING Visit a Princess Auto Ltd location for a solution if the tool does not function properly or parts are missing If unable to do so have a qualified t...

Page 10: ...l Handle with Cotter Pin 1 5 Handle Socket 1 6 Pin 1 7 Hex Bolt 1 8 Connecting Rod 1 9 Small Runner 1 10 Screw Bolt 1 11 Base 1 12 Climbing Pin Spring 2 13 Climbing Pin 2 14 Cross Pin 2 15 Reversing S...

Page 11: ...V1 0 48 in Farm Jack 8760654 Visit www princessauto com for more information 11...

Page 12: ...8760654 48 in Farm Jack V1 0 12 For technical questions call 1 800 665 8685...

Page 13: ...V1 0 8760654 Vous devez lire et comprendre toutes les instructions avant d utiliser l appareil Conservez ce manuel afin de pouvoir le consulter plus tard...

Page 14: ...ou de d c s si on ne respecte pas certaines instructions DANGER Cet avis indique un risque imm diat et particulier qui entra nera des blessures corporelles graves ou m me la mort si on omet de prendre...

Page 15: ...ous que les personnes qui ne portent pas l quipement de s curit appropri ne se trouvent pas proximit de l aire de travail 3 Rangez les outils correctement dans un lieu s curis et sec Gardez les outils...

Page 16: ...ubstituer une adh sion stricte aux r gles de s curit de l outil Si vous utilisez cet outil de fa on dangereuse ou incorrecte vous pouvez subir des blessures corporelles graves 1 Utilisez le bon outil...

Page 17: ...g 110 lb afin d engager le syst me cliquet au moment d abaisser la charge Autrement le gros coulisseau et la charge descendront sans r sistance ce qui pourrait entra ner des blessures graves D BALLAGE...

Page 18: ...rs le bas sur la poign e Vous entendrez le d clic de la goupille de levage no 13 au moment o elle entrera dans la barre d acier no 3 ce moment rel chez la poign e afin de permettre la goupille no 15 d...

Page 19: ...tionnez la selle de levage sous le point de contact d sir 2 Soulevez l g rement la charge avec le cric et ramenez la poign e la position verticale 3 Retirez soigneusement les chandelles ou les structu...

Page 20: ...cric de ferme Tout bris d un composant du syst me de remorquage pourrait provoquer un fouettement de la cha ne ou du c ble capable de blesser ou de tuer l utilisateur ou quiconque se trouvant proximi...

Page 21: ...composants endommag s ou us s Employez seulement des pi ce autoris es 3 Suivez les instructions pour lubrifier et remplacer les accessoires 4 Gardez les poign es de l outil propres s ches et exemptes...

Page 22: ...lez le 1 800 665 8685 D PANNAGE Si l outil ne fonctionne pas correctement ou si des pi ces sont manquantes visitez un magasin Princess Auto Ltd afin de trouver une solution Si ce n est pas possible de...

Page 23: ...1 5 Douille de la poign e 1 6 Goupille 1 7 Boulon hexagonal 1 8 Bielle 1 9 Petit coulisseau 1 10 Boulon taraud 1 11 Base 1 12 Ressort de goupille de levage 2 13 Goupille de levage 2 14 Goupille transv...

Page 24: ...8760654 Cric de ferme 48 po V1 0 12 En cas de questions techniques appelez le 1 800 665 8685...

Reviews: