background image

8442923 

2-3/4 Ton Pallet Jack 

V1.0 

For technical questions call 1-800-665-8685 

3. 

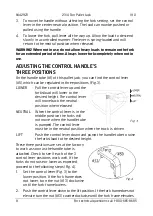
To move the handle without affecting the fork setting, set the control 
lever in the center neutral position. The load can now be pushed or 
pulled using the handle. 

4. 

To lower the fork, pull lever all the way up. Allow the load to descend 
slowly in a controlled manner. The lever is spring-loaded and will 
return to the neutral position when released. 

WARNING! When not in use, do not allow heavy loads to remain on the fork 
for an extended period of time. Always lower fork completely when not in 
use. 

ADJUSTING THE CONTROL HANDLE'S 
THREE POSITIONS 

On the handle tube (#1) of this pallet jack, you can find the control lever 
(#5), which can be regulated in three positions (Fig. 3). 

LOWER  

Pull the control lever up and the 
forks/load will lower to the 
desired height. The control lever 
will move back the neutral 
position when released. 

NEUTRAL   When the control lever is in the 

middle position the forks will 
not move when the handle tube 
is pumped. The control lever 
must be in the neutral position when the truck is driven. 

LIFT  

Push the control lever down and pump the handle tube to raise 
the forks/load to the desired height. 

These three positions are set at the factory 
to work as soon as the handle tube is 
attached. Check to see if each of the 3 
control lever positions work well. If the 
forks do not raise or lower as expected, 
proceed to the following steps (Fig. 4). 
1. 

Set the control lever (Fig. 3) to the 
lower position. If the fork frame does 
not lower, turn the nut (#13) clockwise 
until the fork frame lowers. 

2. 

Push the control lever down to the lift position. If the fork frame does not 
elevate, turn the nut (#13) counterclockwise until the fork frame elevates. 

Fig. 3


Fig. 4


Summary of Contents for 8442923

Page 1: ...V1 0 8442923 Please read and understand all instructions before use Retain this manual for future reference...

Page 2: ...an alert that there is a possibility of property damage injury or death if certain instructions are not followed DANGER This notice indicates an immediate and specific hazard that will result in sever...

Page 3: ...tion to prevent rust or damage Lock tools away and keep out of the reach of children PERSONAL SAFETY WARNING Wear personal protective equipment approved by the Canadian Standards Association CSA or Am...

Page 4: ...mage broken or misplaced Repair or replace the parts 3 Before lowering load ensure that there are no obstructions underneath and that all people are standing clear 4 Never allow anyone to ride on the...

Page 5: ...icient force to penetrate your clothing and skin A pinpoint hole may inject hydraulic fluid into your body Seek immediate medical attention if this occurs see Injection Injury 2 Never exceed the hydra...

Page 6: ...symptoms will depend on the type of fluid injected Bring the Safety Data Sheet for the fluid with you to the medical facility if possible INJECTION PRECAUTIONS Fluid can penetrate the skin at 100 PSI...

Page 7: ...r plate Fig 2 2 up and slip the bolt head under the notch in the lever plate Do not adjust the nut unless the pallet jack doesn t work properly CAUTION Do not loosen or over tighten the lock nut 13 Th...

Page 8: ...ol lever up and the forks load will lower to the desired height The control lever will move back the neutral position when released NEUTRAL When the control lever is in the middle position the forks w...

Page 9: ...ree from oil grease at all times 5 Maintain the tool s labels and name plates These carry important information If unreadable or missing contact Princess Auto Ltd for replacements WARNING Only qualifi...

Page 10: ...o a suitable container Pump handle until all oil has drained Dispose of used hydraulic oil according to local disposal regulations 4 Pull out plunger piston 40 and or ram piston 42 5 Remove all O ring...

Page 11: ...redients may still be toxic Contact your local municipality for proper disposal instructions or locations TROUBLESHOOTING Visit a Princess Auto Ltd location for a solution if the tool does not functio...

Page 12: ...442923 2 3 4 Ton Pallet Jack V1 0 12 For technical questions call 1 800 665 8685 PARTS BREAKDOWN PARTS LIST DESCRIPTION QTY 1 Handle Tube 1 2 Blade Spring 1 3 Spring 1 4 Elastic Pin 1 5 Control Lever...

Page 13: ...sher 2 29 O ring 1 30 Valve Base 1 31 Tapered Column 1 32 Spring 1 33 Washer 1 34 Release Plug 1 35 U packing 1 36 Dust Seal Ring 1 37 Spring 1 38 Spring Cap 1 39 E ring 1 40 Plunger Piston 1 41 Steel...

Page 14: ...73 Push Rod 2 74 Crank Shaft 1 75 Spring Pin 1 76 Socket Head Cap Screw 1 77 Fork Frame 1 78 V Nut 2 79 Guide Roller 2 80 Hex Cap Screw 2 81 Spring Pin 2 82 Rod Pin 2 83 Load Wheel Axle 2 84 Flat Was...

Page 15: ...V1 0 2 3 4 Ton Pallet Jack 8442923 Visit www princessauto com for more information 15...

Page 16: ...8442923 2 3 4 Ton Pallet Jack V1 0 16 For technical questions call 1 800 665 8685...

Page 17: ...V1 0 8442923 Vous devez lire et comprendre toutes les instructions avant d utiliser l appareil Conservez ce manuel afin de pouvoir le consulter plus tard...

Page 18: ...xiste un risque de dommage la propri t de blessure ou de d c s si on ne respecte pas certaines instructions DANGER Cet avis indique un risque imm diat et particulier qui entra nera des blessures corpo...

Page 19: ...ue les personnes qui ne portent pas l quipement de s curit appropri ne se trouvent pas proximit de l aire de travail 3 Rangez les outils correctement dans un lieu s curis et sec Gardez les outils hors...

Page 20: ...angereuse ou incorrecte vous pouvez subir des blessures corporelles graves 1 Utilisez le bon outil pour la t che effectuer Cet outil a t con u pour une utilisation sp cifique vitez de modifier ou d al...

Page 21: ...sants mobiles 4 V rifiez l outil avant chaque usage Ne l utilisez PAS s il est tordu cass fissur s il a des fuites ou est endommag de toute autre mani re si des pi ces suspectes sont observ es ou s il...

Page 22: ...une source d allumage 9 Changez imm diatement vos v tements s ils ont t arros s avec le liquide hydraulique Rangez les v tements ou les chiffons contamin s par le liquide hydraulique dans une bo te de...

Page 23: ...ssurer qu il est certifi pour subir la pression D BALLAGE AVERTISSEMENT Ne faites pas fonctionner l outil si des pi ces sont manquantes Remplacez les pi ces manquantes avant l utilisation Le non respe...

Page 24: ...p dition voir Purge du syst me hydraulique UTILISATION Ce transpalette main a t con u pour s utiliser avec des palettes ouvertes ou des ch ssis mobiles seulement Les palettes ferm es doivent tre plac...

Page 25: ...les fourches resteront immobiles au moment de pomper le tube de la poign e Le levier de commande doit se trouver en position neutre lorsqu on d place le camion LEVER Abaissez le levier de commande et...

Page 26: ...composants endommag s ou us s Employez seulement des pi ce autoris es 3 Suivez les instructions pour lubrifier et remplacer les accessoires 4 Gardez l outil propres s ches et exemptes d huile ou de g...

Page 27: ...remplissage d huile fig 5 2 80 au moyen d huile pour cric hydraulique soit sur une profondeur d environ 2 1 2 po fig 5 3 l int rieur du carter de pompe fig 5 1 N utilisez jamais d autres types d huile...

Page 28: ...l outil Une huile p n trante peut agir comme un solvant qui provoque la d composition de la graisse interne et le grippage de l outil LIQUIDE HYDRAULIQUE Ne d versez pas l huile hydraulique dans les...

Page 29: ...pos e s Le syst me hydraulique ne monte pas 1 Bas niveau d huile 2 Pr sence d air dans la pompe 3 Joint torique us dans le cylindre du b lier 1 Ajoutez suffisamment d huile 2 Voir Purge du syst me hyd...

Page 30: ...4 tonnes V1 0 14 En cas de questions techniques appelez le 1 800 665 8685 R PARTITION DES PI CES LISTE DES PI CES NO DESCRIPTION QT 1 Tube de poign e 1 2 Ressort de lampe 1 3 Ressort 1 4 Goupille last...

Page 31: ...ape 1 31 Colonne conique 1 32 Ressort 1 33 Rondelle 1 34 Bouchon de d gagement 1 35 Garniture en U 1 36 Bague d tanch it antipoussi re 1 37 Ressort 1 38 Capuchon ressort 1 39 Anneau en E 1 40 Piston p...

Page 32: ...e vilebrequin 1 75 Tige de ressort 1 76 Vis d assemblage six pans creux 1 77 Cadre de fourche 1 78 crou en V 2 79 Rouleau de guidage 2 80 Boulon t te hexagonale 2 81 Tige de ressort 2 82 Goupille de t...

Reviews: