


Troubleshooting
PQ7-M102XL Series User Manual
5-2
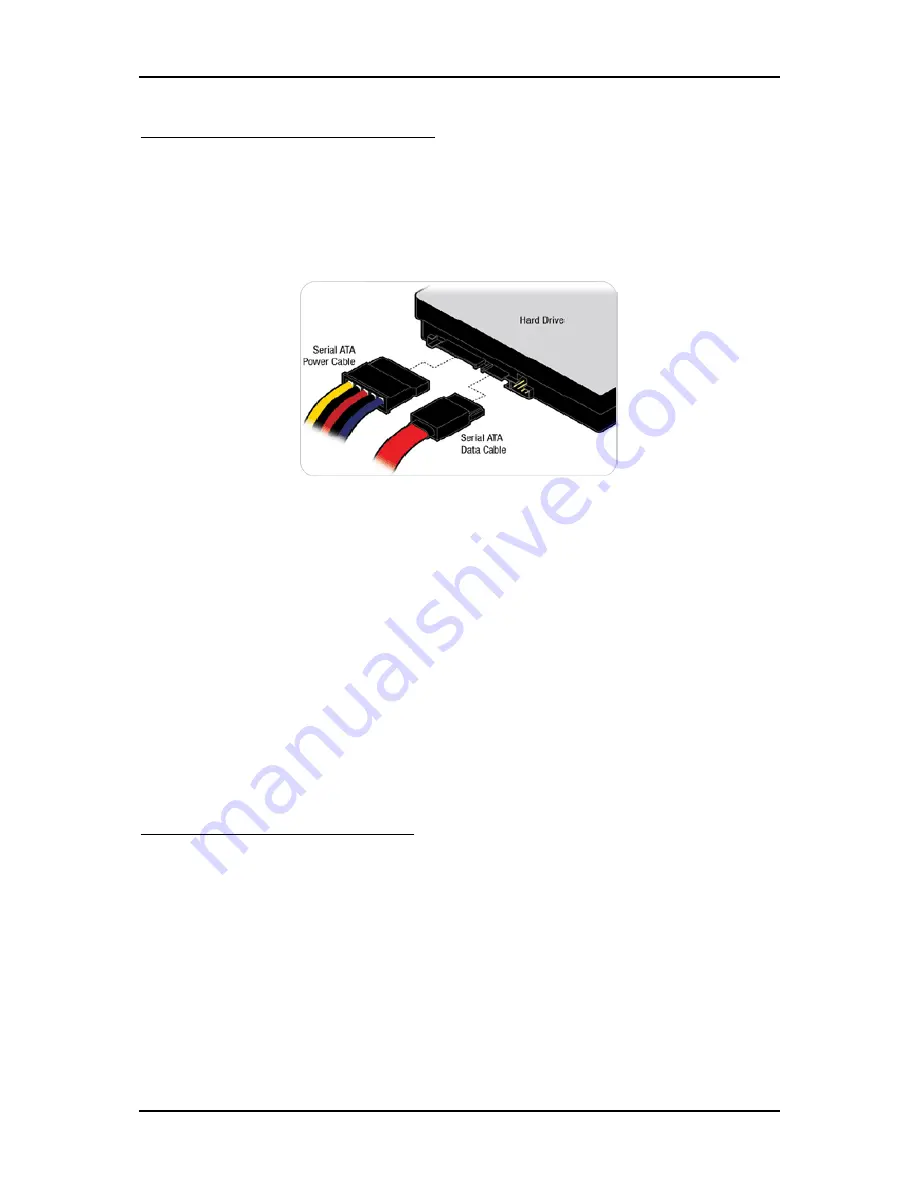
Serial ATA Hard Disk Setting for IDE
Serial ATA channel can only connect to one SATA hard disk at a time; there are total
Four connectors, J3 (PQ7-C100). The installation of Serial ATA is simpler and easier
than IDE, because SATA hard disk doesn’t require setting up Master and Slave,
which can reduce mistake of hardware installation. All you need to do is to plug in
two cables and enable SATA in System BIOS.
5.2
BIOS Setting
It is assumed that users have correctly adopted modules and connected all the
device cables required before turning on DC 12V power. 200-pin DDR2 SO-DIMM,
keyboard, mouse, SATA hard disk, VGA connector, device power cables, 12V
DC power accessories are good examples that deserve attention. With no
assurance of properly and correctly accommodating these modules and devices, it is
very possible to encounter system failures that result in malfunction of any device.
To make sure that you have a successful start with PQ7-M102XL, it is recommended,
when going with the boot-up sequence, to hit “DEL” key and enter the BIOS setup
menu to tune up a stable BIOS configuration so that you can wake up your system far
well.
Loading the default optimal setting
When prompted with the main setup menu, please scroll down to “
Load Optimal
Defaults
”, press “Enter” and “Y” to load in default optimal BIOS setup. This will
force your BIOS setting back to the initial factory configuration. It is recommended to
do this so you can be sure the system is running with the BIOS setting that Portwell
has highly endorsed. As a matter of fact, users can load the default BIOS setting any
time when system appears to be unstable in boot up sequence.


