background image


10


No.

Voice Name

PIANO


001

Grand Piano

002

Bright Piano

003

Honky-tonk Piano

004

MIDI Grand Piano

005

CP 80

006

Harpsichord


E.PIANO


007

Funky Electric Piano

008

DX Electric Piano

009

Hyper Electric Piano

010

Bell Electric Piano

011

Clavi


ORGAN


012

Jazz Organ 1

013

Jazz Organ 2

014

Jazz Organ 3

015

Full Organ

016

Rock Organ 1

017

Rock Organ 2

018

Church Organ

019

Reed Organ


ACCORDION


020

Traditional 
Accordion

021

Musette Accordion

022

Bandoneon

023

Harmonica


GUITAR


024

Classical Guitar


No.

Voice Name


025

Folk Guitar

026

12Strings Guitar

027

Jazz Guitar

028

Octave Guitar

029

Clean Guitar

030

Muted Guitar

031

Overdriven Guitar

032

Distortion Guitar


BASS


033

Acoustic Bass

034

Finger Bass 

035

Pick Bass

036

Fretless Bass

037

Slap Bass

038

Synth Bass


No.

Voice Name


039

Techno Bass

040

Dance Bass


STRINGS


041

Strings

042

Chamber Strings

043

Synth Strings

044

Slow Strings

045

Tremolo Strings

046

Pizzicato Strings

047

Orchestra Hit

048

Violin

049

Cello

050

Contrabass

051

Banjo

052

Harp


No.

Voice Name

CHOIR


053

Choir

054

Choir Aahs

055

Choir Oohs

056

Synth Choir


SAXOPHONE


057

Soprano Sax

058

Alto Sax

059

Tenor Sax

060

Baritone Sax

061

Oboe

062

English Horn

063

Bassoon

064

Clarinet


No.

Voice Name

GrandPno

000

z

w

z

q

q

w


z


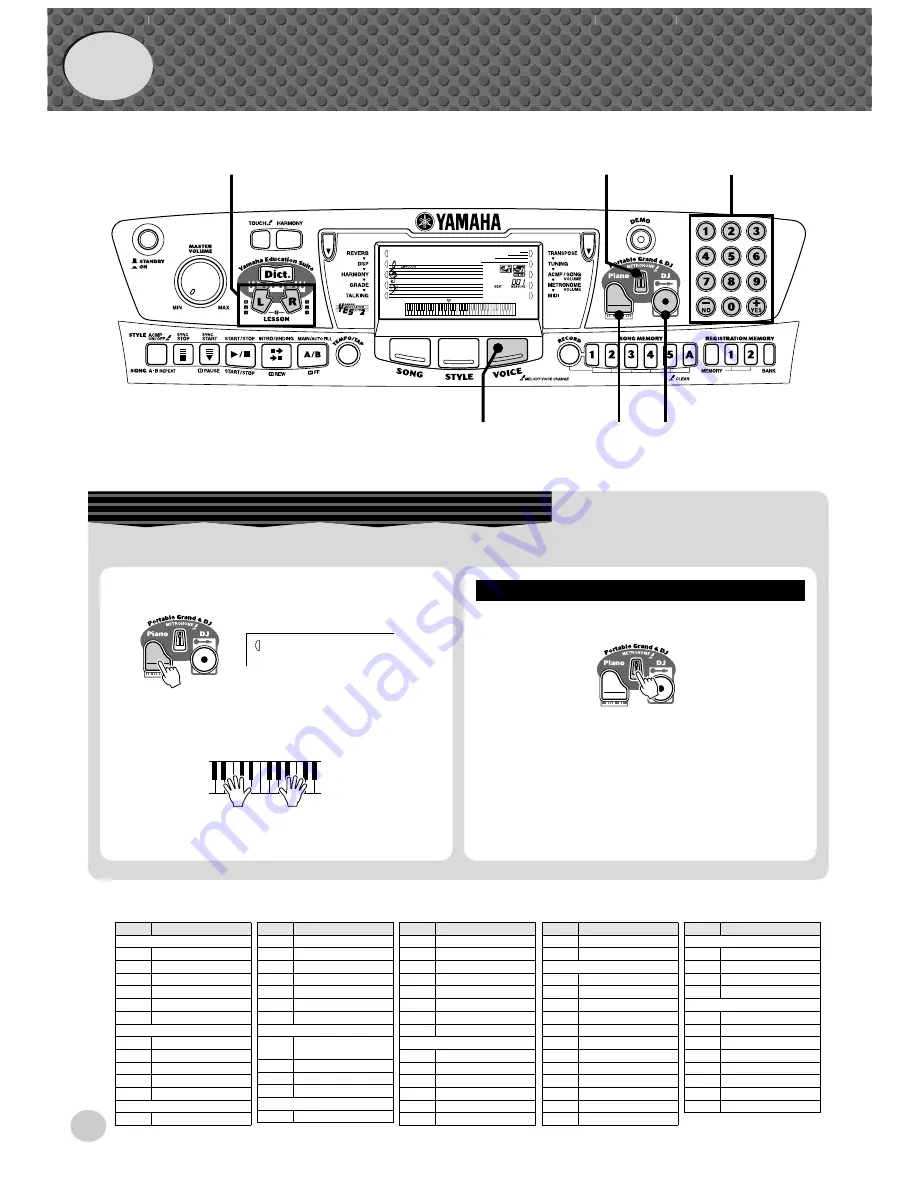
Press the [Piano] button. 


x


Play the keyboard.


Want to find out more?  See page 20.

GrandPno

000


Playing the Piano


Simply by pressing the [Piano] button, you can automatically reset the entire PSR-280 for piano play.


z


Press the [METRONOME] button.


Want to find out more?  See page 20.


Playing along with the Metronome


Step 1


  Voices


Quick 
Guide


 Panel Voice List

Summary of Contents for PSR-280

Page 1: ...1 PORTATONE PSR 280 Owner s Manual 00 03 24...

Page 2: ...ATION The name plate is located on the bottom of the product The model number serial number power requirements etc are located on this plate You should record the model number serial number and the da...

Page 3: ...rheating fire or battery fluid leakage Do not dispose of batteries in fire Do not attempt to recharge batteries that are not intended to be charged When the batteries run out or if the instrument is n...

Page 4: ...or realistic piano performance Pressing the Piano button instantly calls up the stunningly authentic Stereo Sampled Piano voice and configures the entire PSR 280 for optimum piano play Special Pianist...

Page 5: ...the Split Point 44 Dictionary 45 Registration Memory 48 Registration Memory Presets 48 Recording a Registration Memory Preset 48 Recalling a Registration Memory Preset 49 Selecting and Playing Songs 5...

Page 6: ...functions settings and operations of the PSR 280 including effects transpose tuning and MIDI See page 29 i DEMO button This is used to play the Demo songs See page 12 o Piano button This instantly ca...

Page 7: ...ic keypad or buttons See page 20 It also allows you to tap out the tempo and automatically start a selected song or style at that tapped speed See page 36 0 SONG button This is for enabling song selec...

Page 8: ...the PSR 280 may not sound or function properly As soon as this happens replace them with a complete set of six new batteries Turning On the Power With the AC power adaptor connected or with batteries...

Page 9: ...voices The footswitch functions the same way as a damper pedal on an acoustic piano press and hold down the footswitch as you play the key board to sustain the sound Using the MIDI Terminals The PSR...

Page 10: ...r Bass 035 Pick Bass 036 Fretless Bass 037 Slap Bass 038 Synth Bass No Voice Name 039 Techno Bass 040 Dance Bass STRINGS 041 Strings 042 Chamber Strings 043 Synth Strings 044 Slow Strings 045 Tremolo...

Page 11: ...lute 076 Piccolo 077 Pan Flute 078 Recorder 079 Ocarina SYNTH LEAD 080 Square Lead 081 Sawtooth Lead 082 Voice Lead 083 Crystal 084 Brightness 085 Analog Lead SYNTH PAD 086 Fantasia 087 Bell Pad 088 X...

Page 12: ...gs 001 010 showcase the sophisticated fea tures and stunning sound of the PSR 280 Let s play the Demo songs now starting with 001 z Press the DEMO button x Stop the Demo song Playing the Demo songs Ca...

Page 13: ...chi ACCOMPANIMENT 036 Twinkle Twinkle Little Star 037 Beautiful Dreamer 038 Battle Hymn Of The Republic 039 Home Sweet Home 040 Valse Des Fleurs From The Nutcracker 041 Aloha Oe 042 I ve Been Working...

Page 14: ...roduces appropriate bass chord and rhythm backing Use your right hand to play melodies and you ll sound like an entire band Accompaniment section Left hand Auto accompaniment for example bass guitar d...

Page 15: ...chord type of the chord in this case M7 v Play the notes of the chord as indicated in the keyboard diagram in the display The chord name flashes when the chord is played prop erly b To leave the Dict...

Page 16: ...right hand parts of each song individually simply press the appropriate button L left or R right The practice steps below apply to either hand Lesson 1 Timing This lesson step lets you practice just t...

Page 17: ...onvenient Tap Tempo function that allows you to tap a new tempo in real time See page 36 This step lets you work on the timing of the notes In Les son 1 the particular note you play on the keyboard is...

Page 18: ...ing the START STOP button starts song playback Using the numeric keypad selects style numbers Pressing the START STOP button starts style playback w Overall indicator The Overall buttons on either sid...

Page 19: ...ameters as well as other important operation messages When the tempo setting is active the value is shown o Song track indicators In song recording and playback these indicate the sta tus of the track...

Page 20: ...F and style 086 Stride The Portable Grand setting is designed also for playing with the special Pianist styles 086 100 When auto accompaniment is turned on these provide piano only accompaniment in a...

Page 21: ...ll high clicks 2 2 4 3 3 4 4 4 4 5 5 4 6 6 4 7 7 4 8 8 4 9 9 4 0 Plays no 1 beats all low clicks Indicates current beat number TIME SIG 2 Adjusting the Metronome Volume You can adjust the volume of th...

Page 22: ...block as indicated in the display When Talking is on the blocks are also announced in Lesson 2 When the DJ teacher is playing the block numbers appear in the display one after another according to th...

Page 23: ...c styles The Voice mode also features special effect sections that let you enhance the sound of the voice These include Reverb and Harmony as well as a DSP section that provides miscellaneous effects...

Page 24: ...the button to select the next voice number and press the button to select the previous voice Holding down either button continuously scrolls up or down through the numbers 3 Play the selected voice S...

Page 25: ...General MIDI Voices The GM Voices can also be used for optimum playback of GM compatible song data This means that any GM song data played from a sequencer or other MIDI device will sound just as the...

Page 26: ...the right Overall button repeatedly if necessary until TRANSPOS appears in the display 2 Change the value Use the numeric keypad to set the desired Transpose value 12 12 To transpose the pitch down si...

Page 27: ...y 2 Change the value Use the numeric keypad to set the desired Tuning value 100 100 To tune the pitch down simultaneously press and hold the button and use the numeric keypad to type in the negative v...

Page 28: ...e Use the numeric keypad or buttons to set the desired setting 1 2 or 3 explained below Settings When Touch is turned off a constant volume corresponding to a velocity value of 80 is produced 1 Soft T...

Page 29: ...avail able 1 Select the Reverb function 2 Set the Reverb Type if desired Use the numeric keypad or buttons to set the desired Reverb Type For a list of the available Reverb Types see page 32 To turn...

Page 30: ...the dark bar indi cation appears next to DSP 2 Set the DSP Type if desired Use the numeric keypad or buttons to set the desired DSP Type For a list of the available DSP Types see page 32 To turn the...

Page 31: ...essary until the dark bar indi cation appears next to HARMONY 3 Set the Harmony Type if desired Use the numeric keypad or buttons to set the desired Harmony Type For a list of the available Harmony Ty...

Page 32: ...Rotary2 21 Tremolo 1 Tremolo1 Rich Tremolo effect with both volume and pitch modulation 22 Tremolo 2 Tremolo2 23 Guitar Tremolo Guitar Tremolo Simulated electric guitar tremolo 24 Auto Pan AutoPan Se...

Page 33: ...the rhythm Triplet settings are also available 1 6 quarter note triplets 1 12 eighth note triplets 1 24 sixteenth note triplets The Trill effect Types 6 12 create two note trills alternating notes whe...

Page 34: ...ed for playing a melody line and the lower set by default to keys F 2 and lower is for the auto accompaniment function The PSR 280 also features the convenient Dictionary function page 45 Dictionary p...

Page 35: ...section will play Pressing this button alter nately enables and can cels the Sync Stop function See page 39 Pressing this button switches between the Main A and Main B sec tions automatically add ing...

Page 36: ...g Sync Start The PSR 280 also has a Sync Start function that allows you to start the rhythm accompaniment by simply pressing a key on the keyboard To use Sync Start first press the SYNC START button t...

Page 37: ...section 1 Press the MAIN AUTO FILL button to select which section A or B is to follow the Intro 2 Press the INTRO ENDING button 3 Press the SYNC START button to enable Sync Start and start the Intro...

Page 38: ...ON OFF button can also be used to turn off and on the bass chord accompaniment while playing allowing you to create dynamic rhythmic breaks in your performance You can use the Sync Stop func tion to c...

Page 39: ...d 1 Press the SYNC STOP button Setting Sync Stop to on before starting the auto accompaniment automati cally sets Sync Start to on as well letting you immediately start the accom paniment by playing t...

Page 40: ...automatically plays a fill in pattern followed by the Main B section See illustration on page 41 You can also select either the Main A or B section to start by pressing the MAIN AUTO FILL button befor...

Page 41: ...3 1st measure 4 1 2 3 4 1 2 3 4 1 2 2nd measure 3rd measure 3 3 a fill in pattern plays immediately until the end of the measure and the Main A or B section begins here If you press the MAIN AUTO FIL...

Page 42: ...seventh The illustration shows how to produce the four chord types The key of C is used here as an example other keys follow the same rules For example Bb7 is played as Bb and A Fingered Chords Using...

Page 43: ...Seventh 7 1 3 5 b7 or 1 3 5 b7 C7 C7 Seventh flatted ninth 7 b9 1 b2 3 5 b7 C7 b9 C7 b9 Seventh add flatted thirteenth 7 b13 1 3 5 b6 b7 C7 b13 C7 b13 Seventh ninth 7 9 1 2 3 5 b7 C7 9 C7 9 Seventh a...

Page 44: ...lay 2 Change the value Use the numeric keypad or buttons to set the desired value 0 C 2 127 G8 This setting also affects the split point for the special Split voices Split Point Auto accompani ment se...

Page 45: ...minor seventh etc Press the key on the keyboard that corresponds to the desired chord type as printed on the panel Pressing the Dict button auto matically turns on the auto accompaniment Dict Pressing...

Page 46: ...nd are the most basic and common chords in most music In this triad the lowest note is the root The root is the most important note in the chord because it anchors the sound harmonically by determinin...

Page 47: ...d be indicated to the right as well Exam ples for the key of C are shown below One important point Chords are made up of notes stacked on top of each other and the stacked notes are indicated in the c...

Page 48: ...is tration Memory can have different settings for the following parameters Voice number Tempo Transpose Reverb Type DSP Type Harmony On Off setting and Type Split Point Style number and style related...

Page 49: ...Registration Memory 49 Recalling a Registration Memory Preset 1 Select the appropriate Registration Memory bank 2 Press the desired Registration Memory preset button 1 or 2 BANK 1 REGIST1 1...

Page 50: ...number or use the buttons to step up and down through the songs Song Playback Display These display the notes and name of the current chord Current measure number The indication F t appears in the di...

Page 51: ...ected phrase repeats indefinitely until stopped You can play along with the song using the currently selected voice or even select a different voice for playing along Simply call up the Voice mode whi...

Page 52: ...nvenient Melody Voice Change feature takes this one step further it lets you replace the original voice used for the melody of the song with the panel voice of your own selection For example if the cu...

Page 53: ...o set the desired Tempo value or use the buttons to increase or decrease the value Also the tempo of a song returns to the default setting when selecting a dif ferent song The set tempo remains howeve...

Page 54: ...g Volume value 000 127 You can also use the buttons to increase or decrease the value Hold ing down either button continuously increases or decreases the value SONG VOL 100 Indicates Song Volume is se...

Page 55: ...ming Changing sections Intro Main A B etc Accompaniment Volume Tempo Time Signature 1 Make all desired PSR 280 settings Before you actually start recording you ll need to make various settings for the...

Page 56: ...er 2 rEC Keep in mind that all recording operations replace the data In other words if you record to a track that already has recorded data all previous data in the track will be erased and replaced b...

Page 57: ...eturn to the above condition When recording the Chord track With Sync Start on play the first chord of the song in the auto accompani ment section of the keyboard The accompaniment starts automaticall...

Page 58: ...ect the desired song Press the SONG button then use the numeric keypad or buttons to select the desired song 101 105 2 While holding down the A button press SONG MEMORY button 1 All track indications...

Page 59: ...he desired song Press the SONG button then use the numeric keypad or buttons to select the desired song 101 105 2 Press and hold down the button corresponding to the track to be erased Press and hold...

Page 60: ...you practice just the timing of the notes any note can be used as long as you play in rhythm Lesson 2 Waiting In this lesson step the PSR 280 waits for you to play the correct notes before continuing...

Page 61: ...in the display if the Grade function is turned on page 65 After a short pause the Lesson begins again automati cally 4 Press the START STOP button to stop the Lesson The PSR 280 exits from the Lesson...

Page 62: ...is indi cated 3 Play the appropriate melody or chord with the song After the lead in the song starts automatically and the appropriate notes appear in the display In Lesson 1 simply play one note repe...

Page 63: ...the lead in the song starts automatically and the appropriate notes appear in the display In Lesson 2 play the correct notes at your own pace until you can master playing them in rhythm Lesson 3 Minus...

Page 64: ...master both hands at the same time Go on to this lesson step after you ve mastered each hand s part in the previous three lesson steps Practice both hands in time with the rhythm along with the notat...

Page 65: ...Good and Excellent When the Talking function page 66 is on the PSR 280 also announces your grade 1 Select the Grade function Press the left Overall button repeatedly if necessary until GRADE appears...

Page 66: ...ons 1 Select the Talking function Press the left Overall button repeatedly if necessary until TALKING appears in the display 2 Set Talking to on or off as desired Use the buttons to set Talking to on...

Page 67: ...sing the grand piano sound on the PSR 280 keyboard Unlike an acoustic instrument that puts out a resonated note the electronic instrument puts out information from the keyboard such as with what voice...

Page 68: ...clusive Messages that transmit data unique to each instrument manufacturer and Realtime Messages that control the MIDI device The messages transmitted received by the PSR 280 are shown in the MIDI Imp...

Page 69: ...gram below MIDI IN MIDI OUT MIDI OUT MIDI IN PSR 280 Computer sequencer software MIDI IN RS 422 MIDI OUT PSR 280 Computer sequencer software When using a Macintosh series computer set the MIDI interf...

Page 70: ...arate MIDI key board or controller When you want to control playback of the PSR 280 s styles or songs from an external MIDI device you ll have to change the clock setting on the PSR 280 to external 1...

Page 71: ...ta Saving Bulk Data 1 First set up the connected MIDI device for recording the data The actual procedure may differ depending on your particular equipment and software For example if you are using the...

Page 72: ...IDI Data Filer 2 Start sending the data from the connected MIDI device Send the data from the connected device Refer to the owner s manual of the device for details The PSR 280 automatically receives...

Page 73: ...the middle of a song for example completely changing the PSR 280 settings for the next sec tion of the song Sending Initial Setup Data 1 First set up the sequencer for recording The actual procedure m...

Page 74: ...normal way then with as little delay as possible press the button to actually start transmitting the data An End message briefly appears in the display when the operation is com plete 6 Stop recordin...

Page 75: ...he Accompaniment Volume page 41 is set to an ap propriate level Make sure that the Split Point page 44 is set to an appropriate value When playing back one of the Pianist styles 086 100 the rhythm can...

Page 76: ...Touch On Off Tuning Grade On Off Talking On Off Data Initialization All data can be initialized and restored to the factory preset condition by turning on the power while holding the highest rightmos...

Page 77: ...rdion 021 0 112 21 Musette Accordion 022 0 113 23 Bandoneon 023 0 112 22 Harmonica GUITAR 024 0 112 24 Classical Guitar 025 0 112 25 Folk Guitar 026 0 113 25 12Strings Guitar 027 0 112 26 Jazz Guitar...

Page 78: ...Kit 128 127 0 48 Symphony Kit Voice Bank Select MIDI Program Change Voice Name MSB LSB Voice Bank Select MIDI Program Change Voice Name MSB LSB PIANO 129 0 0 0 Acoustic Grand Piano 130 0 0 1 Bright Ac...

Page 79: ...Pad 5 bowed 222 0 0 93 Pad 6 metallic 223 0 0 94 Pad 7 halo 224 0 0 95 Pad 8 sweep SYNTH EFFECTS 225 0 0 96 FX 1 rain 226 0 0 97 FX 2 soundtrack 227 0 0 98 FX 3 crystal 228 0 0 99 FX 4 atmosphere 229...

Page 80: ...81 A4 0 123 118 SFX BLJ Trill 082 A 4 0 123 118 Talking Voice Good 083 B4 0 123 118 SFX FMTB1 084 C5 0 123 118 Human Voice Yeah 085 C 5 0 123 118 Talking Voice Very Good 086 D5 0 123 118 Human Voice U...

Page 81: ...unk 2 043 Soul 044 Gospel Shuffle 045 6 8 Gospel 046 4 4 Blues JAZZ 047 Cool Jazz 048 Jazz Ballad 1 049 Jazz Waltz 1 050 Fusion 051 Swing 1 052 Big Band Swing 053 Big Band Ballad 054 Jazz Quartet 055...

Page 82: ...nalog 4 49 C 2 37 C 1 Side Stick Analog Side Stick 50 D 2 38 D 1 Snare L Snare L2 SD Room L SD Rock SD Elec M SD Analog 1H SD Analog 3 51 D 2 39 D 1 Hand Clap 52 E 2 40 E 1 Snare H Hard Snare H Hard2...

Page 83: ...1 1 Hi Hat Closed 55 G 2 43 G 1 Floor Tom H Jazz Tom 2 Brush Tom 2 Jazz Tom 2 56 G 2 44 G 1 1 Hi Hat Pedal 57 A 2 45 A 1 Low Tom Jazz Tom 3 Brush Tom 3 Jazz Tom 3 58 A 2 46 A 1 1 Hi Hat Open 59 B 2 4...

Page 84: ...0 32 o o Bank Select 1 x 2 o Modulation wheel 6 38 x 2 o Data Entry 7 o o Part Volume Control 10 x o Pan 11 x 2 o Expression Change 64 o o Sustain 91 93 94 x o Effect Depth 96 97 x o RPN Inc Dec 100...

Page 85: ...es for ll are ignored MIDI Master Tuning F0H 43H 1nH 27H 30H 00H 00H mm ll cc F7H This message simultaneously changes the tuning value of all chan nels The values of mm and ll are used for MIDI Master...

Page 86: ...Effect TYPE MSB TYPE LSB 00 01 02 08 16 17 18 19 20 000 064 No Effect 065 Chorus Chorus2 066 Celeste Chorus1 067 Flanger Flanger1 Flanger2 068 127 No Effect TYPE MSB TYPE LSB 00 01 02 08 16 17 18 19...

Page 87: ...Song 100 Songs 5 User Songs Song Clear Track Clear Recording Song User Song 5 Songs Real Time Recording Recording Tracks 1 2 3 4 5 CHORD MIDI Clock Bulk Send Receive Initial Send Auxiliary jacks PHON...

Page 88: ...0 Intro 36 L Lesson 60 loading bulk data 72 M Main A B 40 Metronome 20 MIDI 67 MIDI channels 68 MIDI Implementation Chart 84 MIDI terminals 68 Multi Fingering 42 music stand 19 N numeric keypad 24 O O...

Page 89: ...You may also contact Yamaha directly at the address provided below 2 Deliver the unit to be serviced under warranty to the retailer selling the product an authorized service center or toYamaha with an...

Page 90: ...l 91 577 7270 GREECE Philippe Nakas S A Navarinou Street 13 P Code 10680 Athens Greece Tel 01 364 7111 SWEDEN Yamaha Scandinavia AB J A Wettergrens Gata 1 Box 30053 S 400 43 G teborg Sweden Tel 031 89...

Page 91: ...COVER 3...

Page 92: ...COVER 4...

Reviews: