Polyprint S.A.
Polyprint S.A
– Texjet plus operation manual English V1.9
- 44 -
Place the Universal plate over the 2 long interface brackets and screw the 4 countersunk hex screws.
Page 1: ...TEXJET PLUS Digital Textile Garment Printer Users Manual...
Page 2: ...errors or inaccuracies that may appear in this document Polyprint is a trademark or trade name of Polyprint S A Thessaloniki Greece Federal copyright laws permit you to make a backup of software inclu...
Page 3: ...ent 19 How to fill and refill the cartridges 19 Cable Connection Interface 23 Data cable 23 Start up and ink loading 24 User handling of the printer 25 Printing with TexJet Plus 25 Light indications o...
Page 4: ...s up to 8 colors 9 cartridge system 2xCMYK CMYK 4xWhite or other combinations The system is based on a standard inkjet technology the Epson 3880 printer is the heart of the system The printer has been...
Page 5: ...shocks and vibrations Keep this product away from dusty areas If you use a stand the stand must be at least 64x59cm and able to support 125Kg 275lb Operate the machine in an environment with a temper...
Page 6: ...ng inks make sure to wear gloves Avoid skin and eye contact with inks If ink does get on your skin wash it thoroughly with soap and water If it gets on your eyes flush them out immediately with water...
Page 7: ...uct should not be disposed into the normal household waste stream Do not discard the inks into any sewers into any body of water or on the ground We decline all responsibility of damages resulting by...
Page 8: ...manual English V1 9 8 Unpacking the printer Open the box and remove the items that fix the printer into the box Remove the carton box by lifting it above the level of the printer Lift the product by 2...
Page 9: ...nsport fixtures Remove all the tapes of the printer s housing Remove the yellow safety bar that keeps the tray steady during transportation do NOT throw away this fixture because you will need it for...
Page 10: ...equipment TexJet T shirt Printer 9 refillable cartridges and 9 spare arc chips 1 Maintenance Tank chip Reseter 1 short USB 2 cable Type A B M M 2 power cables EU and UK standards 1 Ethernet cable Poly...
Page 11: ...Intel Core i5 7 AMD 2Ghz dualcore or more HDD1 Tbyte 7200rpm Ram2 Gbyte Consumables for printing Inks available in 4 colors and White PD201 Cyan PD202 Magenta PD203 Yellow PD204 Black PD205 White Ava...
Page 12: ...ntenance Tank 6 Texjet Plus Panel Display 7 Cable Connection Interface Epson s Panel Display 1 Power ON OFF 2 Delete button for 3 secs 3 LED light error indicators 4 Epson Display shows the printer st...
Page 13: ...Diagnostic mode 3 Move table Down With Shift enter exit the maintenance mode for the printer 4 Shift operation button 5 Automatic height adjustment 6 Move table manually Out With Shift enable the aut...
Page 14: ...nt S A Texjet plus operation manual English V1 9 14 1st function line Shift Operation Press Shift and within 10 press any other button This procedure will enable the 1st function line on the button an...
Page 15: ...tallation on the refillable cartridges Step 1 Detach the removable part on the top of the refillable cartridge that holds the Auto Reset Chip ARC using an object with a sharp edge Step 2 Remove the or...
Page 16: ...tep 4 Attach the removable part that holds the ARC on top of the original Epson chip The auto reset chip resets itself The user only has to release the cartridge via the push button and then put it ba...
Page 17: ...ith the maintenance tank removed Since the maintenance tank is not inside after initialization you should see the message INSTALL MAINTENANCE CARTRIDGE on the top display Step 2 Empty the remaining in...
Page 18: ...icon of the maintenance tank still remains blank NON GENUINE the user must always check visually the real ink level of the tank and empty it when needed The correct ink assignment is shown below Corre...
Page 19: ...rocedure 1 Use the 20ml syringe provided with the printer the user can always use a syringe with a different capacity as long as it has the same neck diameter that fits in the cartridge s supply hole...
Page 20: ...9 20 3 After completion of the refilling procedure put the rubber seal back to its place and make sure that it is fully inserted 4 Lastly before inserting the cartridge into the printer s respective...
Page 21: ...manual English V1 9 21 1 Remove the rubber seal from the cartridge s supply hole 160ml cartridges 2 Use the funnel provided with the printer to fill the cartridge with its respective ink It is advised...
Page 22: ...Texjet plus operation manual English V1 9 22 3 After completion of the refilling procedure put the rubber seal back to its place and it is make sure that it is fully inserted Also make sure to remove...
Page 23: ...ly for firmware update For countries with 110V power network the user must use a voltage converter 110V 220V Use the USB cable to connect the machine to the computer Data cable To connect the printer...
Page 24: ...TER For best viewing of all the ink channels on the nozzle check place a transparent film page at the top left corner of the table Picture 3 A perfect nozzle check should look like the one below Pictu...
Page 25: ...lays flat on the media plate Adjust the plate height by pressing Automatic plate height adjustment button 5 and wait until it stops with the plate at the front If the plate doesn t complete the adjus...
Page 26: ...o When ON control panel is available o When OFF device is switched off o When FLASHING the printer is busy o When blinking slowly the printer is in DEBUG mode Printer is off C P led light indication...
Page 27: ...we recommend Wagner W550 One thorough coat applied to the relevant area of the fabric is enough remember to thoroughly clean your spray gun when you are finished using it Use a mohair blend roller to...
Page 28: ...he pre treated fabric must not touch the printer head as the ink and pre treatment will react upon the head surface potentially blocking nozzles In your daily operation of your printer observe the cor...
Page 29: ...has consumables and part of the maintenance is to replace them if necessary We ask you to perform the maintenance tasks according to the intervals given in the description Following these steps will i...
Page 30: ...exit the maintenance mode 9 After that the printer will automatically perform one normal head cleaning so that the cleaning solution will be able to clean the cap the pump and the tubes inside 10 Afte...
Page 31: ...en move slightly the maintenance window cover to the left 3 Below you can see the release knob that releases the print head form the cap station Move it anti clockwise to the direction of the arrow un...
Page 32: ...lution liquid and a swab It is more convenient to open the top cover and pass your hand from the top side You have to make sure that the rubber parts of both the wiper and the cap station are always c...
Page 33: ...d with the maintenance procedure move the print head manually to its parking position far right position Move the release knob to the opposite direction the arrow indicates clock wise until the print...
Page 34: ...ecessary Monthly Maintenance check 1 Turn off the printer 2 Then move slightly the maintenance window cover to the left 3 Below you can see the release knob that releases the print head form the cap s...
Page 35: ...dirt or ink comes out of it on the paper Printhead surface The dried out ink on the Printhead surface bellow has to be removed for proper operation This part gets dirty during printing and after long...
Page 36: ...nk The Printhead shouldn t remain longer than 15 minutes out of the capping station since there is a danger to dry it out 4 After having finished with the maintenance procedure move the print head man...
Page 37: ...alves from remaining and dried out ink Exchange broken parts and put back the ink in to the cartridges Every Year At least once in the year the ink in the bulk ink cartridges has to be refreshed compl...
Page 38: ...more persons Don t forget to empty the Maintenance tank waste tank of the printer or you may damage the printer Moving the printer to another position Please make sure you have performed the followin...
Page 39: ...stent quality and performance of the white ink Product Storage Guidelines It is recommended to store the white ink in a clean dry area with temperatures between 10 and 30 degrees Celsius Handling of w...
Page 40: ...at this plate is extra equipment You need to order it T Shirt Mini plate Sleeve plate The Mini plate includes the following items 1 mini plate 32x28cm 1 adapter plate 42 5x7 5cm 2 short interface brac...
Page 41: ...print S A Texjet Polyprint S A Texjet plus operation manual English V1 9 41 Place second short interface bracket to the correct position Se the photo Place the mini plate and the adapter plate on posi...
Page 42: ...plus operation manual English V1 9 42 T Shirt polo plate The Polo plate includes the following items 1 Polo plate 4 countersunk hex 2 5mm screws 2 5mm Alen metric wrench tool Unscrew the long interfa...
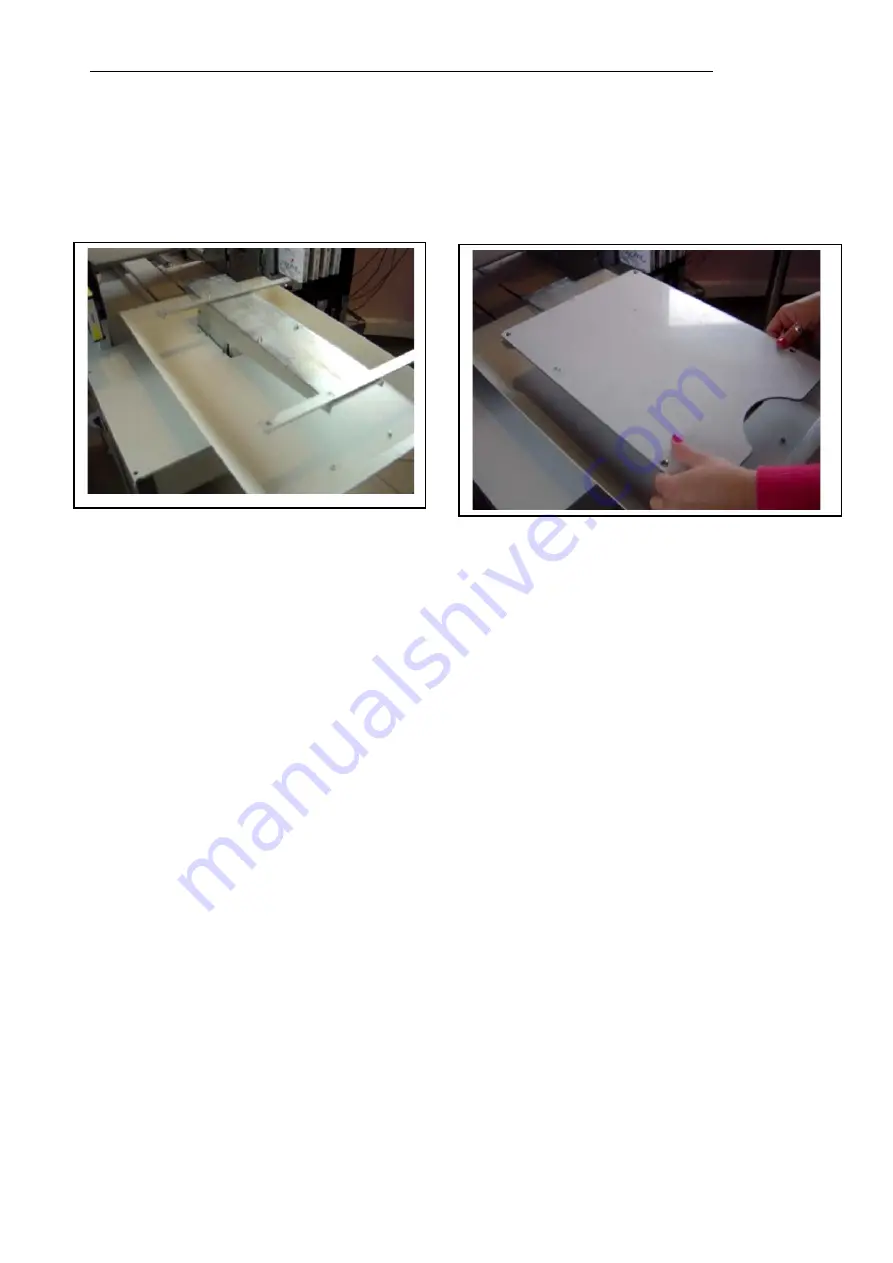
Page 43: ...manual English V1 9 43 Place the Polo plate over the 2 long interface brackets and screw the 4 countersunk hex screws Universal plate The Polo plate includes the following items 1 Universal plate 4 co...
Page 44: ...Polyprint S A Texjet Polyprint S A Texjet plus operation manual English V1 9 44 Place the Universal plate over the 2 long interface brackets and screw the 4 countersunk hex screws...
Page 45: ...l English V1 9 45 Standard plate max The Standard plate includes the following items 1 Standard plate 4 countersunk hex 2 5mm screws 2 5mm Alen metric wrench tool Place the Standard plate over the 2 l...
Page 46: ...operation manual English V1 9 46 Frame system The frame system includes the following items 1 frame system 4 bold hex 3mm screws 3mm Alen metric wrench tool Place the frame system over the 2 long inte...
Page 47: ...000 colors min res 1024x768 Mouse USB2 connection interface 2 USB ports free for dongle and printer Recommended Intel Core i5 7 AMD 2Ghz dualcore or more HDD1 Tbyte 7200rpm Ram2 Gbyte Computer Graphic...
Page 48: ...SB cable to the computer before installing the Epson 3880 printer driver Select accordingly to your computer platform the file found in the driver folder of the Polyprint RIP Software DVD Run the inst...
Page 49: ...Polyprint S A Texjet Polyprint S A Texjet plus operation manual English V1 9 49 3 Start the setup 4 Choose the correct printer and press OK...
Page 50: ...plus operation manual English V1 9 50 5 The installation starts 6 During the installation a pop up security window may appear asking you if you agree to install the drivers on your oparating system P...
Page 51: ...jet Polyprint S A Texjet plus operation manual English V1 9 51 7 The installation continues 8 in this step connect the USB cable and wait until you system recognizes the printer Ensure that the printe...
Page 52: ...Texjet Polyprint S A Texjet plus operation manual English V1 9 52 9 After the installation of the driver is complete a massage will show you that the printer is ready to use 10 Click OK in the confirm...
Page 53: ...on as administrators before installing Texjet RIP Software Installation Instructions 1 Run as administrator the TexjetRIPInstaller661I exe file located in the enclosed DVD and then choose your preferr...
Page 54: ...1 9 54 4 In the next window you can change your destination folder or you can leave it as it is 5 In the setup type window click on the complete installation and then Next 6 Now you are ready to insta...
Page 55: ...able to see the option to finish Click Finish to end the installation Have in mind that afterwards you must restart your computer in order for the new software to take effect 8 Now you can start up th...
Page 56: ...epetition to see improvement See for Printhead clogging problems On the photo image has been attached another ICC Profile from its embedded Picking another profile with a smaller gamut like sRGB can l...
Page 57: ...ook their best For 50 50 blends of cotton and polyester ink needs needed to be fixed quickly to reduce possible bleeding How the garment is being washed Wash at maximum 40 C inside out preferable with...
Page 58: ...connection Remove the USB cable and put it again There is a communication error between your Texjet and your computer Restart the printer and the computer to ensure that all pending jobs have been del...
Page 59: ...rip ink Thoroughly clean the capping station Debris or shirt fibers collected on print head as well as print head carriage Using the reflection from the print bed gently clean the bottom of the print...
Page 60: ...cording to the intervals given in the description Run head cleanings before printing in the morning as well as printing a nozzle checks to gauge status of print head prior to printing onto garments Th...
Page 61: ...etup PPR SIZE CHECK which always needs to be OFF In order to set it to OFF switch OFF the printer and start it in diagnostic mode F1 Power On The user must locate the setting in the top menu Enter the...
Page 62: ...r unidirectional Printing speed White T shirts 720x720 1min 13secs Dark T Shirts 1440x720W 720X720C 3min 35secs Head height Max 50mm Auto height adjustment Printable textiles Cotton Cotton Lycra Cotto...
Page 63: ...by means of Giorgos Beglopoulos delegated by the company Polyprint S A that the overhead described machine if installed maintained and used in according to the operating and maintenance instructions i...
Page 64: ...efective parts and inks and does not include labor or other costs caused by the damage POLYPRINT will offer warranty replacement only to official dealers trained on this equipment Start of warranty pe...