background image

Polypipe Building Products

Broomhouse Lane

Edlington

Doncaster DN12 1ES

Tel: 01709 770 000

Fax: 01709 770 001

2410 London Road

Mount Vernon

Glasgow G32 8XZ

Tel: 0141 778 8822

Fax: 0141 778 2703

Dromore Road

Lurgan, Craigavon

Co. Armagh BT66 7HL

Tel: 028 38 881270

Fax: 028 38 882344

www.polypipe.com

For technical advice visit 

www.polypipeufh.com

www.polypipe.com

Polypipe Building Products is a registered training division of Polypipe Limited

Summary of Contents for UFHTIME4RFB

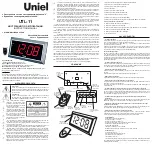
Page 1: ...4 Zone RF Time Clock User Guide UFHTIME4RFB...

Page 2: ...e unit is designed to be used with our range of wireless master wiring centres and slave units Details on how to initiate communication with the receiver units in RF applications are provided in the a...

Page 3: ...ngs The Time Clock operates in 2 different modes Comfort The time clock is on allowing individual room thermostats to operate Setback The time clock will be off meaning no room thermostats will operat...

Page 4: ...s 1 1 Keyboard 1 2 Display 2 First Time Installation 2 1 Installing Batteries 2 2 Time and Date Adjustment 2 3 Zone Allocation and RF Initiation 3 Selecting a Pre set Program P1 P9 4 User Defined Prog...

Page 5: ...5 Contents 5 Operating Menus 5 1 Automatic Mode 5 2 Off Mode 5 3 Holiday Mode 5 4 Keyboard Lock Function 6 Pre set Programs 7 Hidden Menus 8 Technical Specification 9 Fault Diagnostic...

Page 6: ...6 1 Battery Access and User Controls 1 2 3...

Page 7: ...7 1 1 Keyboard...

Page 8: ...8 1 2 Display 5 6 7 8 9 10 11 12 13 14 15 16 17 4 1 2 3...

Page 9: ...n of parameter 11 Program of the current day 12 Zone number or Period number in the program of the current day or current zone number 13 Key lock indicator 14 Current zone state On activated and Off d...

Page 10: ...n sticker if the batteries are already installed in the compartment Replace the front panel Your time clock will ask you to set the time Note The time and date setting can be set at any time by pressi...

Page 11: ...ustments Time and day Hours setting Minutes setting Day of week setting Date Day setting Month setting Year setting You can access the time and date adjustment made by pressing OK key for 3 seconds at...

Page 12: ...te have been entered the unit will ask you to activate the required number of heating zones by displaying By displaying a flasing Yes this means that Zone 1 is active By displaying a flashing No this...

Page 13: ...zone press OK key The unit will indicate that RF initiation is taking place for that particular channel by displaying a series of dashes Once the receiver unit or RF master unit has been accepted the...

Page 14: ...select the zone number and if you want to finish zone initiation step press OK key when this screen is displaying You will be able to change your configuration by accessing the zone activation menu p...

Page 15: ...will default to P1 see programs pages 26 to 34 To select a preset program use the navigation keys to move the cursor from Auto to Prog Press OK to make the P1 P9 adjustable Use the or keys to choose...

Page 16: ...for each period up to 3 periods per day eg Morning afternoon and evening Between time periods temperature will default to Setback If for example at a weekend you only need your heating to come on and...

Page 17: ...e navigation keys to move from Auto to Prog as previous Press OK to make P1 P9 adjustable Use the or keys to choose P1 to P9 or U1 to U4 Select any of U1 to U4 as this allows each time clock to store...

Page 18: ...18 With U1 to U4 blinking press the OK key to access the program settings The program creation will always start with the Monday Once you have pressed the OK key the following display will appear...

Page 19: ...19 Adjust the hour of the first step of the program with or Press OK to validate and jump to the following step...

Page 20: ...20 You will then see the below screen You can set this period to run to the end of the day midnight by pressing OK or use the button to set the off time for this period...

Page 21: ...ress OK to accept or press button to set the start time for the next period Repeat previous steps until all periods are set and press OK to complete You then have the option to copy this period to oth...

Page 22: ...ch day individually or scroll to No and create new programmes as previously To edit and existing user defined programme select the existing programme in the Prog menu U1 U4 and press OK button You wil...

Page 23: ...r No Selecting Yes will clear the previous programme and allow you to start from the begining Selecting No will allow you to edit the existing programme scroll through days with the or key then press...

Page 24: ...ogram Built in or User defined according to the time 5 2 Off Mode Off Use this mode if you wish to turn off your time clock Frost protection is automatically provided as a minimum temperature of 5 0 C...

Page 25: ...ion in days with or press OK to validate adjustable 1 to 99 days The On icon will blink and the number of days remaining is displayed until the end of the period If you want to stop the holiday functi...

Page 26: ...n Use this function to prevent changes to the settings To activate the key lock function press the two arrow keys simultaneously The logo will now be displayed on the screen Repeat with the same proce...

Page 27: ...12 13 14 15 16 17 18 19 20 21 22 23 0 1 2 3 4 5 6 7 8 9 10 11 12 13 14 15 16 17 18 19 20 21 22 23 0 1 2 3 4 5 6 7 8 9 10 11 12 13 14 15 16 17 18 19 20 21 22 23 0 1 2 3 4 5 6 7 8 9 10 11 12 13 14 15 1...

Page 28: ...20 21 22 23 0 1 2 3 4 5 6 7 8 9 10 11 12 13 14 15 16 17 18 19 20 21 22 23 0 1 2 3 4 5 6 7 8 9 10 11 12 13 14 15 16 17 18 19 20 21 22 23 0 1 2 3 4 5 6 7 8 9 10 11 12 13 14 15 16 17 18 19 20 21 22 23 0...

Page 29: ...ekend 0 1 2 3 4 5 6 7 8 9 10 11 12 13 14 15 16 17 18 19 20 21 22 23 Mo 0 1 2 3 4 5 6 7 8 9 10 11 12 13 14 15 16 17 18 19 20 21 22 23 0 1 2 3 4 5 6 7 8 9 10 11 12 13 14 15 16 17 18 19 20 21 22 23 0 1 2...

Page 30: ...6 7 8 9 10 11 12 13 14 15 16 17 18 19 20 21 22 23 0 1 2 3 4 5 6 7 8 9 10 11 12 13 14 15 16 17 18 19 20 21 22 23 0 1 2 3 4 5 6 7 8 9 10 11 12 13 14 15 16 17 18 19 20 21 22 23 0 1 2 3 4 5 6 7 8 9 10 11...

Page 31: ...8 9 10 11 12 13 14 15 16 17 18 19 20 21 22 23 0 1 2 3 4 5 6 7 8 9 10 11 12 13 14 15 16 17 18 19 20 21 22 23 0 1 2 3 4 5 6 7 8 9 10 11 12 13 14 15 16 17 18 19 20 21 22 23 0 1 2 3 4 5 6 7 8 9 10 11 12 1...

Page 32: ...8 9 10 11 12 13 14 15 16 17 18 19 20 21 22 23 0 1 2 3 4 5 6 7 8 9 10 11 12 13 14 15 16 17 18 19 20 21 22 23 0 1 2 3 4 5 6 7 8 9 10 11 12 13 14 15 16 17 18 19 20 21 22 23 0 1 2 3 4 5 6 7 8 9 10 11 12 1...

Page 33: ...5 6 7 8 9 10 11 12 13 14 15 16 17 18 19 20 21 22 23 0 1 2 3 4 5 6 7 8 9 10 11 12 13 14 15 16 17 18 19 20 21 22 23 0 1 2 3 4 5 6 7 8 9 10 11 12 13 14 15 16 17 18 19 20 21 22 23 0 1 2 3 4 5 6 7 8 9 10 1...

Page 34: ...7 8 9 10 11 12 13 14 15 16 17 18 19 20 21 22 23 0 1 2 3 4 5 6 7 8 9 10 11 12 13 14 15 16 17 18 19 20 21 22 23 0 1 2 3 4 5 6 7 8 9 10 11 12 13 14 15 16 17 18 19 20 21 22 23 0 1 2 3 4 5 6 7 8 9 10 11 12...

Page 35: ...7 8 9 10 11 12 13 14 15 16 17 18 19 20 21 22 23 0 1 2 3 4 5 6 7 8 9 10 11 12 13 14 15 16 17 18 19 20 21 22 23 0 1 2 3 4 5 6 7 8 9 10 11 12 13 14 15 16 17 18 19 20 21 22 23 0 1 2 3 4 5 6 7 8 9 10 11 12...

Page 36: ...a 12 hour or 24 hour clock display temperature readings in either degC or degF etc and the installer menu can be used to adjust various operational settings of the unit The access the User menu set t...

Page 37: ...mperature Display Deg C Deg F 02 Time Clock Display 24H 12H 03 dSt Automated clock change for Daylight Saving time Yes No 04 AirS Current room temperature N A None 05 AirC Calibration of temperature r...

Page 38: ...38 UFHTIME4RFB User Menu Menu No Display Description Default Option 09 CLr ALL Restore factory Default settings Press OK during 5s 10 Software Version None 11 End Return to main screen Press OK...

Page 39: ...ping and Storage Temperature 0 C 40 C 10 C to 50 C Setting Temperature Range Anti freeze OFF 0 5 C to 10 C by 0 5 step Regulation Characteristics Hysteresis of 0 5 C Electrical Protection Class II IP3...

Page 40: ...k it with an ohmmeter the value must be around 10 kohms Remove the batteries to remove the error Problem on keyboard If the Err Key message remains after the period of displaying Wait please contact y...

Page 41: ...41...

Page 42: ...42...

Page 43: ...43...

Page 44: ...n Road Mount Vernon Glasgow G32 8XZ Tel 0141 778 8822 Fax 0141 778 2703 Dromore Road Lurgan Craigavon Co Armagh BT66 7HL Tel 028 38 881270 Fax 028 38 882344 www polypipe com For technical advice visit...

Reviews: