6.Mounting/fixing instructions
8
SADRIN WS SMA
POLITEC | INSTALLATION MANUAL - VER.2.1
6.1 Placement and installation height
This type of Active Infrared Beam barriers is always made up of a pair of columns, one is a TX
transmitter only and the other a RX receiver only.The barrier is self-powered with batteries already
included, and must be combined with a radio transmitter of any brand of Wireless systems on the
market.
Its compact size makes it particularly suitable for single barrier systems to protect windows, doors or
facades of limited dimensions.
Therefore, we advise against installation in open areas unless due precautions are taken.
Position it in such a way that in its range of action there are no obstacles such as: pots on the
windowsills, mosquito nets or objects that can swing or move with the wind.
In any case, it is necessary to take into account the diffusion of the infrared beam, to avoid reflection
of the beams caused by adjacent shiny surfaces.
If possible, position the barrier so that sunlight does not hit the RX column directly.
6.2 Mounting
•
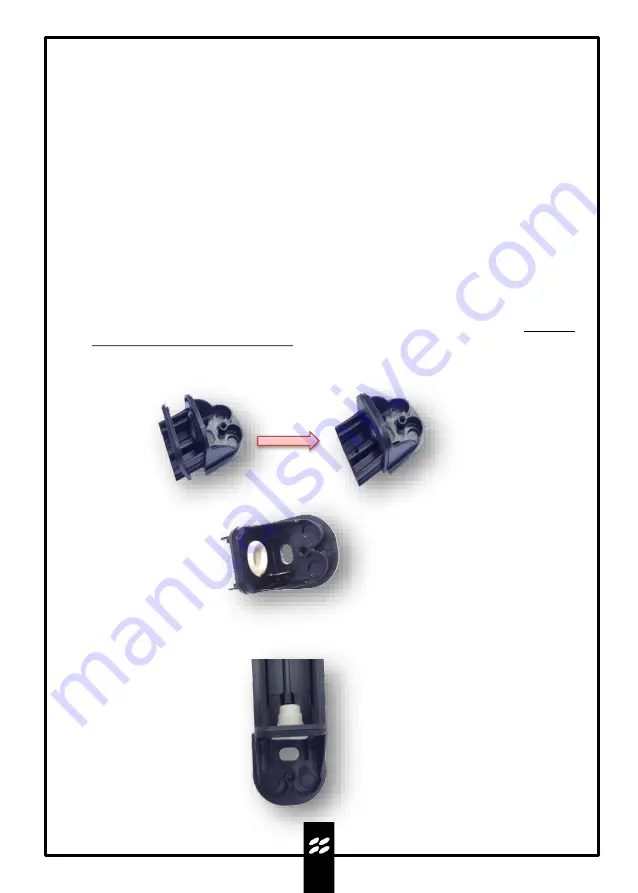
Remove the caps and remove the extruded cover.The barriers are a standard size in terms of
column height but different sizes can be supplied if communicated when ordering.If at this stage,
it is necessary to reduce the length of the profile, it can be cut, taking care to prevent metal slag
from ending up on the electronic circuits.
•
The barrier in the
WSI
version can be mounted indifferently with both boards with the terminal
board, at the top or bottom.
•
Insert the square gasket into the cap until the joints fit together.
•
Insert the concentric cable grommet in the appropriate hole.
•
Make a hole in the concentric gasket, of the lower or upper cap, so that the conical wall exerts a
sealing pressure on the sheath of the connection cable that will pass inside it.
•
Insert the cap into the aluminium profile until the gasket matches the metal.


