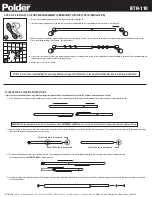
BTH-110
1. Be sure to keep rubber gasket in place when screw mounting the end caps to
the shower wall.
see image 1A.
2. Position the end cap (
C
) at a 45
°
angle, aligning the two mounting holes with
the tile grout lines.
see image 1B.
NOTE: additional placement options are listed to the right
3. With a pen, mark the two hole locations directly on the shower wall through
the end cap (
C
) hole openings.
4. Move the end cap (
C
) away from the wall, and drill a hole through the marked
areas using a 1/4" drill bit. Be careful not to bore into the tile
(if positioning allows).
NOTE: extended bar should be horizontal (flat) when in place.
5. Press the plastic grommet (
B
) into the hole opening, lightly tapping with a
hammer (if needed).
see image 1C
6. Place the end cap (
C
) back over the two grommets (
B
) and screw in place
using supplied hardware (
A
).
NOTE: you may need to use an extender in order to reach through the end cap.
PLEASE READ THROUGH ENTIRE INSTRUCTION BOOKLET BEFORE ATTEMPTING TO INSTALL THIS PRODUCT
D
x 2
BTH-110
Polder inc. 8 Slater Street, Port Chester, NY 10573 800-431-2133 • [email protected] • www.polder.com
Made in China. Fabriqué en Chine. Hecho en China.
INCLUDED COMPONENTS
OPTIONAL SCREW MOUNT INSTALLATION
STEP ONE
: Mount end caps on shower wall
(hardware needed -
A, B, C & D
- see images above)
TWO-PERSON ASSEMBLY IS SUGGESTED FOR PROPER INSTALLATION OF THIS PRODUCT
7. While one person holds the unmounted end cap in place, the other person should place one end of the rod (
D
) into the mounted end cap and extend until it just reaches the opening of the unmounted end cap.
Hold in place. DO NOT TIGHTEN. Using a level, check to see if the rod is level. Move rod away from unmounted end cap and mark the hole location (see image above).
8. Repeat steps 4 & 5 for one portion of unmounted endcap - do not drill both holes at this time!
9. Place the end cap (
C
) over the grommet (
B
) and screw LIGHTLY in place using supplied hardware (
A
). NOTE: The endcap should be LIGHTLY screwed in place in order to adjust the bottom portion.
10. Insert end of second rod (
D
) into mounted end cap, and extend across to reach the opening of the partially mounted end cap.
11. Adjust the partially mounted end cap until the second rod is straight and level. Mark the hole location. (see image above).
12. Repeat steps 4 through 6. Tighten the end cap in place. (Be sure to tighten both screws)
(INSIDE SHOWER)
(OUTSIDE SHOWER)
1B
IMPORTANT: BE SURE THE END CAPS AND RODS ARE LEVEL BEFORE DRILLING THE MOUNTING HOLES FOR THE SECOND END CAP.
A
x 4
B
x 4
C
x 2
1A
SHOWER WALL
1C
(CURTAIN ROD)
(TOWEL ROD)
(CURTAIN ROD)
(SHOWER LINER)
(CURTAIN ROD)
(TOWEL ROD)
TOWEL ROD OUTSIDE SHOWER
offers an easy and convenient solution for drying towels, bathing suits, etc.
Place smaller portion of the end cap (curtain rod portion) toward the inside of
the shower and position the larger portion of the end cap (towel rod portion)
at a 45
°
angle. Be sure to line up the mounting holes of the endcaps with the
tile grout.
SHOWER LINER PLACEMENT
offers a separate rod to hang shower liner, extending the life of the curtain
and the liner and protecting it from mold and mildew growth.
Place smaller portion of the end cap (curtain rod portion) toward the inside of
the shower and position the larger portion of the end cap (towel rod portion)
paralell. Be sure to line up the mounting holes of the endcaps with the tile
grout.
TOWEL ROD INSIDE SHOWER
same easy and convenient solution for drying towels, bathing suits, etc. but
keeps these wet items hidden behind the shower curtain!
Place smaller portion of the end cap (curtain rod portion) toward the outside
of the shower and position the larger portion of the end cap (towel rod
portion) at a 45
°
angle. Be sure to line up the mounting holes of the endcaps
with the tile grout.
MOUNTED ENDCAP
UNMOUNTED ENDCAP
FIRST ROD
MOUNTED ENDCAP
PARTIALLY MOUNTED ENDCAP
SECOND ROD
STEP TWO
: Insert rods in end caps
(hardware needed -
C and D
- see images above)
13. Place one end of the rod (
D
) into its corresponding end cap (
C
) opening
NOTE: the diameters on the rod endcap openings vary slightly
14. While holding one end in place extend the rod until it slides into the adjacent end cap. Tighten by positioning one hand on each half of the rod and twisting the smaller diameter
rod counter-clockwise. Repeat for both rods. (see image above).


